Deze vertaling geeft mogelijk niet de meest recente updates van de bronhandleiding weer. Help ons met het updaten van de vertaling of bekijk de bronhandleiding.

MacBook Air 13" eind 2020 Vervanging van de batterij
Inleiding
Ga naar stap 1Gebruik deze handleiding om de batterij van je MacBook Air eind 2020 (M1) op veilige wijze te verwijderen en te vervangen.
Om het risico op beschadiging te minimaliseren, schakel je je MacBook uit en laat je de batterij zich volledig ontladen voordat je met deze procedure begint. Een geladen lithium-ion batterij kan erg gevaarlijk zijn als deze per ongeluk wordt doorboord. Neem, als je batterij gezwollen is, de juiste voorzorgsmaatregelen.
Deze procedure omvat ook het verwijderen van beide speakers. Je zult nieuwe kleefstrips nodig hebben om de speakers aan het einde weer op de juiste wijze opnieuw te bevestigen en om te voorkomen dat ze gaan trillen in de behuizing.
Wat je nodig hebt
Reparatieset
Deze set bevat alle onderdelen en tools om deze handleiding te voltooien.
Onderdelen
Gereedschap
Toon meer…
-
-
Als je MacBook op Big Sur v11.1 of een latere versie runt kan het uitschakelen van de Auto Boot mogelijk niet werken. Ga in dat geval gewoon door met de procedure, maar zorg wel dat je de batterij zodra je binnen bent zo snel mogelijk loskoppelt.
-
Gebruik een P5-schroevendraaier om de volgende schroeven te verwijderen:
-
Twee 7.9 mm lange schroeven
-
Twee 7.3 mm lange schroeven
-
Zes 2.6 mm lange schroeven
-
-
-
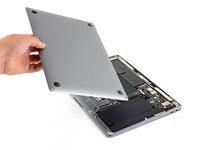
Wring je vingers tussen het scherm en de onderste behuizing en trek de behuizing omhoog om deze los te krijgen.
-
Verwijder de onderste behuizing.
-
Breng je deze op de juiste plek aan en druk je deze stevig naar beneden om de twee klemmen eronder weer in de laptop vast te klemmen. Als het goed is hoor en voel je de klemmen op hun plek vallen.
-
-
-
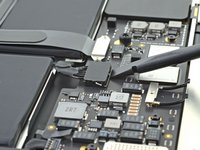
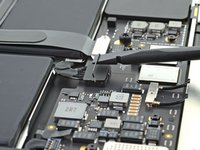
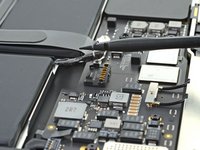
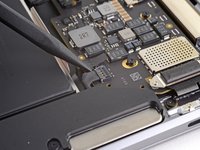
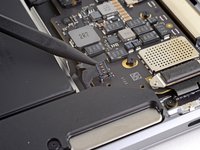
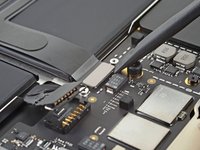
Gebruik het platte einde van je spudgre om de metalen sluiting op de batterijaansluiting omhoog te duwen.
-
Til de metalen sluiting in een rechte beweging omhoog om de batterijaansluiting uit het contact op het logic board te trekken.
If having difficulty in flipping the bar up, place the machine vertical and not that there is a small “locking nib” that the bar has to clear. You may have to give the bar honest persuasion to clear the nib.
The bar can lock backwards making it very hard to even see let alone move. Great care is needed to shift it. I had to use two thumbnails, one on each side, then once flipped forward it takes more push than I expected to clip it in place. Ensure the plug is fully seated first !
As others commented, it can be hard to click the battery connector back into place. First make sure the bar is not underneath the connector. Then, turning the computer so the connector pins are facing you (LCD hinge end closer to you) can also make it easier to position the connector on top and then click it into place.
Some replacement batteries have a retainer bar that differs from OEM batteries. I had to swap the retainer bar to properly secure it under the "locking nib" to ensure it didn't release on its own (before it could freely swing).
-
-
-
Gebruik een T3 Torx-schroevendraaier om de drie 1.4 mm lange schroeven, die het schild op de aansluiting op het audiobord bevestigen, te verwijderen.
-
Als je T3 Torx-schroevendraaier iets te losjes aanvoelt, kun je ook een T4-schroevendraaier gebruiken.
-
-
-
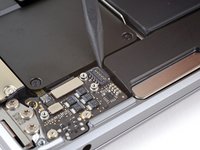
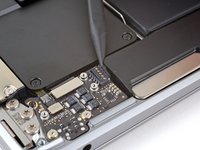
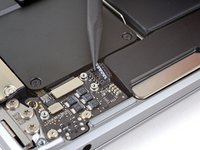
Schuif de punt van je spudger onder de kabel van de rechterspeaker en duw deze in een rechte beweging omhoog om deze van het audiobord los te koppelen.
Be careful. I replaced the battery twice (first one was 3rd party crappy one). The second time, I pulled the socket off. The directions should say that there is a socket sodered onto the board and the connector has to come out of the socket. The three images did not help me see what to do
-
-
-
Gebruik een T3 Torx-schroevendraaier om de 4.2 mm lange schroef, die de rechterspeaker in de behuizing bevestigt, te verwijderen.
-
-
-
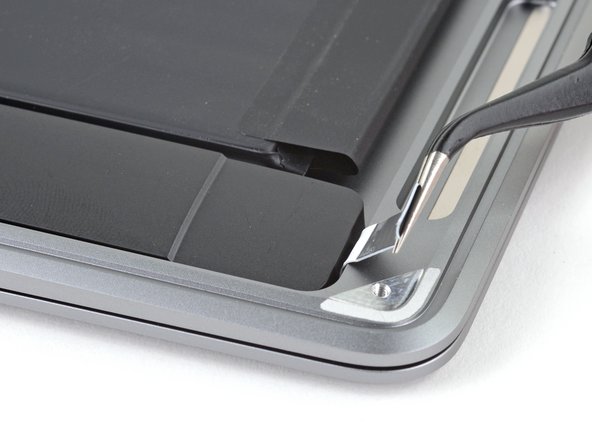
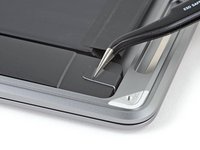
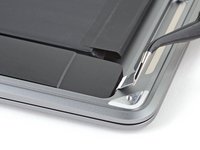
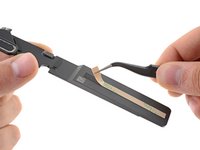
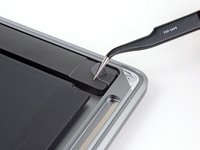
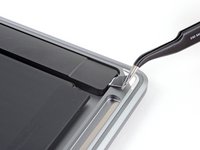
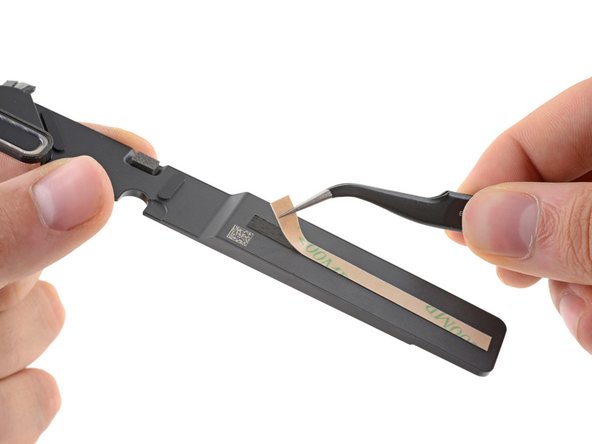
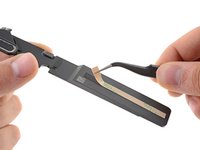
Gebruik een pincet om de zwarte treklip van de uitrekbare kleefstrip los te trekken totdat je deze stevig tussen je vingers vast kunt pakken.
-
-
-
-
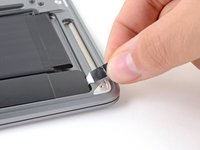
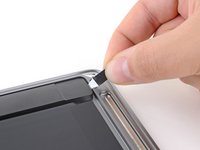
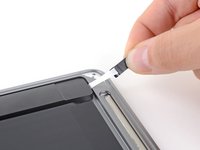
Pak de treklip van de kleefstrip vast en trek deze langzaam maar zeker onder de speaker vandaan.
-
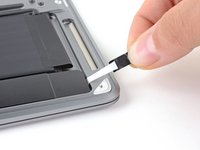
Trek de kleefstrip los totdat deze onder de speaker vandaan komt.
-
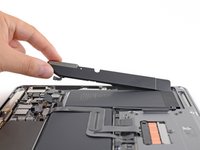
Verwarm de speaker om de lijm eronder te verwarmen en zo te verzwakken.
-
Schuif je spudger op voorzichtige wijze onder de speaker om deze van de kleefstrip eronder te scheiden.
Pulling the adhesive is a delicate balance between strength and speed. It is important to pull as slowly as possible, with a decent force but not to break it. You can also pull a bit and then relax and wait for the adhesive to pull itself out from under the speaker. Then repeat the short pull and wait.
Even with the above, my adhesives broke each time. A hairdryer can help warm the speaker (and the adhesive under it), but don’t warm the battery next to it too much. Once hot, slowly move the spudger under the speaker and loosen it gradually. It will eventually come off in one piece.
-
-
-
Schuif de punt van je spudger onder de linker speakerkabel en wrik deze in een rechte beweging omhoog om deze van het logic board los te koppelen.
-
-
-
Gebruik een T3 Torx-schroevendraaier om de 4.2 mm lange schroef, die de linkerspeaker in de behuizing bevestigt, te verwijderen.
-
-
-
Gebruik een pincet om de zwarte treklip van de uitrekbare kleefstrip onder de speaker los te peuteren totdat je deze stevig tussen je vingers vast kunt pakken.
-
-
-
Pak de treklip van de uitrekbare kleefstrip vast en trek deze langzaam maar zeker onder de speaker vandaan.
-
Trek de kleefstrip weg totdat deze in z'n geheel onder de speaker vandaan komt.
-
Verwarm de speaker om de kleefstrip eronder te verzwakken.
-
Schuif een spudger of een openingsplectrum op voorzichtige wijze onder de speaker om deze van de kleefstrip los te krijgen.
-
-
-
Gebruik een T3 Torx-schroevendraaier om de twee 1.4 mm lange schroeven die het schild op de trackpadkabel bevestigen los te schroeven.
-
-
-
Gebruik het platte einde van je spudger om de aansluiting van de trackpadkabel uit het contact omhoog te duwen.
-
-
-
Gebruik een T3 Torx-schroevendraaier om de twee 2.6 mm lange schroeven, die de batterijhouder aan de behuizing bevestigen, te verwijderen.
I think I lost these two battery tray screws somehow, but they don't seem super critical. Any way to get replacements?
-
-
-
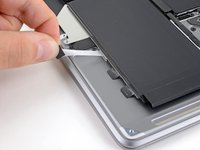
Gebruik een pincet om de drie zwarte treklippen die aan de uitrekbare kleefstrips aan de linkerkant van de MacBook zijn bevestigd weg te trekken totdat je deze stevig vast kunt grijpen met je vingers.
-
-
-
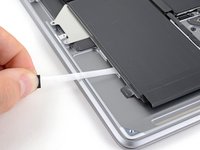
Pak een treklip van een van de kleefstrips en trek deze langzaam maar zeker onder de batterij vandaan.
-
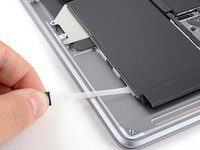
Trek de kleefstrip weg totdat deze onder de batterij vandaan komt.
-
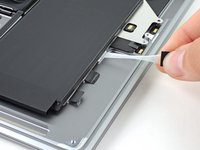
Herhaal deze stappen voor de overige twee kleefstrips aan de linkerzijde van de batterij.
What happens if you don't put this tape back the way it was? Can it cause the battery to have any sort of issue?
I dont know but Im doing the same thing. On mine its in there pretty good without any tape. The two screws are holding it in place so as long as its not flapping around I cant see an issue. Its a used battery so I dont want to tape it back in.
Can I replace the strips under the battery with the same suggested adhesive tape (Tesa 61395) as the speakers?
-
-
-
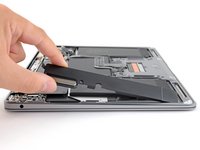
Verwijder de batterijmodule.
-
Laad je batterij op tot 100% en laat 'm nog minimaal twee uur doorladen.
-
Haal je laptop van de oplader en gebruik deze totdat deze zich uitschakelt als gevolg van een lege batterij.
-
Bij de waarschuwing over een bijna lege batterij sla je je werk op en houd je je laptop aan totdat deze zichzelf uitschakelt.
-
Wacht minimaal 5 uur en laad je laptop nog een keer ononderbroken op tot 100%.
On boot after reinstallation, the fans go crazy during the Apple logo/progress bar, and the bar is very slow. Machine unuseable. I've reset SMC to no avail. Any other ideas?
Solved my own problem: I didn't have the battery connector pushed in far enough. Its edge really sits flush with the containing latch, though it isn't really obvious from the way it connects.
matt -
Matt, glad to hear you got it sorted! Thanks for giving an update on your comment—connectors can be tricky! Hopefully it helps other users that have the same problem in the future. Happy fixing!
-
Vergelijk het vervangende onderdeel met het originele onderdeel om te zien of je extra onderdelen mee over moet zetten of om te zien of je beschermfolie moet verwijderen voordat je sommige onderdelen kunt installeren.
Om je toestel weer in elkaar te zetten, volg je deze stappen in omgekeerde volgorde.
Breng je e-afval naar een door R2 of e-Stewards gecertificeerde recycler.
Ging je reparatie niet zoals gepland? Check dan ons antwoordenforum voor hulp bij het oplossen van je probleem.
Annuleren: ik heb deze handleiding niet afgemaakt.
69 andere personen hebben deze handleiding voltooid.
Met dank aan deze vertalers:
72%
Thomas Keulemans helpt ons de wereld te herstellen! Wil je bijdragen?
Begin met vertalen ›
27Gids Commentaar
You’ve gotta be kidding me…
Hard to believe, but true.. this is an improvement from a couple generations ago, when you had to disassemble the entire computer or futz about with isopropyl alcohol and credit cards (or dental floss) to remove swollen but still glued in batteries. If this has you feeling overwhelmed, go look at the 74-step guide for the 2015 15” MacBook Pro Battery Replacement.
I concur with that. Made the fix for a Macbook Pro 13" 2014 some times ago and it looks really more difficult and stressing, especially with potentially destructive steps. I felt a bit lucky that it worked fine after that and since then...
Ok I have the battery out but where do you buy replacement adhesive strips? Everywhere I look they say they are for iphones or generic lcd repair. I had to take the battery out for other reasons and want to put the same battery back in.
Stephen, the linked adhesive is a generic solution & should work just fine. Apple-specific adhesives are sometimes hard to source. You could also cut and adapt stretch-release adhesive strips to fit. Best of luck on your repair!
Might as well go to apple themselves and get the battery replaced for 129...
What is the price of a replacement with the battery included?
Does anyone know for sure if the Macbook Air M1 will turn on with the battery disconnected, only with the power connected? Not sure if my motherboard is broken or only battery.
I have the same question. My macbook air won't turn on even with battery disconnected and power connected. would love an answer
Kiradon -
Does the battery capacity show 100% after replacing the battery in System Preferences?
I had Air 2015 and changing battery was as simple as possible. No unscrewing speakers, no adhesive strips removing. Just FIVE easy steps.
дякую! ця інструкція врятувала мені бюджет.
Great guide! Completed in about an hour. The Fix Kit DOES include at card adhesion/tape so there is no need to purchase that separately.
What if you don't use the adhesives when you reassemble?
Would it really be much of an issue?
Had two new MBA 2020 to replace the batteries (leftover machines from an insane phone company discount, still in their original sealed boxes), the 1st was done in 65 min. the 2nd in 30 min.) - thank you very much for this guide !
Bonjour @daniel57 orientez-vous à l'adhésif présent d'origine dans votre MacBook. Si vous n'y avez plus accès, pouvez-vous me dire quelle pièce vous souhaitez recoller s'il vous plaît ?
Bjr Claire,
merci pour votre retour, je change la batterie et il y a plusieurs pièces qui nécessitent du double face.
je vais prendre du 10 mm et le retailler au besoin.
cordialement,
Daniel
@daniel57 Avec plaisir et bonne réparation à vous :)
Vielen Dank, hat sehr gut funktioniert. Etwa eine reichliche halbe Stunde brauchte ich.
ONLY 24 steps! ON a slightly older Macbook Pro it's over 60 and the battery is glued down.
Apple clearly hates its own technicians. Why this should take more than 5 minutes is beyond me.
30 minutes? More like 3+ hours. I am sure if you have everything set up perfectly, have done this a dozen times, and rush at a risk of damaging jeweler sized parts, you could do it within an hour. But if you want to be sure everything is done correctly, slow steady and leisurely is the right way to go.
I did the job today, took about an hour, all good. The battery shows 100% max capacity and Battery Condition "Normal" after replacement.
I highly recommend making a little paper template to organize your screws as they come out so you don't lose them!





















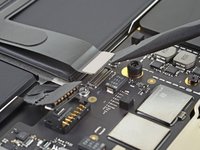


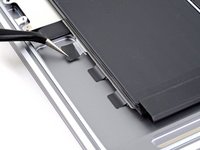
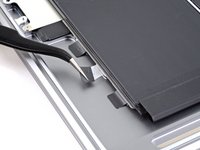
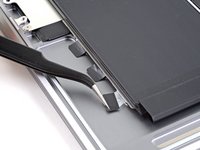




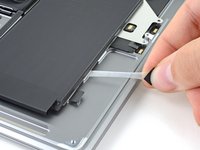
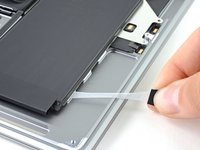


ESD safe mat, plugged into ground, with a wrist strap, also grounded, are the best best to protect the logic board.
Robin Ray - Antwoord
Re-Assembly Tip: Before putting the screws back in, snap the lower case on and test to make sure the MacBook powers up. When I first re-assembled, I became very nervous I did something wrong because it would not power on. It turns out I just needed to plug the laptop into a power source for it to power up (despite having a good charge before disassembly). It was the perfect way to test the new USB-C ports!
Austin - Antwoord
Big points to this one, especially for mentioning needing to plug the laptop in. The bottom case needs to be screwed in and laptop needs to be plugged in before it will boot.
Bayden Yazalina -
Wiha 4PL driver for these screws.
Greg Worrel - Antwoord
Printing out all the images from this Ifixit guide prior to starting and using duct tape help me keep track of screws.
raju midjdeya - Antwoord
This Guide has a high chance of not working if an aftermarket display is used as MAC serialization was introduced post ~2023. Likely you will need an original MAC screen replacement and to serialize the display for it to work.
Tron Computers - Antwoord