Inleiding
This repair guide was authored by the iFixit staff and hasn’t been endorsed by Google. Learn more about our repair guides here.
Use this guide to remove or replace a worn battery in the Google Pixel 4. If your battery is swollen, take appropriate precautions.
For your safety, discharge your battery below 25% before disassembling your phone. This reduces the risk of a dangerous thermal event if the battery is accidentally damaged during the repair.
Note: Some photos in this guide show the SIM card tray ejected from the phone. You do not need to eject the SIM card tray for this procedure.
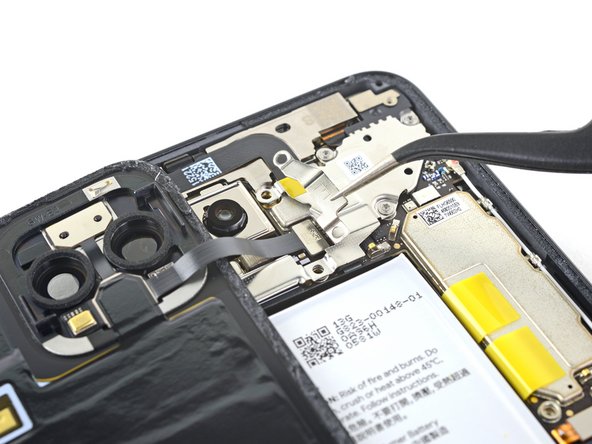
Caution: Google warns that disassembly of the front laser assembly could result in hazardous exposure to invisible infrared laser emissions. Read their safety warnings here.
Wat je nodig hebt
-
-
Prepare an iOpener and apply it to the bottom edge of the back panel for one minute.
-
-
-
Apply a suction cup to the heated edge of the back panel by pressing down on it to create suction, as close to the edge as possible.
-
-
-
Pull up on the suction cup with strong, steady force to create a gap between the back panel and the frame.
-
Insert the point of an opening pick into the gap.
-
-
-
Slide the opening pick across the bottom towards the left corner to slice the adhesive.
-
With the pick still inserted, slide it from the bottom left corner over to the bottom right corner to completely slice the bottom side adhesive.
-
Leave the pick inserted in the bottom right corner to prevent the adhesive from re-sealing.
-
-
-
Prepare an iOpener and apply it on the left edge of the phone for one minute.
-
-
-
Prepare an iOpener and apply it on the right edge of the phone for one minute.
-
-
-
-
Slide the third opening pick around the top right corner and across the top side of the phone, slicing the final strip of adhesive.
-
-
-
Once you have sliced around the perimeter of the phone, carefully lift the right edge of the back cover, opening it like a book.
-
Do not try to pull the panel all the way off yet, as it is still connected to the phone.
-
-
-
Remove the five T3 Torx screws securing the battery connector shield:
-
Four 4.0 mm screws
-
One 2.1 mm screw
-
-
-
Use a T3 Torx driver to remove the two 4 mm screws securing the back panel connector cover.
-
-
-
Pull on the yellow pull tab of the adhesive strip with steady force.
-
Continue firmly pulling up on the adhesive strip with constant force. If you're using a spudger, spin it every so often to keep the exposed section of the pull tab as short as possible.
-
Continue this process for each of the three pull tabs, until all are either out or have snapped in half.
-
-
-
If the battery tabs snapped during removal, insert an opening pick on the upper right edge of the battery, slicing the adhesive underneath.
-
-
-
Lift the battery up and away from the phone to remove it. You may need to peel the battery away from any leftover adhesive tabs.
-
If you're using stretch release adhesive, apply them onto the battery. Otherwise, apply some double-sided tape, or pre-cut adhesive strips in the phone's battery well, being careful not to cover the charge port flex cable. Peel away any tape liners to expose the adhesive.
-
Temporarily re-connect the battery's connector to the motherboard socket. This ensures that the battery is properly positioned.
-
Lay the battery in place and press firmly.
-
Disconnect the battery connector from its motherboard socket and resume re-assembly.
-


For optimal performance, calibrate your newly installed battery after completing this guide.
Compare your new replacement part to the original part—you may need to transfer remaining components or remove adhesive backings from the new part before installing.
To reassemble your device, follow the above steps in reverse order.
Take your e-waste to an R2 or e-Stewards certified recycler.
Repair didn’t go as planned? Try some basic troubleshooting, or ask our Answers community for help.
Annuleren: ik heb deze handleiding niet afgemaakt.
58 andere personen hebben deze handleiding voltooid.


26 opmerkingen
If you are gonna sell me your tool kit at least supply a *!&$!&$^ T3 Tork bit to complete the job.
Hi Nicholas,
The iFixit kit should definitely have a T3 bit. Please contact our customer support and we will get the issue resolved!
Hey Keith,
When putting the phone back together and reinstalling the back panel, we recommend removing the old adhesive and installing new adhesive. The Pixel 4’s back panel adhesive can be found here, and a guide on how to install it can be found here!
If you’d like to reuse your old adhesive, try removing any large uneven chunks, reheat the adhesive, and press the back panel back into place.
Does the kit include replacement battery adhesive strips? I don’t recall seeing it in mine.