Inleiding
Gebruik deze handleiding om de batterij van je iPad Pro 12.9" 5e generatie te vervangen.
Deze handleiding is tot stand gekomen met behulp van het A2379-model (wifi en LTE met mmWave) van de iPad Pro. Als je het wifi-only model hebt, kun je deze handleiding ook gebruiken, maar zul je extra demontagestappen moeten uitvoeren die niet in deze handleiding uitgelegd worden.
Op sommige afbeeldingen in de handleiding zie je dat de batterijaansluiting door middel van twee strips geblokkeerd is. Hoewel dit een methode is die je kunt gebruiken, raden we je aan de batterij volledig te ontladen alvorens met deze reparatie te beginnen.
Wat je nodig hebt
-
-
Koppel alle aangesloten kabels los en schakel je iPad volledig uit.
-
-
-
Leg een verwarmde iOpener gedurende twee minuten op de rechterzijde van het scherm.
-
-
Gereedschap gebruikt in deze stap:Clampy - Anti-Clamp$24.95
-
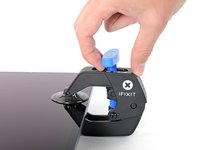
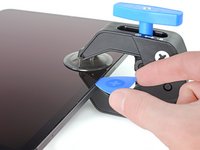
Trek het blauwe handvat naar achteren om de armen van de anti-klem te ontgrendelen.
-
Plaats een object onder je iPad zodat het op iets rust terwijl je het tussen de armen van de anti-klem klemt.
-
Plaats de zuignappen in het midden van de rechterkant, een aan de boven- en een aan de onderkant.
-
Houd de onderkant van de anti-klem vast en zet druk op de bovenste zuignap zodat de zuignappen zich goed vastzuigen.
-
-
-
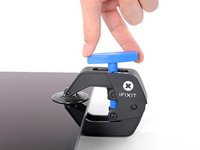
Trek het blauwe handvat naar voren om de armen te vergrendelen.
-
Draai het handvat 360 graden met de klok mee, of draai tot de zuignappen uitgerekt worden.
-
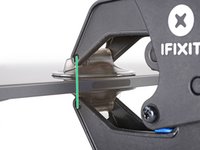
Zorg dat de zuignappen op een lijn ten opzichte van elkaar blijven zitten. Als ze niet langer op een lijn zitten, maak je de zuignappen iets los en breng je ze weer op een lijn met elkaar.
-
-
-
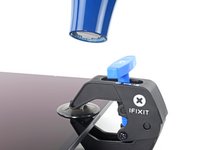
Geef de lijm een minuutje om los te komen, zodat er een kleine opening kan ontstaan.
-
Als je scherm niet warm genoeg wordt, kun je ook een föhn of een heteluchtpistool gebruik om de rechterzijde van de iPad meer te verwarmen.
-
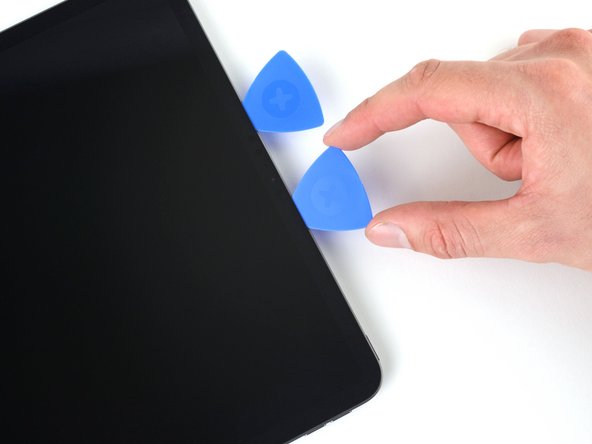
Steek, als de anti-klem een opening heeft gecreëerd die groot genoeg is, een openingsplectrum in de opening onder het scherm.
-
Sla de volgende stap over.
-
-
-
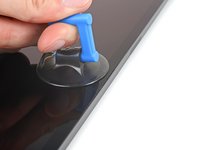
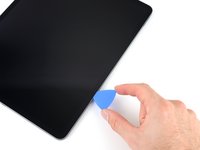
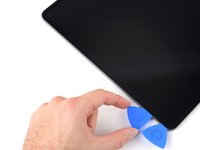
Druk een zuignap op het scherm, zo dicht mogelijk bij de rechterzijde van het toestel.
-
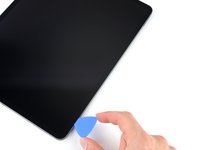
Trek de zuignap met een stevige en constante kracht omhoog om zo een kleine opening tussen het frame en het scherm te creëren.
-
Steek een openingsplectrum in de opening.
-
-
-
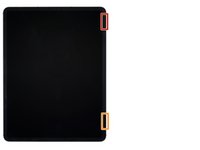
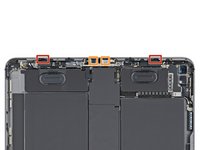
De eerste magneet begint ongeveer 3 centimeter vanaf de bovenkant van de iPad.
-
De tweede magneet begint ongeveer 3 centimeter vanaf de onderkant van de iPad.
-
-
-
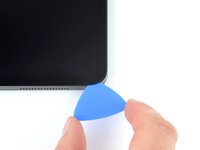
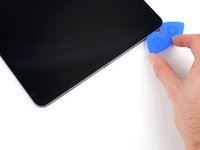
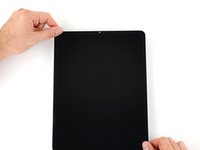
Schuif je openingsplectrum langs de rechterzijde van het scherm om de lijm daar door te snijden.
-
Laat je plectrum in de rechterbenedenhoek zitten voordat je verdergaat.
-
-
-
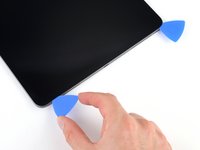
Schuif je openingsplectrum om de rechterbenedenhoek van het scherm heen en snijd de lijm door.
-
Laat je plectrum in de hoek zitten om te voorkomen dat de lijm zich opnieuw aan het toestel hecht.
-
-
-
Leg een verwarmde iOpener gedurende twee minuten op de onderste rand van het scherm.
-
-
-
Steek een tweede openingsplectrum in de opening in de rechterbenedenhoek van het scherm.
-
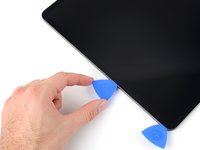
Schuif je plectrum naar de linkerbenedenhoek en snijd onderweg alle lijm door.
-
-
-
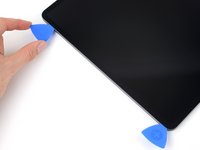
Draai je plectrum door de linkerbenedenhoek heen.
-
Laat je plectrum in de linkerbenedenhoek zitten om te voorkomen dat de lijm zich opnieuw aan het toestel gaat hechten.
-
-
-
Leg een verwarmde iOpener gedurende twee minuten op de linkerzijde van de iPad.
-
-
-
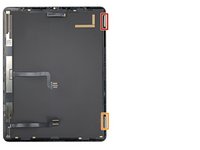
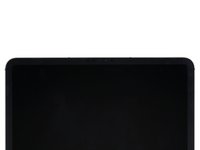
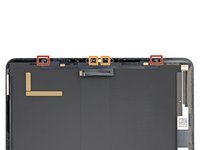
De bovenste uitsnedes beginnen 4 centimeter en 6 centimer vanaf de bovenkant van het frame.
-
De onderste uitsnedes beginnen 4 centimeter en 6 centimer vanaf de onderkant van het frame.
-
-
-
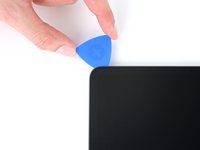
Steek een derde openingsplectrum in de opening bij de linkerbenedenhoek van het scherm.
-
Schuif je plectrum naar de linkerbovenhoek en snijd onderweg alle lijm door. Zorg dat je de aanwijzingen voor het snijden in de buurt van de uitsnedes goed opvolgt.
-
Laat je plectrum in de linkerbovenhoek zitten.
-
-
-
Schuif je openingsplectrum langs de linkerbovenhoek van het scherm.
-
Laat je plectrum in de linkerbovenhoek zitten om te voorkomen dat de lijm zich opnieuw aan het toestel hecht.
-
-
-
Leg een verwarmde iOpener gedurende twee minuten op de bovenkant van het scherm van de iPad.
-
-
-
Lees de volgende informatie door terwijl de lijm aan de bovenkant verwarmd wordt:
-
Er bevinden zich twee omgevingslichtsensoren nabij de hoeken. Steek je plectrum hier daarom niet meer dan 1 mm in de opening.
-
De naar voren gerichte camera en de extra sensoren bevinden zich in het midden van de bovenkant. Steek je plectrum hier niet in de opening. Hier zit maar minder dan 1 mm aan lijm en het risico op het beschadigen van de onderdelen is te groot.
-
-
-
Schuif je plectrum richting de rechterbovenhoek en stop net voor de voorste cameramodule.
-
Laat je plectrum in de opening zitten.
-
-
-
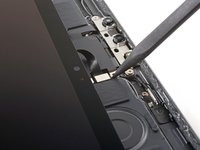
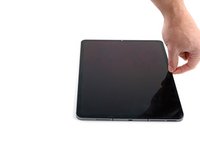
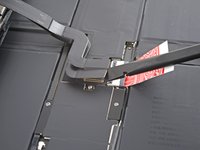
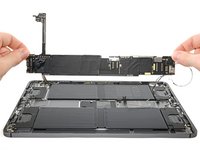
Pak twee tegenoverliggende hoeken van het scherm vast en til het scherm van het frame af omhoog.
-
Beweeg het scherm vervolgens richting de rechterbenedenhoek van het frame tot de lintkabel nabij de bovenkant van de iPad blootligt.
-
-
Gereedschap gebruikt in deze stap:FixMat$36.95
-
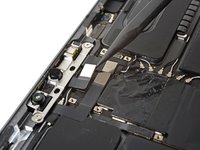
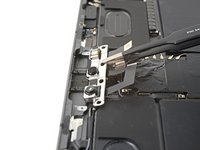
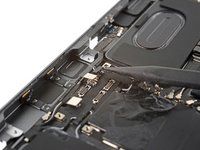
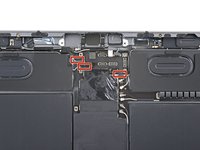
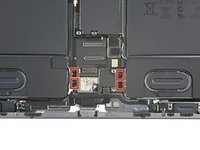
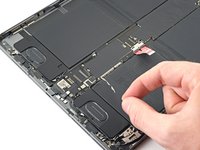
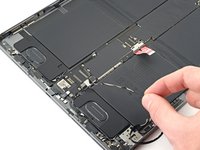
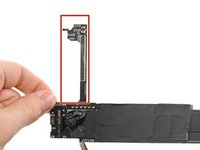
Gebruik een kruiskopschroevendraaier(bitje) om de twee schroeven die het plaatje op de bovenste kabels bevestigt te verwijderen:
-
Eén 1.8 mm lange schroef
-
Eén 1.4 mm lange schroef
-
-
Gereedschap gebruikt in deze stap:Tweezers$4.99
-
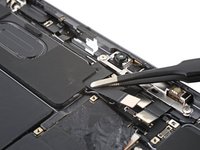
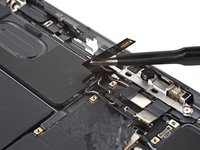
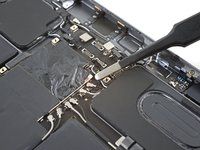
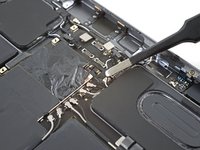
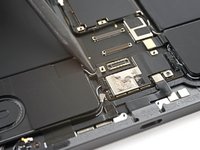
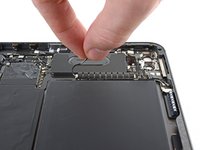
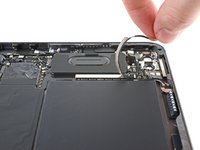
Gebruik een pincet of je vingers om het plaatje vast te pakken en te verwijderen. st te
-
-
-
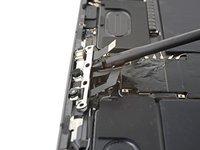
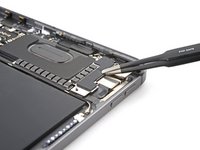
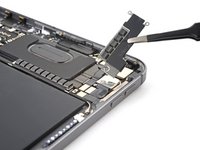
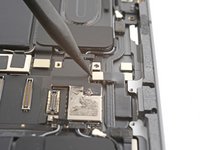
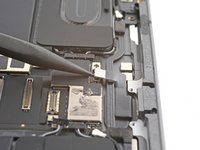
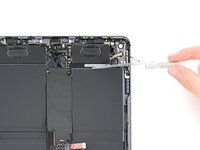
Gebruik de punt van je spudger om de drukaansluiting van de bovenste sensoren omhoog te wrikken en los te koppelen.
-
-
-
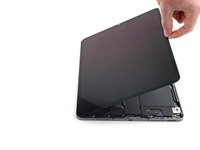
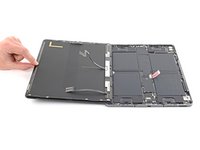
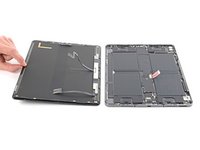
Pak de rechterkant van het scherm vast en open het zoals je een boek zou openen.
-
Leg het scherm links naast de iPad neer met het scherm naar beneden wijzend.
-
-
-
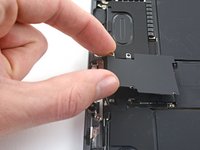
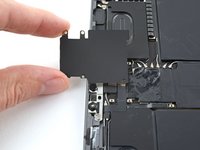
Trek de beschermer van het moederbord af en verwijder deze.
-
-
-
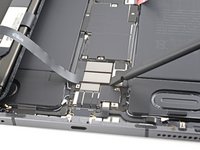
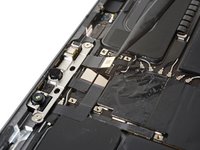
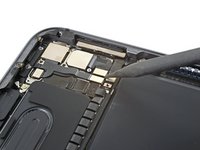
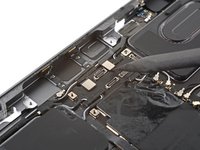
Gebruik een kruiskopschroevendraaier om de 1.7 mm lange schroef, waarmee de batterijaansluiting op het moederbord is aangesloten, te verwijderen.
-
-
-
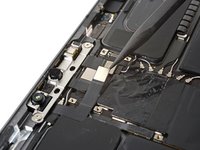
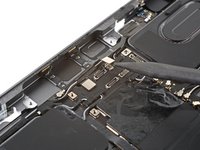
Gebruik een kruiskopschroevendraaier om de zeven schroeven die de twee beugels op de twee schermkabelaansluitingen bevestigen te verwijderen:
-
Vier 1.1 mm lange schroeven
-
Twee 2.0 mm lange schroeven
-
Eén 1.0 mm lange schroef
-
-
Gereedschap gebruikt in deze stap:Tweezers$4.99
-
Gebruik een pincet of je vingers om de bovenste en onderste beugels op de schermaansluitingen te verwijderen.
-
-
-
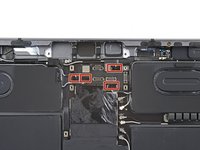
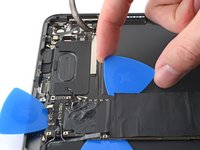
Gebruik een spudger om de drukaansluitingen van de onderste twee schermkabels omhoog te wrikken en los te koppelen.
-
-
-
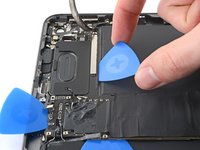
Gebruik een spudger om de drukaansluitingen van de bovenste twee schermkabels omhoog te wrikken en los te koppelen.
-
-
-
-
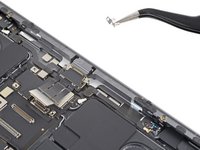
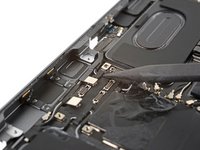
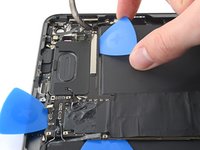
Gebruik een spudger om de drukaansluiting van de oplaadpoort omhoog te wrikken en los te koppelen.
-
-
-
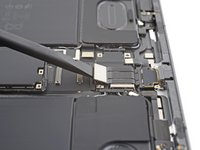
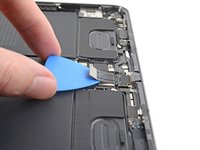
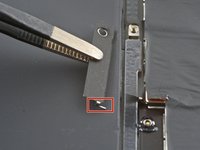
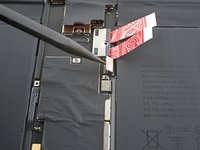
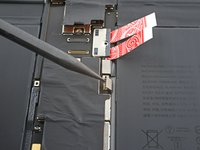
Steek een openingsplectrum tussen de oplaadpoortkabel en het moederbord.
-
Schuif je plectrum richting de oplaadpoort om de lijm los te maken.
-
-
-
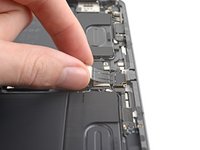
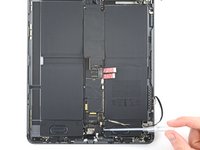
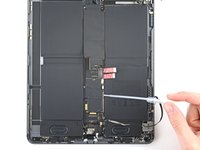
Gebruik een kruiskopschroevendraaier om de twee 1.8 mm lange schroeven, waarmee de oplaadpoort bevestigd is, te verwijderen.
-
-
Gereedschap gebruikt in deze stap:Tweezers$4.99
-
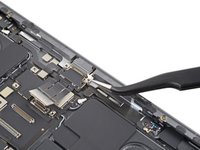
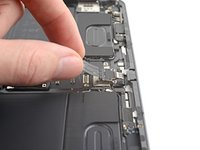
Gebruik een pincet om de twee kleine aardingsklemmen naast de oplaadpoort te verwijderen.
-
-
-
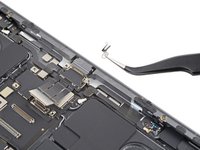
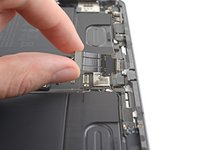
Gebruik je vingers op de oplaadpoort uit de sleuf in het frame te trekken.
-
Verwijder de oplaadpoort.
-
-
-
Gebruik een kruiskopschroevendraaier om de drie schroeven, die de beugel van de voorste camera op het moederbord bevestigen, te verwijderen:
-
Twee 1.1 mm lange schroeven
-
Eén 1.0 mm lange schroef
-
-
-
Verwarm een iOpener en leg deze gedurende twee minuten op de voorste camerabeugel.
-
-
-
Steek een openingsplectrum tussen de voorste camerabeugel en het moederbord.
-
Schuif je plectrum richting de bovenkant van de iPad om de lijm door te snijden.
-
-
-
Schuif de beugel van de voorste camera richting de rechterkant van de iPad om de metalen klem los te maken.
-
Verwijder de voorste camerabeugel.
-
-
-
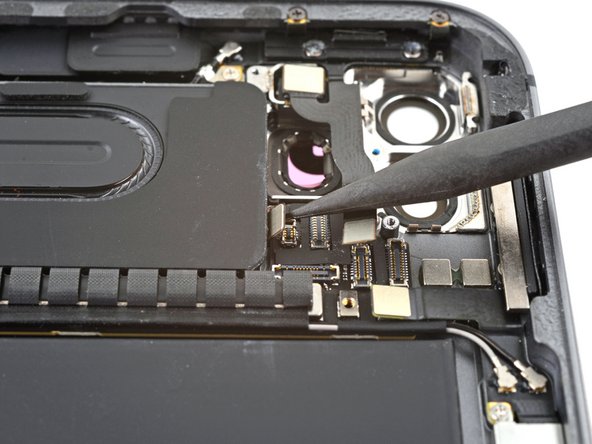
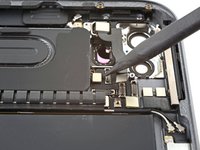
Gebruik een spudger om de drie drukaansluitingen van de voorste camera omhoog te wrikken en los te koppelen.
-
-
-
Gebruik een T3 Torx-schroevendraaier om de twee 2.2 mm lange schroeven, waarmee de voorste camera bevestigd is, te verwijderen.
-
-
-
Steek een spudger onder de voorste camera, tussen de middelste en de rechterkabel.
-
Draai je spudger om de camera van de epoxy eronder te scheiden.
-
Verwijder de voorste camera.
-
-
-
Gebruik een kruiskopschroevendraaier om de vijf schroeven, waarmee de beugel van de achterste camera op het frame is bevestigd, te verwijderen:
-
Twee 1.2 mm lange schroeven
-
Eén 2.7 mm lange schroef
-
Eén 2.6 mm lange schroef
-
Eén 1.8 mm lange schroef
-
-
Gereedschap gebruikt in deze stap:Tweezers$4.99
-
Gebruik een pincet of je vingers om de achterste camerabeugel te verwijderen.
-
-
-
Gebruik een spudger om de drukaansluiting van de groothoekcamera omhoog te wrikken en los te koppelen.
-
Koppel de drukaansluiting van de onderste aan-uitknop los.
-
-
-
Steek een spudger tussen de rechterzijde van de achterste cameramodule en het frame.
-
Wrik de camera omhoog om deze van het frame te scheiden.
-
Verwijder de achterste cameramodule.
-
-
-
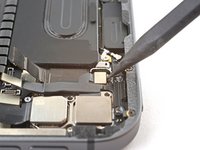
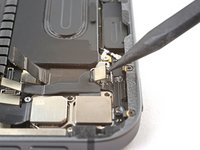
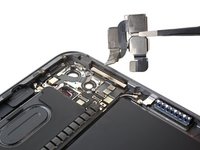
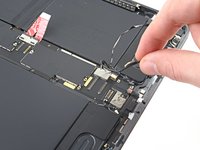
Gebruik de punt van je spudger om de zes coaxiale kabels aan de bovenkant van de iPad los te koppelen door ze omhoog te wrikken.
-
-
-
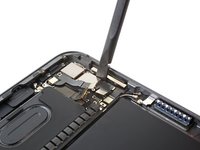
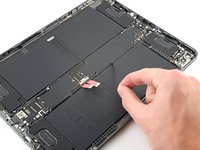
Gebruik een spudger om de twee drukaansluitingen van de bovenste microfoons omhoog te wrikken en los te koppelen.
-
-
-
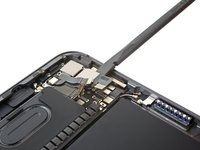
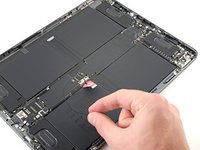
Gebruik de punt van je spudger om de aansluitingen van de vier bovenste speakers omhoog te wrikken en los te koppelen.
-
-
Gereedschap gebruikt in deze stap:Tweezers$4.99
-
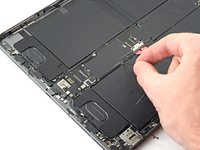
Gebruik een pincet of je vingers om de drie speakerkabels van het moederbord te verwijderen.
-
-
-
Gebruik een spudger om de drukaansluiting van de 5G mmWave-antenne omhoog te wrikken en los te koppelen.
-
-
-
Gebruik een spudger om de drukaansluiting van de microfoon rechtsbovenin het toestel omhoog te wrikken en los te koppelen.
-
-
-
Gebruik de punt van je spudger om de vier onderste speakeraansluitingen omhoog te wrikken en los te koppelen.
-
-
-
Gebruik een spudger om de drukaansluiting van de Smart Connector omhoog te wrikken en los te koppelen.
-
-
-
Gebruik een spudger om de drukaansluiting van de simkaartlezer omhoog te wrikken en los te koppelen.
-
-
-
Gebruik een spudger om de drukaansluiting van de bovenste antenne omhoog te wrikken en los te koppelen.
-
-
-
Gebruik de punt van je spudger om de coaxiale kabel van de wifi-antenne zo dicht mogelijk bij de aansluiting zelf omhoog te wrikken en los te koppelen.
-
-
-
Trek de wifikabel richting de rechterkant van de iPad om deze van het moederbord te scheiden.
-
-
-
Trek de antennekabel langs de rechterkant van het moederbord.
-
-
-
Trek de kabel van de 5G mmWave-antenne richting de rechterkant van de iPad om deze van het moederbord te scheiden.
-
-
-
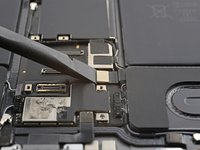
Gebruik een kruiskopschroevendraaier om de twee schroeven die de plaatjes op het moederbord bevestigen te verwijderen:
-
Eén 1.0 mm lange schroef
-
Eén 1.1 mm lange schroef
-
-
-
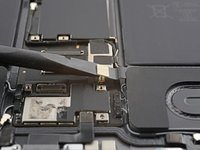
Schuif het rechterplaatje van het moederbord weg om de metalen vergrendeling los te krijgen.
-
Verwijder het rechterplaatje.
-
-
-
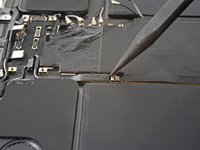
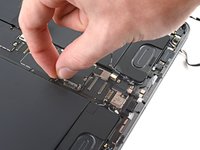
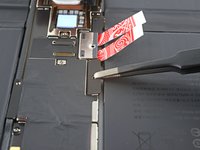
Gebruik een spudger om de drukaansluiting van de antenne linksonderin omhoog te wrikken en los te koppelen.
-
-
-
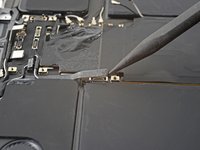
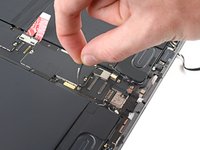
Gebruik een spudger om de drukaansluitingen van de linkermicrofoon en de Apple Pencil-lader omhoog te wrikken en los te koppelen.
-
-
-
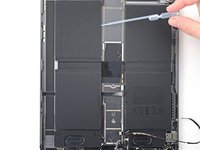
Dien wat isopropylalcohol (>90%) aan de rechterkant van het moederbord toe.
-
Til de rechterkant van de iPad omhoog zodat de alcohol onder het moederbord kan lopen.
-
Geef de alcohol een minuutje de tijd om in de lijm te kunnen trekken.
-
-
-
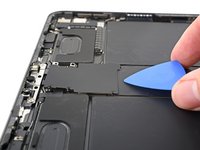
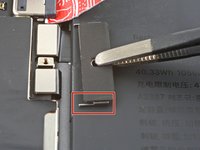
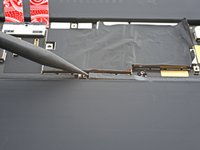
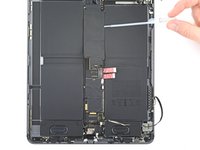
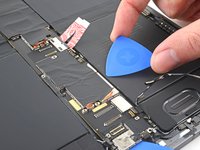
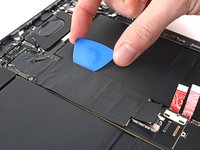
Schuif een openingsplectrum onder de onderkant van het moederbord, in de buurt van de oplaadpoort, om de lijm aan de onderkant door te snijden.
-
Laat je plectrum op z'n plek zitten om te voorkomen dat de lijm zich opnieuw aan het toestel hecht.
-
-
-
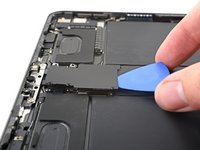
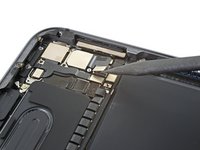
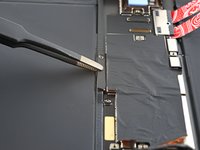
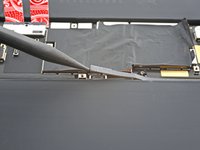
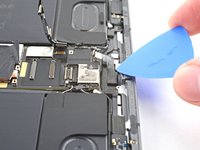
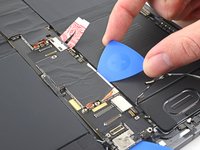
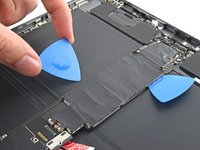
Steek een openingsplectrum onder de rechterkant van het moederbord.
-
Schuif je plectrum richting de batterijaansluiting om de lijm aan de rechterkant door te snijden.
-
Laat je plectrum op z'n plek naast de batterijaansluiting zitten om te voorkomen dat de lijm zich opnieuw gaat hechten.
-
-
-
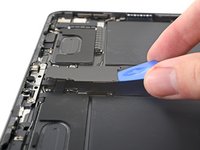
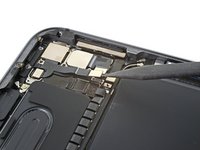
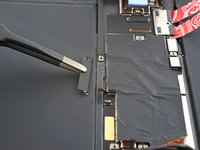
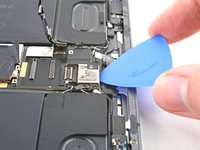
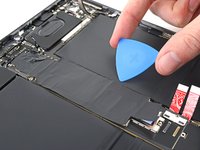
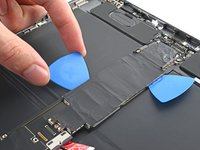
Steek een derde openingsplectrum aan de andere kant van de batterijaansluiting onder het moederbord.
-
Schuif je plectrum richting de bovenkant van de iPad om de laatste stukken lijm aan de rechterkant door te snijden.
-
Laat je plectrum zitten om te voorkomen dat de lijm zich opnieuw aan het toestel hecht.
-
-
-
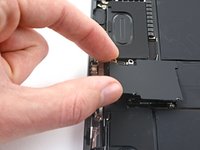
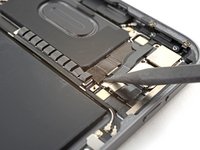
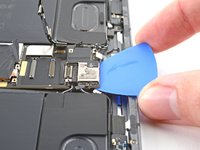
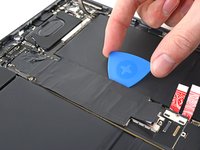
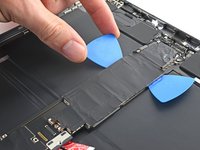
Steek een openingsplectrum onder de linkerzijde van het moederbord.
-
Schuif je plectrum langs de linkerzijde van de iPad om de lijm daar door te snijden.
-
Laat je openingsplectrum op z'n plek zitten om te voorkomen dat de lijm zich opnieuw aan het toestel hecht.
-
-
-
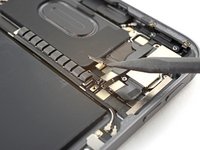
Schuif een vijfde openingsplectrum, in de buurt van de voorste camera, onder de bovenkant van het moederbord om de lijm aan de bovenkant door te snijden.
-
Laat je plectrum zitten om te voorkomen dat de lijm zich opnieuw aan het toestel hecht.
-
-
-
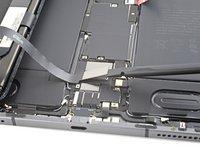
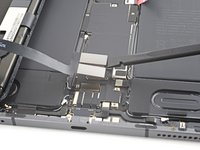
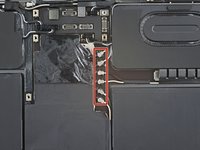
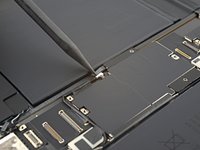
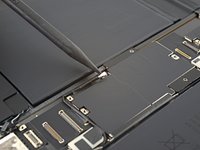
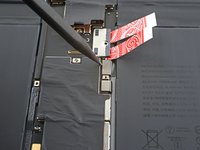
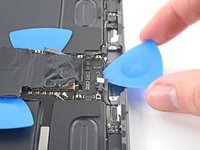
Dien wat isopropylalcohol (>90%) toe onder de arm van het moederbord.
-
-
-
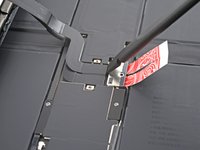
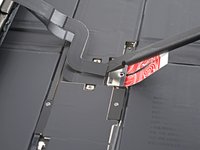
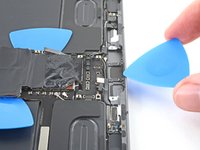
Schuif de openingsplectrum rechtsbovenin langs de arm van het moederbord om de laatste stukken lijm door te snijden.
-
-
-
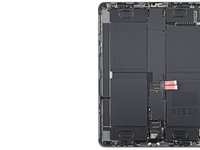
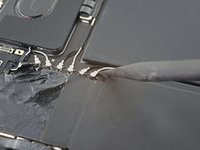
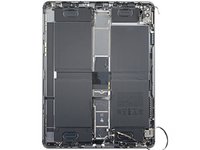
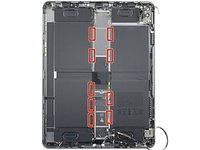
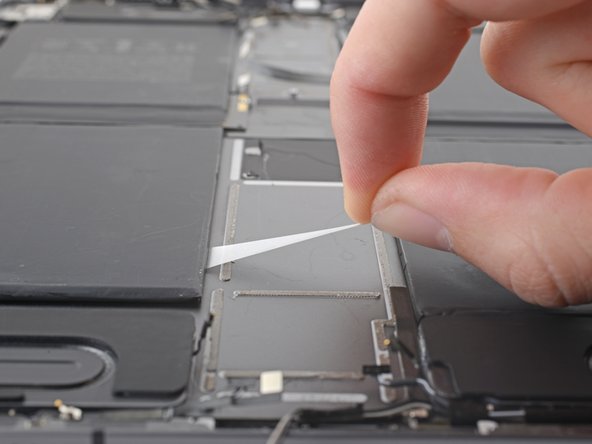
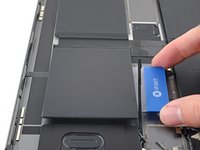
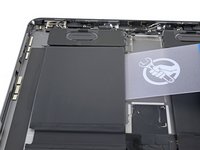
Er bevinden zich negen uitrekbare kleefstrips met treklip die moeten verwijderd om de batterij te kunnen verwijderen.
-
De hoeken van sommige batterijcellen bevatten een klein beetje lijm dat losgemaakt moet worden.
-
De rest van de lijm zit tussen de batterijcellen, onder de batterijborden.
-
-
Gereedschap gebruikt in deze stap:Tweezers$4.99
-
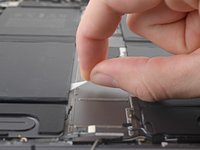
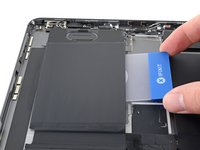
Gebruik een pincet of je vingers om de treklip van de batterij los te trekken zodat je de lip met je vingers vast kunt pakken.
-
-
-
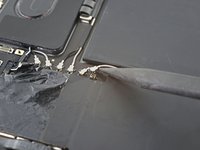
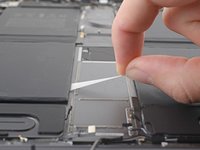
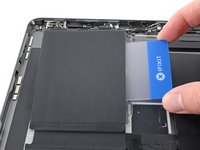
Trek de strips er langzaam en met een zo constant mogelijke kracht uit. Geef de strips voldoende tijd om zich uit te rekken en onder de batterij vandaan te komen.
-
Als een van de kleefstrips afbreekt, probeer je deze opnieuw vast te pakken met je vingers of met een pincet met stompe uiteinden en ga je verder met trekken. Wrik de batterij niet omhoog om de kleefstrip opnieuw te pakken te krijgen.
-
Herhaal deze stap voor alle negen kleefstrips.
-
-
-
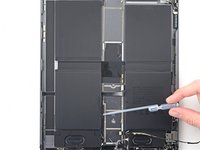
Breng wat isopropylalcohol (>90%) aan langs de rand van de batterij.
-
Kantel de iPad op zo een manier dat de alcohol rustig onder de batterij kan lopen.
-
-
-
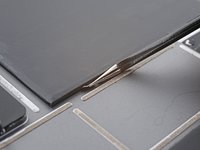
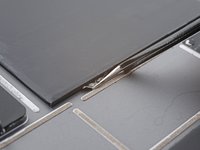
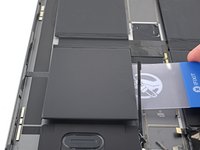
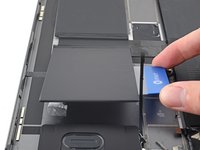
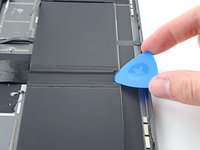
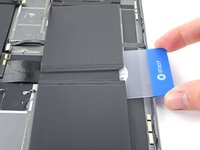
Steek een plastic kaart in de opening tussen de batterij en het frame.
-
Gebruik je plastic kaart om de lijm onder de batterij door te snijden.
-
Herhaal deze stap bij iedere batterijcel waar nog kleefstrips onder zitten.
-
-
-
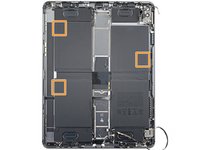
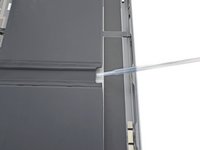
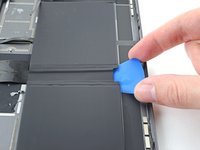
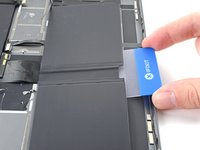
Steek een plastic kaart in de opening tussen de batterijcel rechtsbovenin en het frame.
-
Gebruik je plastic kaart om de lijm onder de batterij door te snijden.
-
-
-
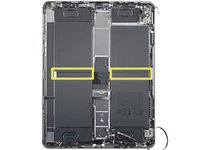
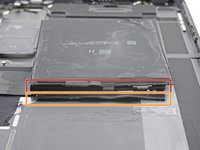
Breng wat isopropylalcohol (>90%) aan rondom de batterijborden tussen de batterijcellen.
-
-
-
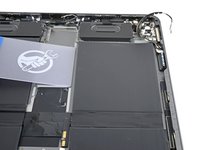
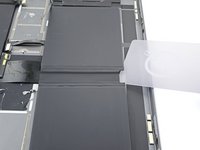
Snijd niet tussen de batterij en het batterijbord.
-
Zorg dat je tussen het bord en het frame snijdt.
-
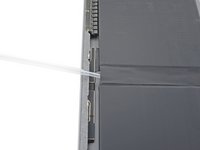
Steek een openingsplectrum onder het midden van de twee batterijcellen om een kleine opening te creëren.
-


Volg bovenstaande instructies in omgekeerde volgorde om je toestel weer in elkaar te zetten.
Kalibreer je nieuwe batterij na het voltooien van deze handleiding en stel je batterij zo in staat optimaal te functioneren.
Breng je e-afval naar een door R2 of e-Stewards gecertificeerd recyclepunt.
Ging je reparatie niet helemaal volgens plan? Bezoek dan onze algemene probleemoplossingspagina of stel je vraag op ons antwoordenforum voor de iPad 12.9" 5e generatie voor hulp bij het oplossen van je probleem.
Annuleren: ik heb deze handleiding niet afgemaakt.
2 andere personen hebben deze handleiding voltooid.
Met dank aan deze vertalers:
100%

Thomas Keulemans helpt ons de wereld te herstellen! Wil je bijdragen?
Begin met vertalen ›


Één opmerking
How to glue screen back? Can iPad work without battery-with power bank only? I hate battery problems -they grow inside-it’s make me feel stupid-like-idea to place them inside