
PlayStation 4 Slim Motherboard Replacement
Inleiding
Ga naar stap 1Use this guide to remove and replace your PS4 Slim's motherboard.
Wat je nodig hebt
Onderdelen
Gereedschap
Toon meer…
-
-
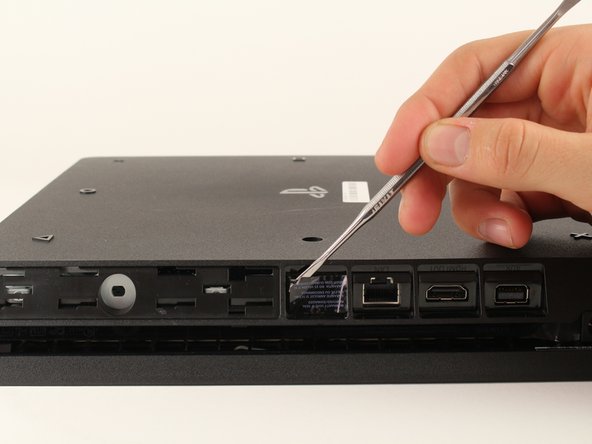
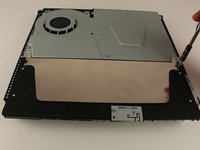
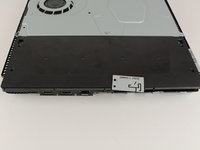
Locate the plastic warranty sticker next to the three ports on the side of the console.
-
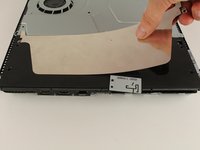
Remove the warranty sticker by peeling it off with any kind of spudger.
-
-
-
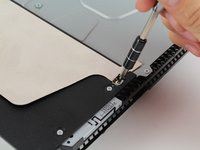
Unscrew and remove the now exposed 5.0mm screw using a TR8 security Torx screwdriver with a counter-clockwise motion.
T8 fits like a glove for me
Is there anything else you can use
A small flathead screwdriver will work
There is a small metal rod in the middle of the screw that isn’t allowing my t8 inside. Any insight on this?
Some T8 bits have a hole in the middle that will allow that rod to go through; some do not. If you have a set of multiple bits, check if there are any others labeled T8 or TR8 with that hole in the middle.
Nicholas -
There is a metal thing inside of the screw slot any insite on this?
-
-
-
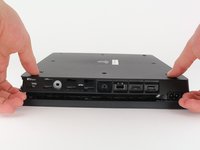
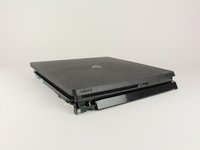
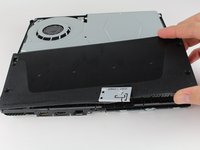
Place the Playstation 4 Slim upside down with the side of the screw you just removed facing you.
-
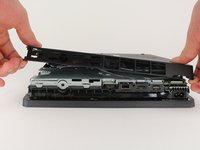
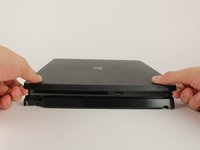
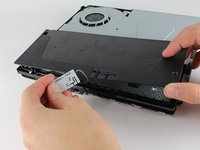
Pry up on the two corners that are facing you with your fingers.
-
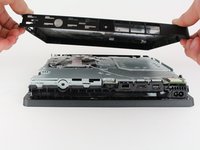
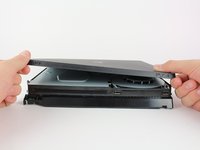
Remove the bottom cover by sliding it towards the back corners and lifting up.
It says to place it upside down, but didn't you do so in the previous step? I've been trying to unscrew the screw with my screwdriver that I got from here and if I had to had the system right side up, I'm afraid I might've stripped the screw from all the force I tried to use to get the screw out that will NOT budge. It didn't even move the slightest after removing the warranty sticker.
There is a single clip on the left side about 5cms in, and another clip on the right side equidistant to the one on the other side. Jamming a spudger in there first, and lifting those clips helped, and then I had to slide down to lift a total of 4 clips on each side (each about 4cms apart). Then push the cover away from you, if that makes more sense than “sliding it towards the back corners”, since the back corners are technically facing you.
I saw many video and tried it my self, you have to remove the hard disc before removing any cover.
-
-
-
Place the Playstation 4 Slim right side up, with the PS logo on top and the side with the words "SONY" and "PS4" facing you.
-
Pry up on the two corners that are facing you with your fingers.
-
Remove the top cover by sliding it towards the back corners and lifting up.
-
-
-
Unscrew and remove the two screws (left one 31.0mm and right one 24.0mm) using a T8 screwdriver with a counter-clockwise motion.
-
Unscrew and remove the 3.0mm screw using a Phillips #1 screwdriver with a counter-clockwise motion.
UK model seems to be different here. There's no Philips screw where there is on your image.
This regards EU models in general, i think. My danish version is the same.
CUH-2215B doesn't seem to have the top antenna screw
-
-
-
Remove the four 16mm Philips screws holding the power supply in place.
Only 2 Phillips actress here on my UK
Only 2 phillips screws on the US one as well.
I also only have two screws here in the US.
CUH-2215B has two T9 Security Torx screws on metal shield and two Phillips screws
-
-
-
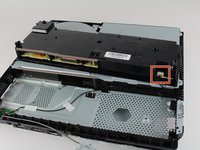
Remove the metal sheet from the top of the power supply by grabbing and lifting up with your hands.
I think the metal sheet protects the rest of the console or something from heating too much.
-
-
-
-
Remove the antenna from the top of the power supply by guiding the wire with your fingers through the groves underneath the metal panel.
What does this mean for part do? This part is not present in my console nor is the space where it's supposed to reside as shown in the picture above.
Me neither, guess they are different models.
The model shown in this tutorial is the PS4 Slim CUH-2115, because it has the WiFi Bluetooth antenna attached to the PSU.
-
-
-
Flip the Playstation 4 Slim onto its back.
-
Unscrew and remove the 4.0mm screw using a Phillips #1 screwdriver with a counter-clockwise motion.
it's usually pretty straightforward to remove the HDD first on any Playstation System
How do you get it when the screw is stripped
-
-
Gereedschap gebruikt in deze stap:Tweezers$4.99
-
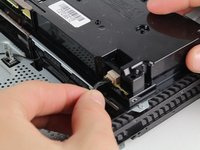
Disconnect the wire connection from the power supply by firmly gripping it with your fingers or tweezers and pulling out.
-
Remove the power supply completely by grabbing and lifting up with your hands.
Your guide is good but detail. Could be alot better for a start you forgot to mention the screw on the other side that must also be removed to let the power supply out of ps4 slim
Could you replace a ps4 slim model CUH-211B with a N16-160P1A power supply
Just because I feel like this needs to be stated clearly, “Do no attempt to pull the plug out by the wires!”
Pull from the plastic, male end of the plug or you’re going to end up have a very bad day.
Literally no way I can do it by the plastic, the only way is wires. Gotta risk it I guess
Misha FV -
You are right, pulling the wires is entirely wrong. I used the small rectangular, thin blue plastic to push the cable back from the socket. It was too tight. From my experience of repairing, never pull wires. The consequences of damaging it are not worth it.
This cable is very hard to remove from the connector. It's much easier to unplug this cable from the motherboard side (in step 20) because you can push the connector out from behind. (This might only be true for some motherboard revisions.)
You can leave the power supply propped up on top of the console, like shown in the first picture. After you've unplugged the two cables in step 13, you can put the power supply back where it was to make flipping the console over easier.
This is about where I'd give up
-
-
-
Unscrew and remove the 31.0mm safety screw using a T8 screwdriver with a counter-clockwise motion.
-
-
Gereedschap gebruikt in deze stap:Tweezers$4.99
-
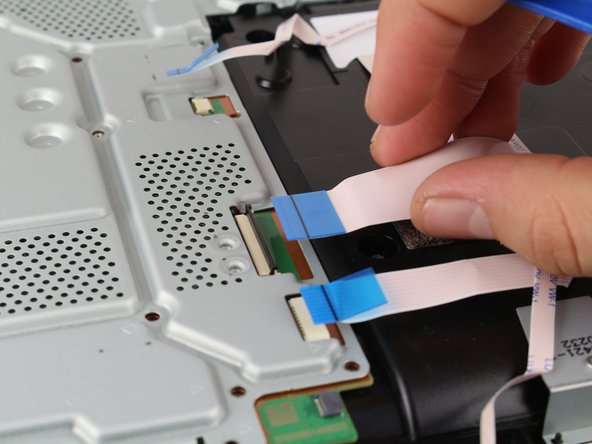
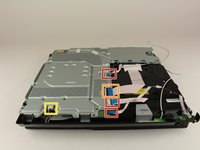
Locate the two wires connected to the bottom of the motherboard.
-
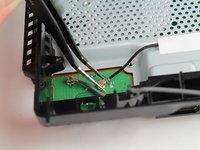
Remove the wires by firmly grasping the metal connections with your fingers or tweezers and pulling up until they disconnect.
-
-
-
Flip the device to the backside.
-
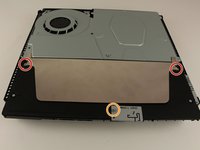
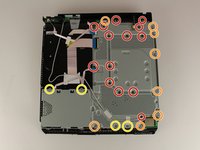
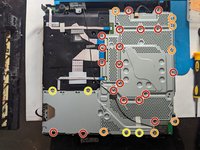
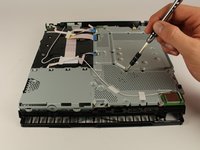
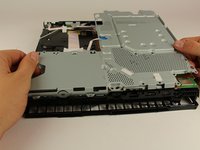
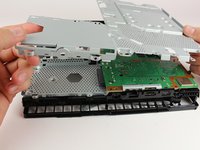
Unscrew and remove 14x (19x for CUH-21xx) 4.0mm black screws using a Phillips #1 screwdriver with a counter-clockwise motion.
-
Unscrew and remove 8x (7x for CUH-21xx) 6.0mm silver screws using a Phillips #1 screwdriver with a counter-clockwise motion.
-
Unscrew and remove 4x 3.0mm silver screws using a Phillips #1 screwdriver with a counter-clockwise motion.
- There are 14x 4.0mm black screws, but the step only shows 13 of them circled in red. One of the 11 orange circles (near front of unit) is actually the 14th black screw. Photo: http://i.imgur.com/7G64egd.png
- As for the 6.0mm silver screws, there are only 8x of those. The two silver screws behind the IO ports on the back are 3.0mm fine-threaded screws. Photo: http://i.imgur.com/cQD6KQu.png
- Source: Have a PS4 Slim (CUH-2015A) right in front of me, doing this exact job. Hope this helps someone else down the road.
In my PS4 slim many of the screws shown in this step are melted plastic rivet type fasteners. I guess I’m supposed to just cut through them and hope the game stays together or is there a way to remove them and drill and tap holes for screws that will hold the board etc in place? My game is getting old and I would like to clean the fan and make sure the thermal paste or Liquid Metal is still working (“the perfect amount “). The fan in my game seems to run a quite a bit. Thanks!
By definition, "unscrew" is in a counter-clockwise motion. And, people who are taking apart a device like this will be able to tell when they try to turn the screw which way is correct.
In the second picture, there is a hard disk. In the first and third pictures, there is no hard disk. You might want to update these instructions to include hard disk drive removal.
In my experience with creating guides you use existing guides as stepping stones to build up new guides. That means sometimes pictures will show a procedure for one step where other steps may come before or after the one being described. The point is you should be looking at what's being described rather than nit-picking on things like is the hard drive there or not. Just assume if the instructions haven't told you to remove the hard drive, then you don't need it removed even if the picture shows it having been taken out.
With regard to the second picture in particular, I added that one when I was taking apart my grandson's CUH-21xx system only to find that the screws were substantially different than the ones in the original guide. My point was to document those differences and no, I didn't worry about whether the hard drive was there or not, so my picture has it in and the others don't.
-
-
-
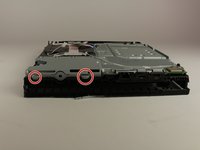
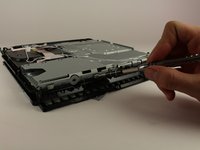
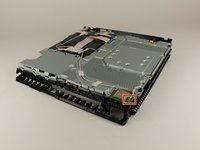
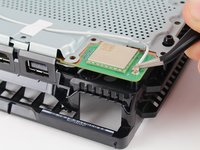
Unscrew and remove the two 5.0mm screws on the side of the console using a Phillips #1 screwdriver with a counter-clockwise motion.
These are 3.0mm screws, not 5.0mm. This step could probably be condensed into the previous step.
These screws are not present on the US model
Yes, my US model doesn't have it either
-
-
-
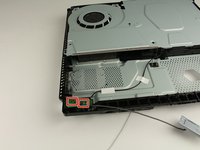
Locate the white wire connected to the corner of the top of the motherboard.
-
Disconnect the wire by firmly grasping the metal connection with your fingers or tweezers and pulling up until it detaches.
-
Unthread the wire from the tape and move it off to the side using tweezers or your fingers.
-
-
-
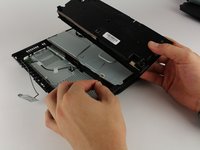
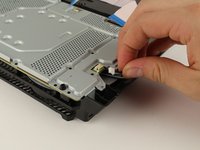
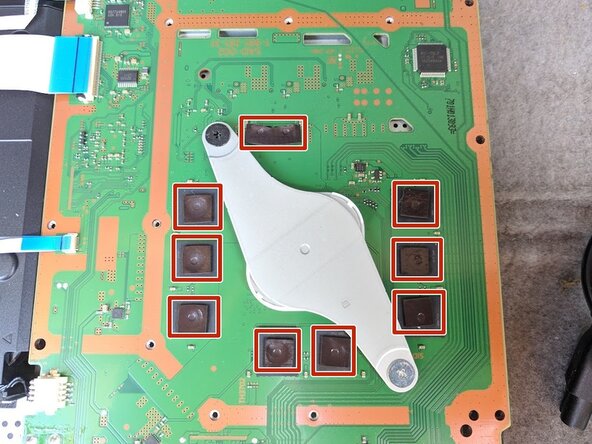
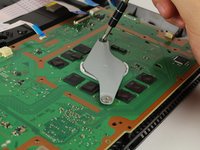
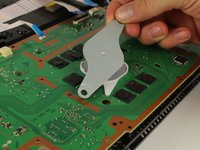
Remove the metal plate by grabbing two sides of the plate and lifting up and away from yourself.
This step would benefit from showing a picture of the black pads in question. Pic: http://i.imgur.com/zQnehtA.png
The US model has two black screws under the HDD
-
-
-
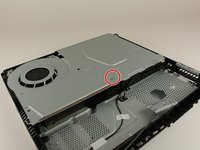
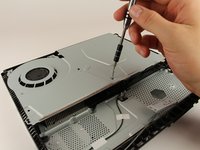
Unscrew and remove the two 10.0mm screws (one silver and one black) using a Phillips #1 screwdriver with a counter-clockwise motion.
-
Remove the small metal plate by grabbing it with your fingers and lifting up.
Why is one silver and one black? I keep thinking they are different and try to keep track of where they go.
What's the name is the part with the two metal screws that is being taken off
both screws are black on the US version
-
-
-
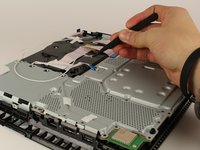
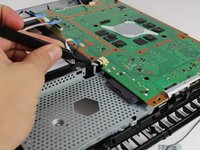
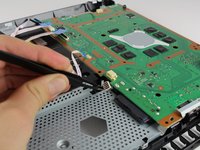
Remove this wire connection by firmly grasping it with tweezers and pulling out.
Do not attempt to disconnect the plug by pulling on the wires! If you rip out the wires, you’re gonna have a very bad day. Wiggle the plug using the plastic on the male end of the connector while pulling out.
que pasa si se desolda esa parte como puedo volver a soldarlo o cuanto se cobra por solo soldar
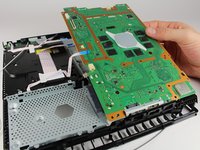
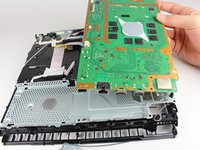
this is plugged in WAY too hard. I've been wiggling it for 5 minutes. Not budging an inch. i learned that if you follow the cables of that, they are just held in place by a few plastic hooks. You can slide them out of there by flipping the ps4 over and then pull the motherboard out no problem, cable still attached.
Also, dont forget about the small plug in at the top of the motherboard. That is the fan power cable and needs to be off to remove the mobo as well.
I broke the cable by accident, where can i find a replacement?
You only need to unplug this cable from one end. You can just fish the cable through the hole, then you can separate the motherboard from the console. There are small plastic guides holding this cable in place; these guides are pretty fragile but it's not a big deal if you accidentally bend or break them.
There is a safer way to unplug this cable from the motherboard. If you look closely, there are two small slits on the back of the connector. If you look very closely, there is a tiny hole inside each slit. If you can find something small enough to fit in that hole, you can push the connector out from behind. It takes some force, but it's less risky than pulling directly on the wires.
(This advice might not apply to all motherboard revisions)
-
To reassemble your device, follow these instructions in reverse order.
To reassemble your device, follow these instructions in reverse order.
Annuleren: ik heb deze handleiding niet afgemaakt.
74 andere personen hebben deze handleiding voltooid.
13 opmerkingen
Hi Harry
I think this guide is fantastic. My PS4 slim is not coming on. It’s not the HDMI display port or anything of the sort. It powers on, you hear the beep and the blue power light stays on. That’s all. Nothing after this… no signal to the TV, cannot reinitialise, nothing. I’ve checked online to see if I can diagnose it. Based on the few signs I’ve seen I think the board is gone. So am looking to replace that hence I came across your guide. Is there a way you know to be certain my board is faulty. Thanks
hi, i have the same issue, did you ever find the cause? best wishes. jc
I have a PS4 slim issue…. when connected to power it doesn't show it’s on and no light displays….. I would say the board is faulty and how do I work on such problem.
do you need to change the optical drive as well?
my ps4 slim power supply ok no power motherboard
We don't need thermal paste, or to replace the optical drive?
My PS4 Slim Output has a-lot of static interference and idk y
Thanks for the amazing guide. I need to replace my motherboard. How do i know what model replacement should i be looking for?
Good evening I wonder if A ps4 islim matherboard SAE-002 if you give to exchange for A SAE-001 thank you
So i was changing the disc drive on my ps4 slim but i accidently broke the wires to the cable when i tried pulling it out (step 20). Where can i find a replacement for this specific cable by chance?
Yeong tell that this first step is remove the HDD, where because this firts step really is remove the case! Where is the HDD?












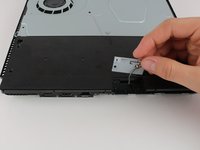


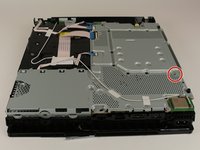
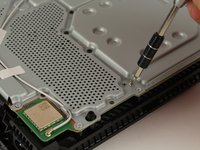


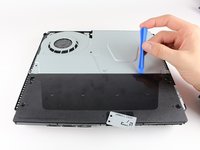


















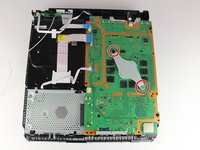


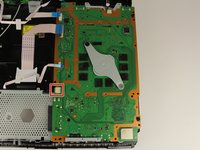


Remove the screw directly to the left of that one in the picture as well. Should be silver.
Elizabeth Johnson - Antwoord
ihr seid so ein scheiß haufen das stimmt über haubt nix
Toaster 95 - Antwoord
einfach alles stimmt nicht
Toaster 95 - Antwoord
Quitar la pegatina anula la garantía en España al menos
Ana y Francisco - Antwoord
So becore you start on this guide if you read the comments at the last step, this guide is geared more towards repairing of the disc drive not replacing the entire optical disc drive, i have done mine already and the guide does help get you halfway there but you are gunna need a bit more to pull the entire disc drive out, i will post another comment on the last step so you can follow these steps and then mine to further reference from that point on. See ya on the last step of the guide 🤘
Walter Gamboa - Antwoord