Inleiding
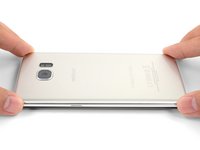
Not sure what to do with all the adhesive strips in your fix kit? You’ve come to the right place! This guide shows how to use the adhesives in your kit for Samsung phones with glass backs (S7 and newer). It also includes instructions on how to transfer and install various back cover components, such as the rear bezel and fingerprint sensor.
You may not need to use all the adhesive strips included in the kit. If you are transferring the fingerprint sensor, you may need some double-sided tape such as Tesa tape.
For a list of adhesive strips for the Galaxy S phone, follow this link.
When applying adhesive strips like these, here are some general tips:
- Generally, adhesives strips have a colored side and a non-colored (paper or clear plastic) side. The non-colored side determines which surface the strip should be applied to first.
- To make adhesive application easier, you can align an unexposed strip to its intended position on the phone, then tape one edge down to hold the strip in place. This will allow you to peel away the plastic liners and expose the adhesive without losing alignment.
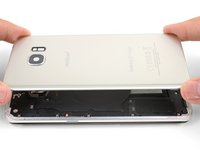
Wat je nodig hebt
-
-
To install the battery adhesive, follow this guide.
-
To transfer and install the fingerprint sensor and gasket, start with the next step.
-
To transfer and install the rear bezel, skip to step 5.
-
To install the back cover support adhesive, skip to step 9.
-
To install the back cover perimeter adhesive, skip to step 13.
-
-
-
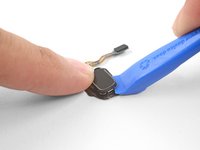
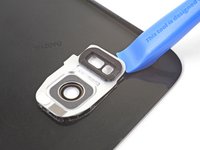
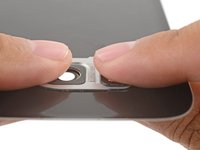
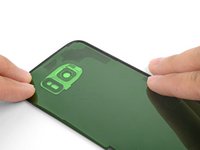
Heat an iOpener and apply it to the fingerprint sensor for one minute.
-
Use an opening tool to gently pry the fingerprint sensor at the lower seam, where it contacts the back cover.
-
Do not pry at the upper seam, which is the fingerprint gasket seam.
-
-
-
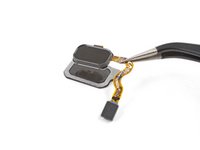
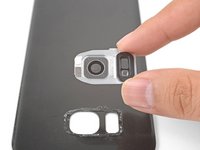
Use an opening tool to pry the fingerprint sensor off of the gasket.
-
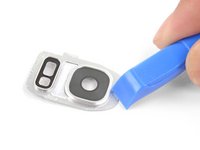
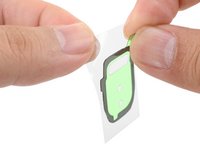
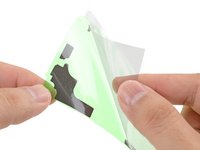
Remove the colored plastic liner on the replacement gasket to expose the adhesive.
-
Carefully align and lay the fingerprint sensor onto the sticky side of the gasket.
-
Once aligned, press down firmly with your finger to bond the adhesive.
-
-
Gereedschap gebruikt in deze stap:Tesa 61395 Tape$5.99
-
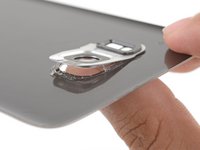
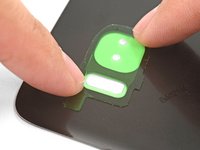
To affix the fingerprint sensor to the new back cover, use a custom cut adhesive, or line the perimeter of the sensor with double-sided tape such as Tesa tape.
-
Align the fingerprint sensor in the back cover cutout and press down firmly with your finger to bond the adhesive.
-
-
-
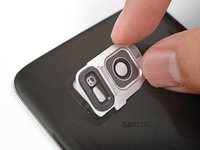
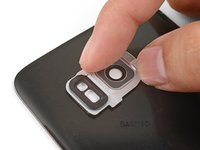
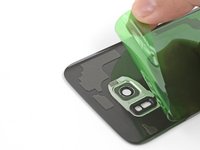
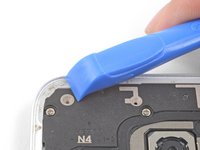
Heat an iOpener and apply it to the rear bezel for a minute.
-
Starting from the outward-facing side of the back cover, push the bezel inwards with a finger to loosen the bezel from its cutout.
-
Alternatively, you can pry around the bezel with an opening tool to loosen it from the back cover.
-
-
-
-
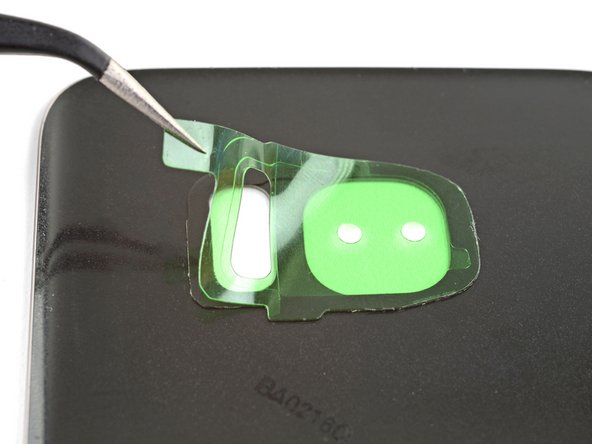
Figure out how the support strip aligns with the surfaces by matching the adhesive strip's contours with the adhesive residue and the phone frame.
-
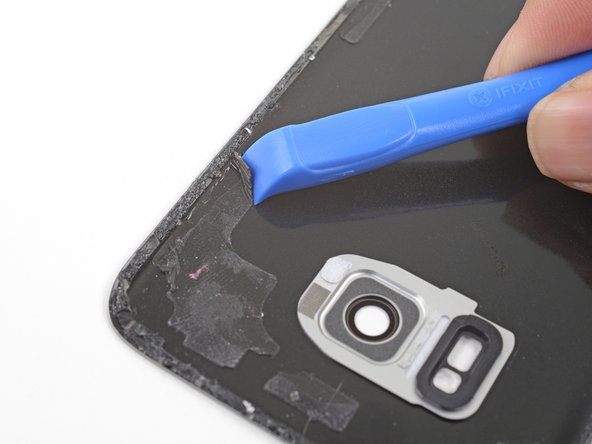
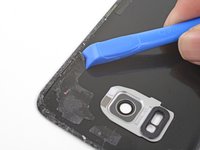
Use an opening tool and high concentration isopropyl alcohol to remove all adhesive residue from the phone frame.
-
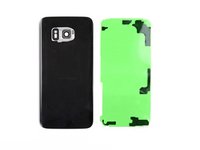
If you're re-using the back cover, remove all adhesive residue from the back cover.
For my Galaxy S7, it appeared to me there were some minor placement inconsistencies (a millimeter or two) where the Back Cover Support adhesive pads (support strips) were on the backing sheet versus the actual phone. Difficult to know for sure since it is hard to tell where the original pads were after the back cover is pried off. I removed the clear backing to expose the strips and blocks, but placed the clear backing covering 80% of the phone as I transferred one portion of the unconnected adhesive strips at a time where they best appeared to be needed. This falls in the category of tweaking.
The adhesive sheet for the back cover was 100% accurate.
You should be very careful with isopropyl alcohol when removing the glue from the NFC antenna part. I did this on my Galaxy S9 and because the glue is very strong i put on a lot of IPA, and unfortunately it also dissolved the coating that is on top of the NFC antenna or whatever that trace is. So be careful to only get the IPA on the hard plastic and not on this trace with what looks like it's a black sticker on it or any other parts really.
-
-
-
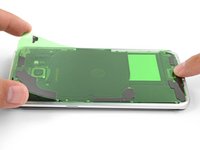
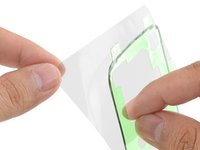
Peel the clear liner off of the support adhesive strip to expose the adhesive.
-
Carefully lay the strip sticky side up on top of the phone frame, being careful not to touch the sticky surface.
-
Align the adhesive strip on the phone frame so that the adhesive contours matches the frame's.
-
If you have two small support strips, repeat the process for both strips.
This process of putting the colored plastic with adhesive onto the phone and then sandwiching the back panel on top seemed counter-intuitive so I decided to remove the colored plastic and place the adhesive + clear plastic onto the back of the phone’s guts.
DON’T BE ME!
Follow the instructions and save yourself close to an hour of hassle. The adhesive loves the colored plastic way more than the clear.
It actually worked!!!
-
-
-
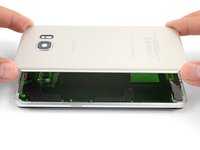
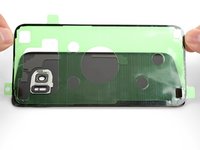
Carefully lower the back cover onto the exposed support strips. This ensures that the adhesive is transferred onto the back cover in its proper position.
I found it easier to lower the back cover onto the support strips using a suction cup. I felt like this gave me more control over placement and my fingers didn't get in the way on the edges.
-
-
-
Use an opening tool and high concentration isopropyl alcohol to remove all adhesive residue from the phone frame.
-
If you're re-using the back cover, remove all adhesive residue from the back cover.
Scrape and peel the adhesive, using goo gone only after systematically scraping the adhesive as much as possible. The goo gone should only be used to clean up residue once manual scraping has been completed, otherwise the adhesive will become tacky and only scrape off in microscopic layers at a time, which takes forever to remove.
-
-
-
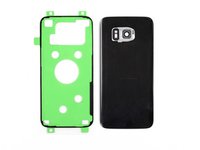
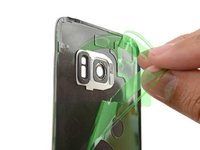
Peel away the clear liner from the perimeter adhesive strip to expose the adhesive.
-
Hold the strip by its tabs and carefully line up a long edge of the adhesive to the edge of the back cover.
-
Set the adhesive onto the back cover and press it onto the cover with your fingers.
-
Peel away the colored liner from the perimeter adhesive strip to expose the adhesive.
(Galaxy S7 kit): I peeled away the clear liner (Step 1), aligned it to the cover edge (Step 2) and pressed it down (Step 3).
When I peeled off the tabbed "coloured" liner (Step 4), it turned out to be two layers: a clear, tabbed one that came away and a green one consisting of a central part and a thin, outer strip that still covered the adhesive.
This thin strip had been partially lifted by the removal of the clear tabbed layer, so I started to remove it all. As I slowly and carefully pulled it, it tried to lift the adhesive strip itself off the cover so I held that down with the tweezer points. That still left the main green part in the centre of the case, but that was easily removed.
However, when I turned the back cover over I saw that where the adhesive strip had lifted slightly it had detached some of the cover's coloured film, leaving it buckled and a bit of a mess.
When I tried to pull away the cover strip, the adhesive stuck to it. I also have no idea why the clear liner and green liner are attached to each other.
The pictures don’t match what is received for the Galaxy S8+. It’s also not clear where to attach the perimeter adhesive. On the lip of the back cover or just inside the well area. In addition, after exposing the adhesive (after removing the clear side), no matter how weel you pre-align the position, you can’t count on the adhesive to stick to whichever method questioned above, without some of it not releasing cleanly from the colored backing. Yes. firm pressure was applied before moving a little further down. At times the adhesive stuck so strongly to the colored backing, it stretched the adhesive out of shape.
I have repaired hundreds of laptops and all in ones, so I understand there are subtleties in a repair, and I found it quite confusing replacing the battery and fingerprint sensor and other necessary parts related to doing that repair with the either inaccurate, outdated, or lack of detail provided (but much needed) in this guide.
If you're like most people and the original back glass (S8) cracked upon removal, and you've ordered and received a plastic replacement from iFixit, remove the adhesive that comes on the replacement plastic back panel, and use the adhesive in this kit. The back panel adhesive in this kit is THICC and seems like it would create a much better seal than what comes preinstalled on the replacement back panel.
-
-
-
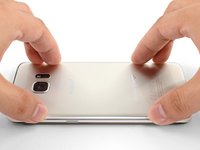
To seal the phone, align and set the back cover onto the phone frame.
-
Apply pressure to the phone perimeter with your fingers.
-
Place some books on top of the back cover for half an hour to help the adhesive bond.
I kind of wonder if any of the adhesive is even necessary, depending on what kind of case you have. My case slides over the phone and holds everything in place very securely. Considering that I'll have to replace the battery again at some point, I'm not looking forward to dealing with the adhesive again.
-


Annuleren: ik heb deze handleiding niet afgemaakt.
135 andere personen hebben deze handleiding voltooid.


16 opmerkingen
The flex cable for the fingerprint sensor is so short and delicate that it’s fiendishly difficult to locate and snap in. You only have a very narrow gap between the back cover and the phone, it wants to jump out of position if you misalign at all, and you can’t reach under there with normal size fingers. Not only that, it’s done with the rear cover adhesive in place so if that touches, it sticks.
I got it snapped on, and the flex cable broke at the same moment. So, no fingerprint sensor for me. Also, the new back cover arrived broken. If it was usable, the way to do it IMHO is to attach the flex cable first, then push the fingerprint sensor assembly on to the new back cover adhesive (it goes on from behind), then close the back cover.
Hey William,
If you bought the back cover from iFixit, please contact our support team here and we will get a replacement sorted out for you!
P.S. I got the battery and cover because the old cover was warped and separated, figured may as well replace the battery in a 2-year-old phone. Turns out, the battery was swollen and huge and it had pushed the back cover open. Not a good situation. So if your back cover is coming off, suspect that battery.
P.P.S. The fingerprint sensor flex cable connector probably could be manipulated into position with the tweezers from the tool kit and pressed down into place with the plastic screwdriver thingy, Just hover the back cover over it with your third hand (or a helper).
Will the phone still be water-resistant after this repair?
Hi Shai,
The phone won’t be as water resistant compared to when it is brand new. However, this is true even if you didn’t repair the phone—adhesive seals break down and lose water resistance over time.
There are also WATERPROOF phone covers you can buy. Why just settle for water resistant GLUE?
Ben -
Do you have custom-cut adhesive strips for Samsung galaxy s9+? Can’t find it in store.
Hi Michael,
We are currently in the process of sourcing the adhesive. Please check back in the future!
where i can buy the adhesive
It’s a little confusing going through the battery removal for the Samsung S10+ and then being sent to the Samsung S10 installation process instead of the Samsung S10+ install. Although moderately intuitive, it would be nice to have a specific article for a specific phone that identifies the actual process with the physical parts involved since The S10 and the S10+ are not the same back covers and the same parts involved.
Additionally, the inner wireless connector plate NEEDS to be connected to validate a connection otherwise the battery will not power the phone. This is a Requirement on the S10+.
I need to do the front gasket...is there an article for the front, I'm replacing my screen. Also, my child lost the earpiece mesh, is there something else I can use? Thanks
I got the S9 battery kit and all of the precut adhesive pieces had been cut backwards. The stiff green/blue plastic was on the wrong side. I had to remove the adhesive pieces entirely and try to use the clear plastic backing as the transfer agent instead of the stiffer, cut plastic pieces. I eventually did get it installed but it took a lot longer than planned.
Galaxy S7: I found the descriptions a bit confusing (for the different devices), but I got it right. I hope it holds now! :-)
The tip about the alcohol and the charging coil and that the alcohol is NOT compatible with the soft plastic parts is extremely important! In my case, some of it dissolved too, so I hope the phone wasn't damaged. Be sure to add it!