
Google Pixel 2 XL Battery Replacement

Inleiding
Ga naar stap 1This repair guide was authored by the iFixit staff and hasn’t been endorsed by Google. Learn more about our repair guides here.
Use this guide to replace the worn-out battery in your Google Pixel 2 XL.
Before disassembling your phone, discharge the battery below 25%. A charged lithium-ion battery can catch fire and/or explode if accidentally punctured.
If your battery is swollen, take appropriate precautions. Do not heat your phone. If needed, you can use a dropper or syringe to inject isopropyl alcohol (90+%) around the edges of the back cover to weaken the adhesive. Swollen batteries can be very dangerous, so wear eye protection and exercise due caution, or take it to a professional if you’re not sure how to proceed.
Wat je nodig hebt
Reparatieset
Deze set bevat alle onderdelen en tools om deze handleiding te voltooien.

Onderdelen

Gereedschap


Toon meer…
-
-
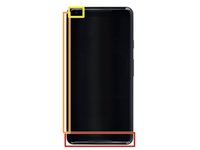
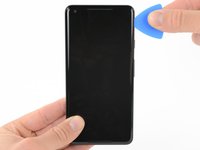
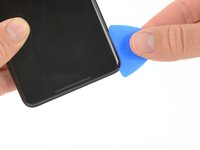
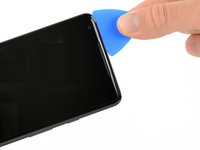
Apply a suction cup as close to the SIM slot edge of the phone as you can while avoiding the curved edge.
-
-
-
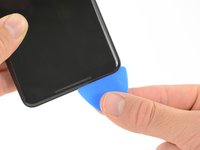
Do not insert the pick more than 0.25 inches (6 mm) into the bottom edge of the phone. If the pick contacts the folded portion of the OLED panel, it can damage the display.
-
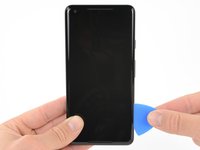
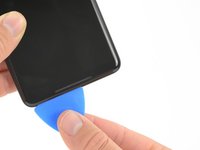
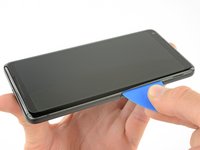
Do not cut along the left edge; there are delicate display cables that can be damaged.
-
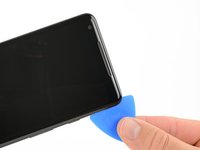
Only make very shallow cuts in the upper left corner; prying deeply can damage the front-facing camera.
-
-
-
Gereedschap gebruikt in deze stap:Magnetic Project Mat$19.95
-
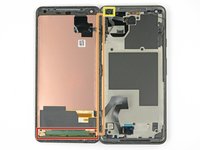
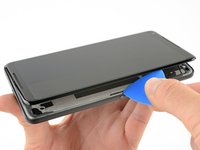
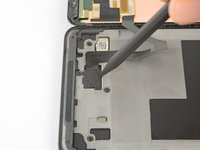
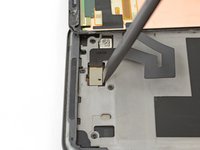
Remove eleven 3.8 mm Phillips screws securing the midframe.
-
-
-
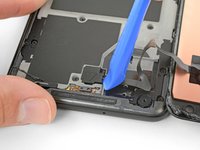
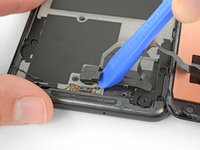
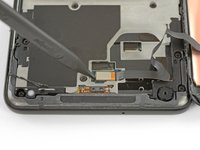
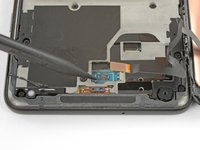
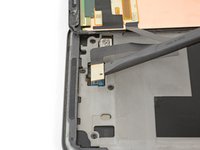
Use the flat end of a spudger to disconnect the battery connector.
-
-
-
If available, apply some isopropyl alcohol under each corner of the battery and allow it to penetrate for several minutes to help weaken the adhesive.
-
Alternatively, apply a heated iOpener to the back of the phone over the battery for at least two minutes. Reheat and reapply the iOpener as needed until the battery adhesive is sufficiently weakened.
-
-
Gereedschap gebruikt in deze stap:Plastic Cards$2.99
-
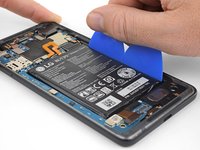
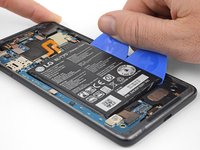
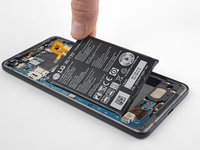
Insert a couple of opening picks or a plastic card along the right edge of the battery.
-
Apply steady, even pressure to slowly lever the battery up and out of the phone.
-
-
Gereedschap gebruikt in deze stap:Tweezers$4.99
-
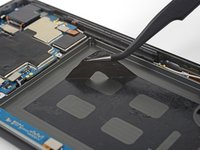
Remove the battery.
-
Use tweezers to peel away any remaining adhesive from the phone, and clean the glued areas with isopropyl alcohol and a lint-free cloth.
-
Secure the new battery with pre-cut adhesive or double-sided adhesive tape. In order to position it correctly, apply the new adhesive into the phone, not directly onto the battery. The adhesive should not touch any of the cables under the battery.
-
Press the battery firmly into place for 20-30 seconds.
-


To reassemble your device, follow the above steps in reverse order.
For optimal performance, after completing this guide, calibrate your newly installed battery.
Take your e-waste to an R2 or e-Stewards certified recycler.
Repair didn’t go as planned? Check out our Answers community for troubleshooting help.
Annuleren: ik heb deze handleiding niet afgemaakt.
61 andere personen hebben deze handleiding voltooid.

21 opmerkingen
Just completed this last night. They weren't kidding when they all say the battery is no fun.
I managed to get it, but doesn't mean the old one wasn't bent like crazy when I was done. I was planning on keeping it as a backup since it wasn't bad, but I don't think I would risk it at this rate. Getting a thin stiff plastic to push through the adhesive along with the spudger helped.
There are a lot of components and boards along the edge of the battery. It's hard to pry without touching them. I saw a guide recommend taking the guts out to remove the battery.
One thing I would recommend while you're in there is to replace the thermal paste. Mine wasn't too bad after a year, but I'm sure it won't make a solid and effective cover on the processor to the heat pipe.
Can I just use Artic silver MX4 for thermal paste? Or is there a paste specifically for it?
DheerajR -
Arctic Silver should be fine!
Its pretty easy to do if you use the iPhone battery tool/pryer thing!
Never again, a nightmare to get it changed out.