
Samsung Galaxy S6 Active Battery Replacement
Inleiding
Ga naar stap 1Use this guide to remove the battery from your phone and then replace it with another new battery.
Wat je nodig hebt


-
-
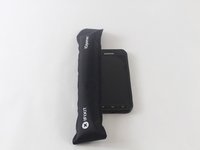
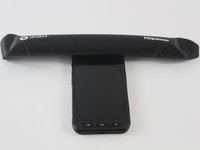
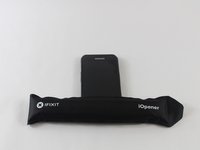
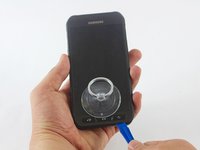
Insert your fingernail or a plastic opening tool into the pivot on the side of the SIM tray.
-
Pry open the tray to get it out of the socket.
-
-
-
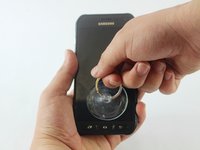
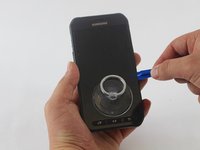
Heat the front face (sides, top, bottom) of the phone with the iOpener, a hair dryer, or a heat gun for 60 seconds to loosen the adhesive around the edge of the glass.
Heat the phone in the microwave??? I really hope you meant to say heat the iopener tool in the microwave.
-
-
-
-
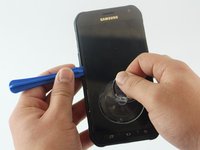
Once you’ve opened a large enough gap, insert a plastic tool at the bottom, between the glass and the rest of frame of the phone.
-
Slide the plastic opening tool around the screen, prying the display gently away from the body
My phone had a substantial amount of adhesive between the copper area on the back of the display assembly (see pic in step 10) and the frame (see pic in step 13). There was no way to have known that as I started to remove the glass, but this made it difficult to lift the glass up and eventually led to the glass cracking as I tried to work the plastic opening tool up along the side of the phone (about in the spot shown in the second picture of this step). In hindsight, I think it would have been extremely difficult to remove the front glass undamaged without first starting to separatie that adhesive from the frame, but I’m not sure what would have been the best way to do that. My guess is I would have needed to slide a tool with a thinner/sharper edge upward from the bottom while pulling on the suction cup to start separating the back of the display assembly from the frame, and worked on both that and the edges of the glass at the same time.
-
-
-
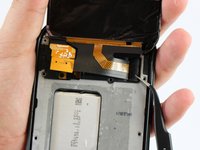
Undo the screen connection with a plastic tool.
If possible, disconnect the battery BEFORE you undo the screen connector. The battery flex is on the left, just under the LCD cable assembly.
-
-
-
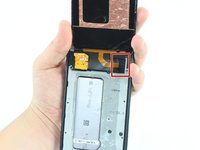
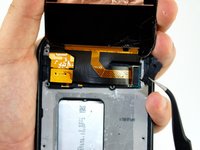
Remove the display assembly (LCD and Digitizer).
All that copper/tin foil, whatever it is, stayed glued to the case and tore off the screen. I hope it isn’t important. What is it for anyways?
Good Question. Mine ripped a little bit 2.
Probably heat displacement, you’ll find them on the back of most Samsung OEM LCD assemblies & high quality replacements. It’s probably not a big deal if you tear it, after all where’s the heat supposed to go from there? Pat yourself on the back for getting the LCD & glass up in one piece, don’t be surprised if nobody else shares your enthusiasm.
-
-
-
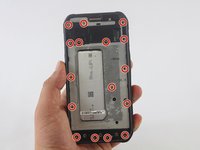
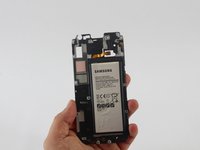
Use the Phillips Head Screwdriver sized PH000 to remove the sixteen 4mm screws from the frame.
PH00 size screwdriver fit the screw heads better on my phone.
Missing intermediate step: the screw just above the battery holds a little plastic cover that hides the battery connector. Take the cover out and carefully disconnect the battery using the tweezers.
-
-
-
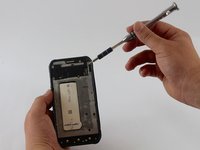
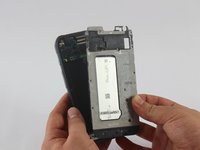
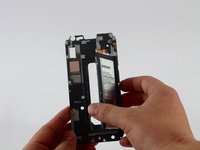
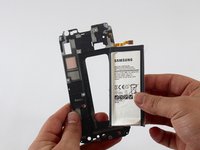
Insert a plastic opening tool on the side of the frame and pull out the battery.
The battery was glued quite well on mine, I had to slowly go around the whole edge about 3 times. Exercise care at this operation, especially if the old battery is swollen.
-


To reassemble your device, follow these instructions in reverse order.
After completing this guide, calibrate your newly-installed battery.
To reassemble your device, follow these instructions in reverse order.
After completing this guide, calibrate your newly-installed battery.
Annuleren: ik heb deze handleiding niet afgemaakt.
42 andere personen hebben deze handleiding voltooid.
Team

USF Tampa, Team 1-5, Sullivan Spring 2017 Lid van USF Tampa, Team 1-5, Sullivan Spring 2017
USFT-SULLIVAN-S17S1G5
3 Leden
25 handleidingen geschreven
20 opmerkingen
thank you for the information on how to dissemble this device Samsung Galaxy S6 Active
You can perform a forced reboot manually. Simultaneously hold down the volume down button and the power button for 10-20 seconds. This will reboot your phone without losing anything.
Looks like the difficult part is the removal of the LCD assembly. What type of adhesive can be used on the LCD screen to glue back on phone?
Never &&^&^$^ answer…
Very good information
Thank
HARD RESET: Press the Power button and the Down Volume for 20 Seconds.
This simulates taking the battery out and back in.
I do want to mention that the OLED screen is VERY fragile and you really shouldn’t attempt this without ordering a new screen. I work at a repair shop and we’ve refused people at the door because the repair is near impossible. The OLED is almost designed to break when you pull the assembly apart.
Any way you can show how to put it back together, specially the part were heat is applied?
Slide in a playing card to loosen the adhesive. If its warm enough it will easily slide off. Shouldn’t take experienced professionals more than an hour or so. Reapply a light layer of b700 and clamp.
Wait so how would you reattach the front screen if the adhesive is gone? I’m making sure beforehand because my S6 Active is having a lot of battery problems (I knew I should’ve bought an iPhone) but I want to be 100% sure before I perform the repair. How do you reattach the front screen?
you will need to purchase replacement adhesive. I also wouldn’t recommend opening the device unless you have lots of experience. the AMOLED display is incredibly fragile and will break 9 times out of 10 when opening the phone.
Shraeder -
Great guide. I changed the battery with no problem at all thanks to it. Thank you very much.
Followed you instructions to the tee. Very pleased with how easy it really is. Just a little patience with the light tug, and it lifted up enough to place the slider and slowly pry it apart. I was able to save the inner sheet. I paid $15 on Amazon for a battery and replacement tool kit. Took me about 15 minutes to replace. Phone company wanted $45 for battery and another $65 to replace. Gotta say.. thanks a bunch for saving me $$.
There wasn’t any comment on the gold foil stuff on the back of the display… mine didn’t want to come off with it. What do I do in that situation?
Looks a little complicated…how do you put it back together? I have one and my battery bad so I have to do this and replace the battery?..How?
i changed the battery thanx to this tutorial. But still my phone shut down as soon as i unplugged it from the charger. The battery goes down from 100% to 0% :-( Is the new battery not working? or something else ?
Success! Due to poor battery capacity. I ordered the $15 HDCKU repair kit from Amazon, then I started reading. The repair process scared me about breaking the screen but I pushed on being extremely careful. Since the battery was swollen half the work of removing the screen was half done since one side was pushed out. This website was an invaluable guide. I also watched a couple of videos. The only thing that was a real problem was getting that ultra tiny battery connector to snap in and stay. I probably spent 10 minutes on that one item. Total time was about 30 minutes beginning to end. The battery started out at 53%. I exactly followed the calibration routine. My wife is very happy now that her phone is back in business with full battery capacity. I dread the day when I have to replace the battery in my Galaxy S10.
Sucessfully followed your instructions to replace battery in my s6 active. Notes: I had to heat with hairdryer about 8 times to get glue to soften enough to lift. The thin metal skin on the back of the screen (the digitizer??) also did not lift with the screen and ripped in one corner. I carefully proceeded as instructed regardless. Also, after snapping the battery frame and back of phone frame apart, the battery frame did not want to remove, had to pry pretty hard to get it to come out, which made me feel I was potentially damaging or disconnecting something else. The battery is also glued in, so has to be lifted/peeled off as well. Regardless, your photos allowed me to confidently proceed and successfully put new battery in. Screen is working, phone is on wireless charger now to see if my repair was successful. Thanks for the instructional!