
Motorola Droid Turbo 2 Midframe Replacement

Inleiding
Ga naar stap 1Follow this guide to remove the midframe of the Droid Turbo 2.
Wat je nodig hebt


-
-
Insert a SIM eject tool, SIM eject bit, or a straightened paperclip into the small hole in the SIM card tray.
-
Press to eject the tray.
-
Remove the SIM card tray assembly from the phone.
-
-
-
Heat an iOpener and apply it to the top edge of the phone for a minute.
After you heat the Iopener, lay the shiny side on the phone. With all the warnings of how hot it could get, I handled it with oven mitts. It wasn’t until I struggled for some time trying to get the back of that I grabbed the Iopener with my bare hand and found the the shiny side was still hot, but the textured side was quite cool. Apparently it has some insulating properties.
-
-
-
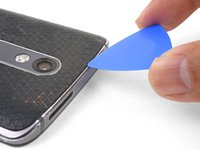
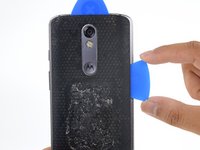
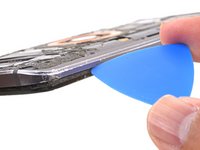
Angle an opening pick and firmly press so that it slips under the back cover.
Use a heat gun to loosen adhesive prior top using spudger
-
-
-
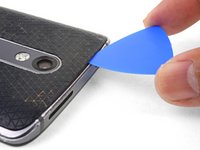
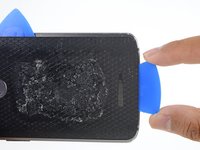
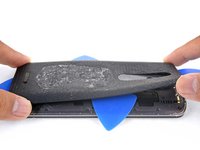
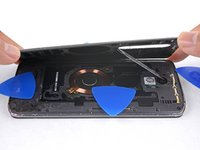
Slide the opening pick along the top edge of the phone to break up the adhesive.
-
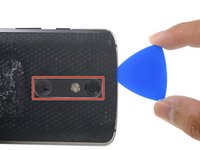
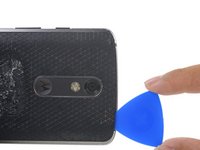
Use the pick to release the deeper areas but avoid slicing through the camera bezel area.
It took me over an hour to pry the back cover off the phone. Don't give up – it can be done! It takes some time, heat, and persistence to wedge the blue picks under the back. And not knowing what is under there can cause stress! Bottom line - don't be afraid to apply pressure to the pick to break the seal between the back and the metal edge, and then you can slide the pick in under the back cover without breaking any electronics. I did not notice the blue plastic prying tool until after I wrestled the back off – I think that would have helped with the final peeling off stage.
-
-
-
-
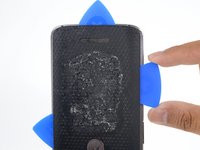
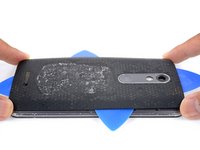
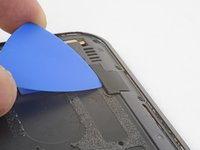
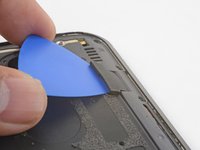
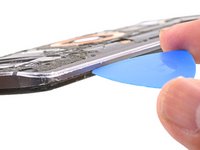
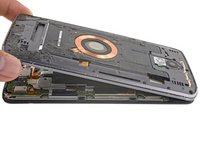
Once you have cut through the adhesive, slowly peel the back cover away from the frame.
-
Remove the back cover.
Getting this back cover off with 4 little picks is nothing less than Fake News. The picks (and a halberd spudger) were good for cutting through adhesive on the outer edges, but a fair amount of heat and several plastic “playing cards” were needed to get to the adhesive holding down the cover on the middle of the device. Be VERY CAREFUL as you near the charging coil…2 little connectors near the bottom right could be easily severed. Take your time, use heat and patience.
-
-
-
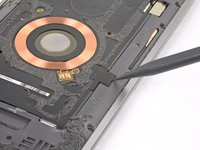
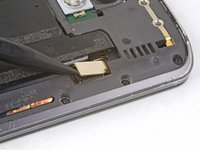
Insert an opening pick under the flash connector rubber cover and pry forward to remove it.
The two plastic covers do not fit snugly in place, so after putting them back in place, use small bits of electrical tape to secure them before installing a new adhesive back cover. I tested my phone thoroughly before the last step, so that I would not have to buy a new cover if something didn't work.
-
-
-
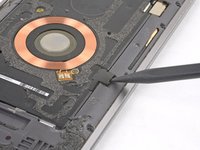
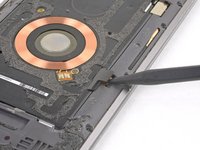
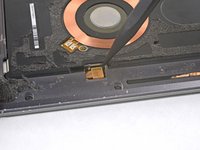
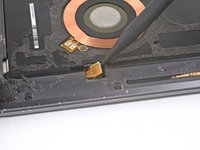
Use the point of a spudger to pry up and remove the coil connector rubber cover.
-
To reinstall the cover, align the cover and use your finger to push it forward into place.
Careful! The cover popped off and flew 8 feet! (Over 2 meters!)
Absolutely true. Mine popped off and shot across the room. I was lucky to be able to find it.
-
-
-
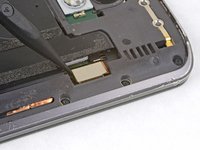
Remove the following T3 screws securing the midframe:
-
Thirteen 3.1 mm black screws
-
Four 4.3 mm silver screws
My phone (purchased 12/2015) has only 2 silver screws top and bottom (4 total), and they're also T3, not Philips.
With a Torx screw this tiny, it pays to take time to make sure that the driver is well seated before turning it. This will eliminate stripped screws. Also, I loosened each screw first, and then removed them. Breaking them free before turning them also helps prevent stripping.
eitherway its a T4 torx in my phone. Double checked my bit. T-4 same for all these screws
T4 in mine as well. Stripped out a T3 bit figuring this out.
They were all T3’s in the one I am repairing. Must be different depending on where it is manufactured.
I recommend placing your phone down on a flat surface and then you can put good pressure straight down to remove the screws.
One of the small screws was stripped. I used a 1/8” drill to eliminate the head - very . The mid-plane came off, and I finished removing the screw with a small pair of needle-nose pliers.
the phone I opened used a T4 bit as well
At first I thought my toolkit only came with a T5, which was too large. Then I found the T3 bit in a ziplock back with an alcohol swab. It worked, but it had some slack, so my screws may have been T4, but I didn’t have that option.
The device I’m fixing now is T4. Stripped 2 heads and had to drill them out. Wish this walkthrough had a note that some are different so I would have double checked before I stripped them out.
Hi Matt,
Thanks for your feedback! So many people are having an issue with this—I’ve added a note to the step as you suggested.
-
-
-
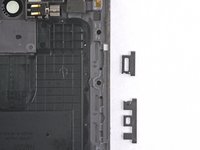
Remove the midframe from the phone.
The buttons will NOT "fall in" when reassembling, so it's important to remember to put them back. I found that putting them in the frame before replacing it is the only way. Check to see how they fit on the phone first, then drop them into their slots outside-in. The power button will fit only one way; the volume buttons should go in oriented as they fit best on the phone. Be sure to test them to make sure they click freely often! It's easier to readjust them before all those screws are back in.
I have not done this yet but, try using a small bit of electrical tape to secure them to the mid-frame before removal
Yes, a small strip of tape on the mid frame to hold the buttons in place works great. Thanks for the idea. I simply put a piece over the buttons and onto the whole frame, then cut it carefully along the edge between the glass an mid frame when I separated the two piece. This held the buttons nicely in place and ready for reinstalling.
Be careful putting the mid-plane back on. The volume control innards were bent and straightening it back out took a lot of time - on phone #2.
My contact wires got bent the first time I took a phone apart. I am pretty sure I bent them when I was prying the phone open (not while I was putting back together). Now I'm extra careful prying the phone open on the volume button side and it hasn't happened again.
Beth -
It sounds like people like the tape idea and it’s a helpful step, so I’ve added it into the guide step. Thanks for the comments!
I tried taping the side buttons on but they slipped out anyway. Observe the photo to replace them in the proper orientation. It’s actually quite easy, and I’m not certain how effective taping them would ultimately be as it’s important to seat the slots over the tabs inside the body. You need to be an extraordinary taper to stick them in place such that they “presto!” drop in place when reinstalling the mainframe
I found that it helped a lot to put a screw in around the down volume button, when reassembling, to prevent the buttons from falling out. That is after you had popped the mid frame and the phone together. I also agree with using the electrical tape to prevent the buttons from falling out.
-


To reassemble your device, follow these instructions in reverse order.
Take your e-waste to an R2 or e-Stewards certified recycler.
Repair didn’t go as planned? Check out our Motorola Moto Droid Turbo 2 Answers community for troubleshooting help.
To reassemble your device, follow these instructions in reverse order.
Take your e-waste to an R2 or e-Stewards certified recycler.
Repair didn’t go as planned? Check out our Motorola Moto Droid Turbo 2 Answers community for troubleshooting help.
Annuleren: ik heb deze handleiding niet afgemaakt.
4 andere personen hebben deze handleiding voltooid.


3 opmerkingen
Other than the comments I left above, I felt this was a nice simple-to-follow guide that gives me confidence to try this myself.
If you fix the items listed above, it will be perfect.
Thanks!
Where can I buy a good T3 screwdriver?
I have tried 3 brands and the screwdriver rounds off instead of removing the screw.