Ga door naar hoofdinhoud
Lenovo IdeaPad 3-15IML05 USB Board Replacement

Lenovo IdeaPad 3-15IML05 USB Board Replacement

Ryan Muscadin

Ryan Muscadin en een andere bijdrager

Voor het laatst geüpdatet op December 30, 2024

30 - 45 minuten
Gemiddeld
Heeft betere plaatjes nodig
Actiemomenten
Behoeft meer afbeeldingen
Betere introductie

This guide will walk you through replacing the USB board in your Lenovo IdeaPad 3-15IML05. This repair is useful if your USB ports are malfunctioning or damaged, restoring your ability to connect peripherals such as flash drives or external hard drives.

Before you begin this repair, make sure your device is turned off and disconnected from the power adapter.

Wat je nodig hebt

Onderdelen

Gereedschap

Toon meer…

  1. Lenovo IdeaPad 3-15IML05 USB Board Replacement, Bottom Cover: stap 1, afbeelding 1 van 2 Lenovo IdeaPad 3-15IML05 USB Board Replacement, Bottom Cover: stap 1, afbeelding 2 van 2
    • Use a Phillips #1 screw driver to remove:

    • Six 5.0 mm screws

    • Four 3.0 mm screws

  2. Lenovo IdeaPad 3-15IML05 USB Board Replacement: stap 2, afbeelding 1 van 3 Lenovo IdeaPad 3-15IML05 USB Board Replacement: stap 2, afbeelding 2 van 3 Lenovo IdeaPad 3-15IML05 USB Board Replacement: stap 2, afbeelding 3 van 3
    • Use an opening tool to pry the bottom cover from the device.

    • Use the opening tool to go around the entire perimeter, releasing the tabs that secure the cover to the frame.

    • Insert opening picks between the bottom cover and the frame to prevent the case from reconnecting.

    • Carefully remove the cover.

  3. Lenovo IdeaPad 3-15IML05 USB Board Replacement, Battery: stap 3, afbeelding 1 van 1
    • Use a Phillips screwdriver to remove the three screws securing the battery to the frame.

    • Be sure not to lose the screws, as you'll need them for the new battery as well.

  4. Lenovo IdeaPad 3-15IML05 USB Board Replacement: stap 4, afbeelding 1 van 3 Lenovo IdeaPad 3-15IML05 USB Board Replacement: stap 4, afbeelding 2 van 3 Lenovo IdeaPad 3-15IML05 USB Board Replacement: stap 4, afbeelding 3 van 3
    • Use the point of a spudger to push on alternating sides of the sliding connector to "walk" it out of its socket on the motherboard.

    • It may take a lot of alternating before the connector comes out. Be patient, and don't pull on the cables.

    • To reconnect the cable, align the connector and use a spudger or clean fingernail to push it fully into the socket.

    • Don't push on the cables themselves, or you may damage the connector.

  5. Lenovo IdeaPad 3-15IML05 USB Board Replacement: stap 5, afbeelding 1 van 2 Lenovo IdeaPad 3-15IML05 USB Board Replacement: stap 5, afbeelding 2 van 2
    • Remove the battery from the laptop.

  6. Lenovo IdeaPad 3-15IML05 USB Board Replacement, USB Board: stap 6, afbeelding 1 van 3 Lenovo IdeaPad 3-15IML05 USB Board Replacement, USB Board: stap 6, afbeelding 2 van 3 Lenovo IdeaPad 3-15IML05 USB Board Replacement, USB Board: stap 6, afbeelding 3 van 3
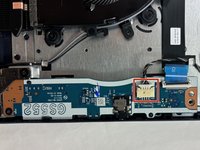
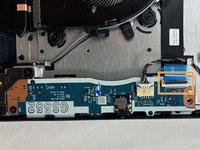
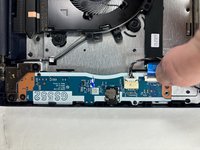
    • Grip the tab at the end of the bundle cable and pull the connector slowly and steadily out of its socket to disconnect the fan cable.

    • Be careful that you do not damage the socket on the motherboard when disconnecting the fan cable.

    • Use a spudger or a clean fingernail to flip up the locking flap of the ZIF connector—this is the unlocked position.

    • Use the widest tool possible to avoid damaging the delicate hinge pins.

    • Use tweezers or your fingers to gently pull the cable out of its socket by the blue tab.

    • To reconnect, make sure the locking flap is flipped up and gently reinsert the cable. Then, flip the locking flap down to secure the cable. The cable should slide into the socket with little to no force. If you're having trouble, remove it, check that the flap is fully unlocked, and try again.

  7. Lenovo IdeaPad 3-15IML05 USB Board Replacement: stap 7, afbeelding 1 van 3 Lenovo IdeaPad 3-15IML05 USB Board Replacement: stap 7, afbeelding 2 van 3 Lenovo IdeaPad 3-15IML05 USB Board Replacement: stap 7, afbeelding 3 van 3
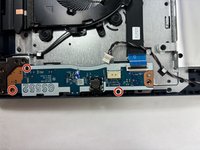
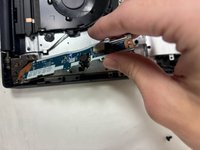
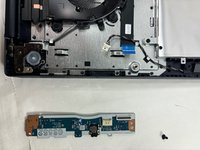
    • Use a Phillips #0 screwdriver to remove the three 3 mm screws securing the USB board to the chassis.

    • Gently remove the USB board from the frame.

    • Be careful when you remove the board that the ports are disconnected from the edge of the device.

Conclusie

To reassemble your device, follow these instructions in reverse order. Take your e-waste to an R2 or e-Stewards certified recycler.

Ryan Muscadin

Lid sinds: 10/24/24

85 Reputatie

1 Handleiding geschreven

Team

UMass Dartmouth, Team 2-2, Santin Fall 2024 Lid van UMass Dartmouth, Team 2-2, Santin Fall 2024

UMASSD-SANTIN-F24S2G2

4 Leden

5 handleidingen geschreven

0 opmerkingen

Voeg opmerking toe

Weergavestatistieken:

Afgelopen 24 uren: 4

Afgelopen 7 dagen: 12

Afgelopen 30 dagen: 22

Altijd: 79