Ga door naar hoofdinhoud
iRobot Roomba 692 Motherboard Replacement

iRobot Roomba 692 Motherboard Replacement

Ruth Oliva

Ruth Oliva en 3 andere bijdragers

Voor het laatst geüpdatet op December 18, 2023

30 minuten
Gemiddeld

This guide will teach you how to access, remove, and replace your iRobot Roomba 692 motherboard. If you are replacing the motherboard, ensure that you have the right motherboard for the Roomba 692 prior to removal.

Remember to review the iRobot Roomba 692 Troubleshooting Page before attempting any maintenance or repairs on your vacuum.

Wat je nodig hebt

iFixit krijgt commissie als je dingen koopt via deze links.
  1. iRobot Roomba 692 Motherboard Replacement, Battery: stap 1, afbeelding 1 van 3 iRobot Roomba 692 Motherboard Replacement, Battery: stap 1, afbeelding 2 van 3 iRobot Roomba 692 Motherboard Replacement, Battery: stap 1, afbeelding 3 van 3
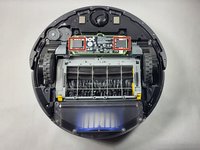
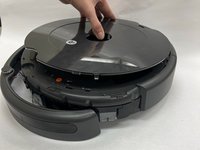
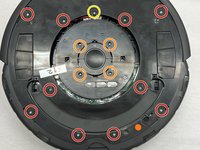
    • To access the iRobot Roomba 692 battery compartment, flip your iRobot Roomba 692 upside down.

    • Using the Phillips #0 screwdriver, remove the 4.0mm screw in the center of the yellow side brush and lift the part out.

  2. iRobot Roomba 692 Motherboard Replacement: stap 2, afbeelding 1 van 3 iRobot Roomba 692 Motherboard Replacement: stap 2, afbeelding 2 van 3 iRobot Roomba 692 Motherboard Replacement: stap 2, afbeelding 3 van 3
    • Use a Phillips #0 screwdriver to remove the four black 3.5 mm screws on the bottom panel.

    • Remove the bottom panel.

    • Can't find the screws? Refer to the red circles in the Step 1 image.

  3. iRobot Roomba 692 Motherboard Replacement: stap 3, afbeelding 1 van 3 iRobot Roomba 692 Motherboard Replacement: stap 3, afbeelding 2 van 3 iRobot Roomba 692 Motherboard Replacement: stap 3, afbeelding 3 van 3
    • Using the black tabs on both short ends of the battery pack, gently pull the battery up and out of its slot.

  4. iRobot Roomba 692 Motherboard Replacement, Motherboard: stap 4, afbeelding 1 van 3 iRobot Roomba 692 Motherboard Replacement, Motherboard: stap 4, afbeelding 2 van 3 iRobot Roomba 692 Motherboard Replacement, Motherboard: stap 4, afbeelding 3 van 3
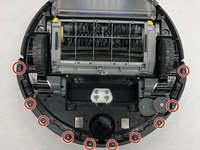
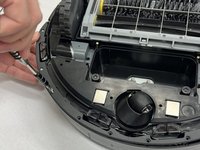
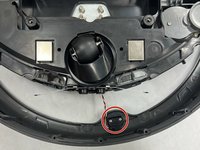
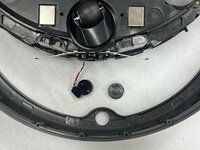
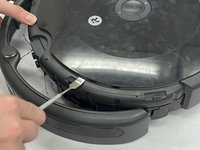
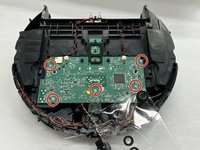
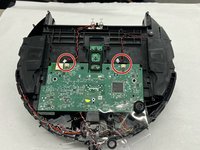
    • Remove the ten 13.3 mm screws with a Phillips #00 screwdriver.

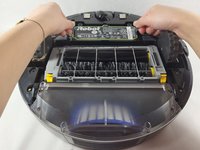
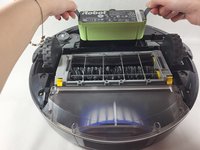
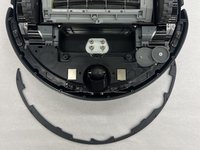
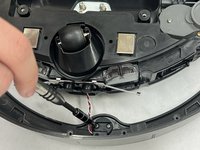
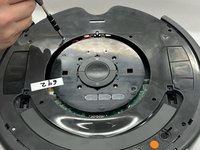
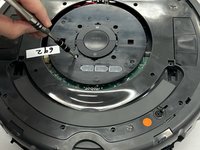
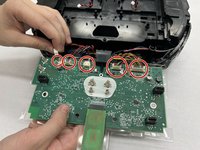
    • Pull off the outer and inner holders.

  5. iRobot Roomba 692 Motherboard Replacement: stap 5, afbeelding 1 van 3 iRobot Roomba 692 Motherboard Replacement: stap 5, afbeelding 2 van 3 iRobot Roomba 692 Motherboard Replacement: stap 5, afbeelding 3 van 3
    • Use a Phillips #00 screwdriver to remove the two 7.4 mm screws that secure the sensor.

    • Once screws are removed slide out the sensor to free it from the slide bumper.

  6. iRobot Roomba 692 Motherboard Replacement: stap 6, afbeelding 1 van 3 iRobot Roomba 692 Motherboard Replacement: stap 6, afbeelding 2 van 3 iRobot Roomba 692 Motherboard Replacement: stap 6, afbeelding 3 van 3
    • Wedge open the top with an opening tool.

    • Wedge the side tabs and middle tabs upward to remove the top lid.

  7. iRobot Roomba 692 Motherboard Replacement: stap 7, afbeelding 1 van 3 iRobot Roomba 692 Motherboard Replacement: stap 7, afbeelding 2 van 3 iRobot Roomba 692 Motherboard Replacement: stap 7, afbeelding 3 van 3
    • Use a Phillips #00 screwdriver to unscrew and remove the following screws:

    • Ten 9.6 mm screws.

    • Four 9.4 mm screws.

    • One 9.5 mm screw.

  8. iRobot Roomba 692 Motherboard Replacement: stap 8, afbeelding 1 van 3 iRobot Roomba 692 Motherboard Replacement: stap 8, afbeelding 2 van 3 iRobot Roomba 692 Motherboard Replacement: stap 8, afbeelding 3 van 3
    • Lift up the top cover to access the motherboard.

    • Use the Phillips #00 screwdriver to remove all five 7.6 mm screws that are holding it down.

  9. iRobot Roomba 692 Motherboard Replacement: stap 9, afbeelding 1 van 2 iRobot Roomba 692 Motherboard Replacement: stap 9, afbeelding 2 van 2
    • Unplug the wiring by pulling it outward.

    • Once all plugs are off the motherboard it can be removed, repaired, or replaced.

Conclusie

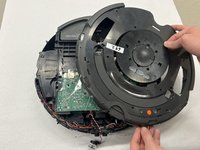
To reassemble your device, follow these instructions in reverse order.

Ruth Oliva

Lid sinds: 11/08/23

217 Reputatie

2 handleidingen geschreven

Team

IUPUI, Team 1-1, Harley Fall 2023 Lid van IUPUI, Team 1-1, Harley Fall 2023

IUPUI-HARLEY-F23S1G1

4 Leden

3 handleidingen geschreven

0 opmerkingen

Voeg opmerking toe

Weergavestatistieken:

Afgelopen 24 uren: 1

Afgelopen 7 dagen: 4

Afgelopen 30 dagen: 13

Altijd: 277