Inleiding
Use this guide to replace a faulty front camera on your iPhone 8 Plus. This camera is part of a larger assembly containing a microphone and proximity/ambient light sensors, all of which are replaced as a single unit.
Wat je nodig hebt
-
-
Power off your iPhone before beginning disassembly.
-
Remove the two 3.5 mm pentalobe screws from the bottom edge of the iPhone.
-
-
-
Measure 3 mm from the tip and mark the opening pick with a permanent marker.
-
-
-
Lay overlapping strips of clear packing tape over the iPhone's screen until the whole face is covered.
-
If you can't get the suction cup to stick in the next few steps, fold a strong piece of tape (such as duct tape) into a handle and lift the screen with that instead.
-
-
-
Pull the blue handle backwards to unlock the Anti-Clamp's arms.
-
Slide the arms over either the left or right edge of your iPhone.
-
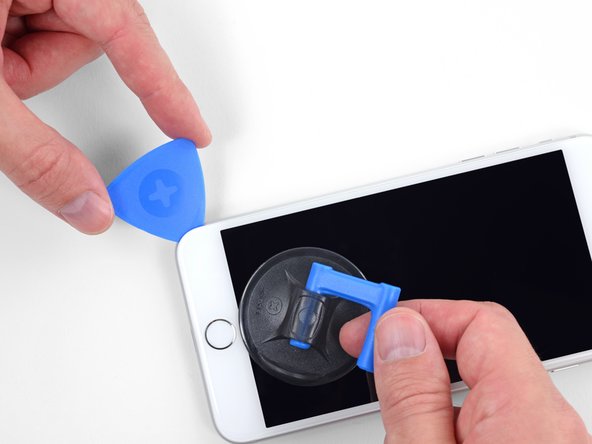
Position the suction cups near the bottom edge of the iPhone just above the home button—one on the front, and one on the back.
-
Squeeze the cups together to apply suction to the desired area.
-
-
-
Heat an iOpener and thread it through the arms of the Anti-Clamp.
-
Fold the iOpener so it lays on the bottom edge of the iPhone.
-
Wait one minute to give the adhesive a chance to release and present an opening gap.
-
Insert an opening pick under the screen when the Anti-Clamp creates a large enough gap.
-
Skip the next three steps.
-
-
-
Use a hairdryer or prepare an iOpener and apply it to the lower edge of the iPhone for about 90 seconds in order to soften up the adhesive underneath.
-
-
-
-
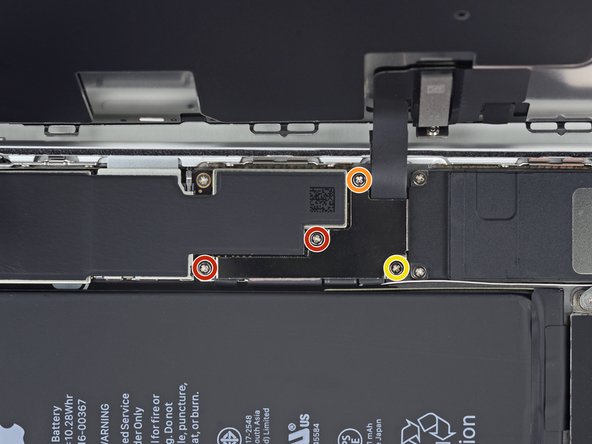
Remove four Phillips (JIS) screws securing the lower display cable bracket to the logic board, of the following lengths:
-
Two 1.3 mm screws
-
One 1.4 mm screw
-
One 2.7 mm screw
-
-
-
Use the tip of a spudger or a fingernail to disconnect the large lower display connector by prying it straight up from its socket.
-
-
-
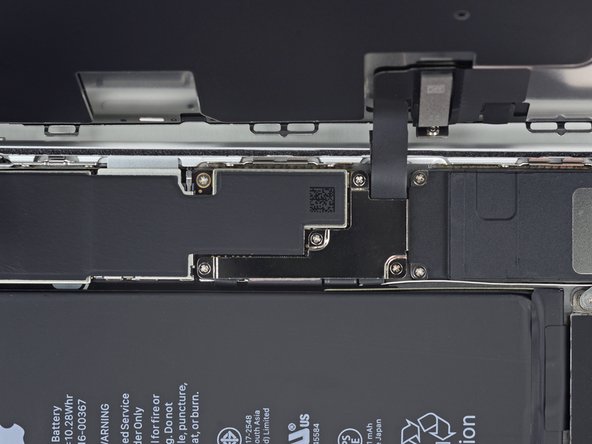
Remove the five Phillips screws securing the earpiece speaker bracket:
-
Two 1.8 mm screws
-
One 2.3 mm screw
-
One 2.4 mm screw
-
One 2.8 mm screw
-
-
-
Gently fold the camera and attached ribbon cable toward the bottom of the iPhone to allow access to the components underneath.
-
-
-
Use a hairdryer or heat gun or prepare an iOpener and apply it to the top front of the display for about a minute, in order to soften the adhesive securing the sensors.
-
Compare your new replacement part to the original part—you may need to transfer remaining components or remove adhesive backings from the new part before installing.
To reassemble your device, follow the above steps in reverse order.
Take your e-waste to an R2 or e-Stewards certified recycler.
Repair didn’t go as planned? Check out our Answers community for troubleshooting help.
Annuleren: ik heb deze handleiding niet afgemaakt.
32 andere personen hebben deze handleiding voltooid.
8 opmerkingen
What happens if the camera/ sensor cables come apart but dont tear if ya know what i mean? theres 2 cables and theyre like taped on top of one another and they connect eachother… well, in my case they just came apart..
Just had the same problem. I placed a new flexcable, they're not very expensive.
Salve,
Ho proceduto alla sostituzione della camera frontale ma, quando accendo il tel il sistema si avvia in modalità loop senza mai avviare il sistema operativo.
Ovviamente se non collego il flat della camera frontale il telefono si avvia regolarmente. Ho anche provato con una camera frontale nuova senza risultato.
Potreste aiutarmi?
I removed one of the 2 small circular stickers (one is white, one green) from where the sensor gets placed. Is it a problem?


