Inleiding
This guide shows how to remove and replace a worn out battery for the iPad Pro 12.9”. The battery is tucked under the logic board. As part of the procedure, you’ll be moving the logic board out of the way in order to remove the battery.
This iPad uses both stretch-release and normal adhesives to hold the battery in place. Use plenty of high concentration isopropyl alcohol or iFixit adhesive remover to help remove the battery and to clean any adhesive residue.
For your safety, discharge your battery below 25% before disassembling your device. This reduces the risk of a dangerous thermal event if the battery is accidentally damaged during the repair. If your battery is swollen, take appropriate precautions.
Wat je nodig hebt
-
-
Completely power down your iPad before you begin.
-
If your screen is cracked, lay overlapping strips of clear packing tape over the iPad's screen until the whole face is covered.
-
Do your best to follow the rest of the guide as described. However, once the glass is broken, it will likely continue to crack as you work, and you may need to use a metal prying tool to scoop the glass out.
-
-
-
As you slice through the adhesive, note the following:
-
The top has a large patch of thick adhesive. You'll need to slice 1/2" deep in order to cut the adhesive.
-
Don't slice deeper than 2 mm along the long edges of the iPad, or you risk damaging the display panel.
-
The lower edge also has thick patches of adhesive, but there are delicate flex cables in each corner. Don't slice deeper than 1/4" around the lower corners.
-
-
-
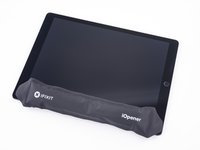
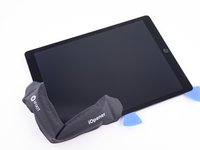
Heat an iOpener and lay it over the left edge of the iPad to soften the adhesive holding the screen in place.
-
Wait two minutes for the adhesive to soften before proceeding to the next step. The edge should be slightly too hot to the touch.
-
-
Gereedschap gebruikt in deze stap:Clampy - Anti-Clamp$24.95
-
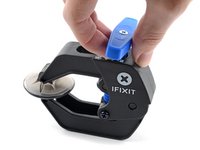
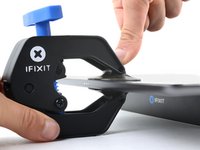
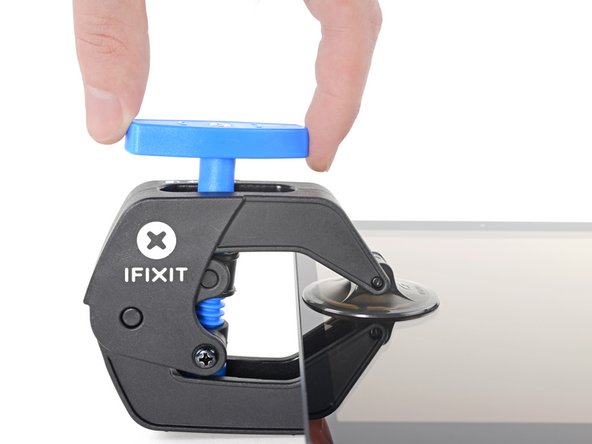
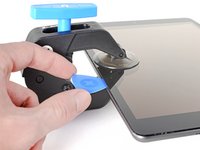
Pull the blue handle backwards to unlock the Anti-Clamp's arms.
-
Place an object under your iPad so it rests level between the suction cups.
-
Position the suction cups near the middle of the left edge—one on the top, and one on the bottom.
-
Hold the bottom of the Anti-Clamp steady and firmly press down on the top cup to apply suction.
-
-
-
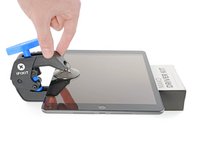
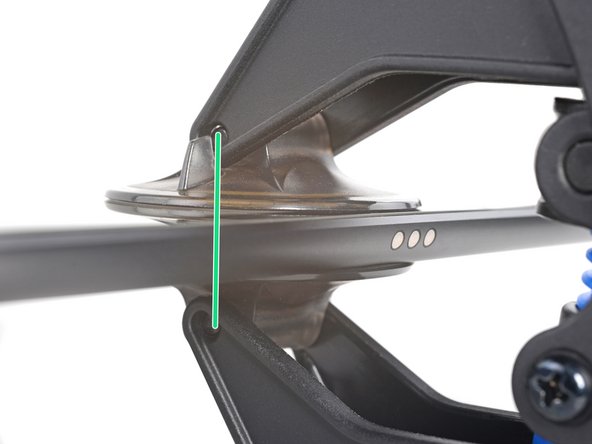
Wait one minute to give the adhesive a chance to release and present an opening gap.
-
If your screen isn't getting hot enough, you can use a hair dryer to heat along the left edge of the iPad.
-
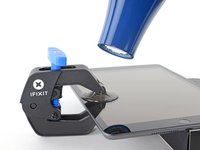
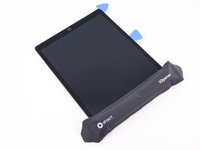
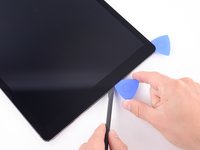
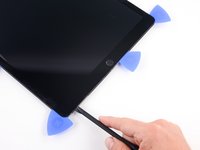
Insert an opening pick under the screen when the Anti-Clamp creates a large enough gap.
-
Skip the next two steps.
-
-
-
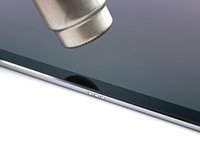
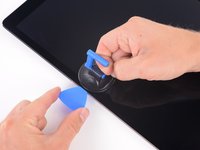
Attach a suction cup to the left edge of the iPad's screen, above the Smart Connector port.
-
-
Gereedschap gebruikt in deze stap:Halberd Spudger$2.99
-
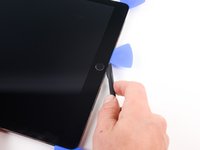
Lay a hot iOpener along the bottom left corner of the iPad, spanning from the opening pick to the home button.
-
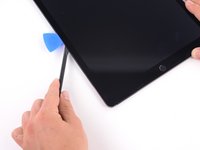
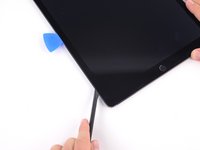
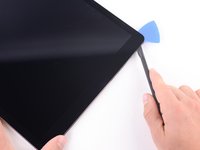
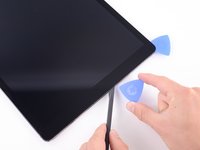
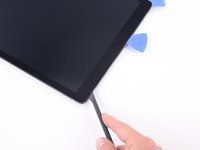
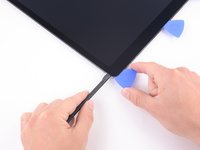
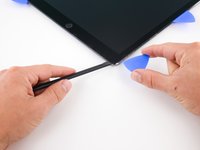
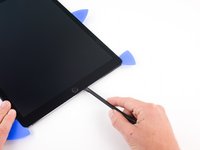
After letting the adhesive soften, insert an opening pick or halberd spudger into the gap next to the Smart Connector.
-
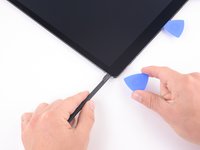
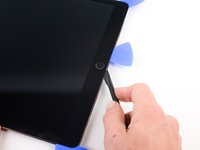
Use an opening pick or halberd spudger to slice the adhesive along the bottom left side of the iPad. If the slicing becomes difficult, reheat the edge and try again.
-
-
-
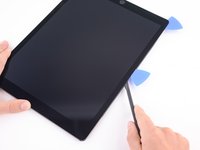
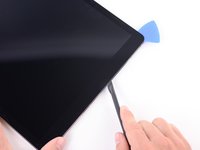
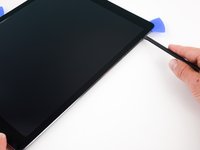
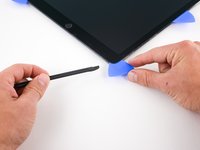
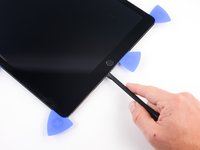
Lay a hot iOpener along the upper left corner of the iPad, spanning from the opening pick to the front-facing camera. Wait a minute to let the adhesive soften.
-
Use an opening pick to slice the adhesive along the upper left side of the iPad. If the slicing becomes difficult, reheat the edge and try again.
-
-
-
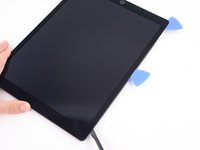
Reheat your iOpener and lay it over the top edge of the device. Wait a couple minutes for the adhesive to soften.
-
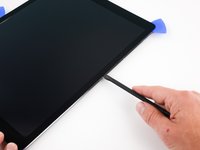
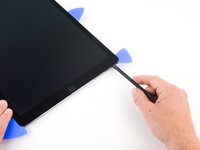
Use an opening pick to slice through the top edge of the iPad, stopping before you reach the front-facing camera.
-
If the slicing becomes hard, reheat the edge and try again.
-
-
-
Reheat your iOpener and lay it over the top edge of the device. Wait a couple minutes for the adhesive to soften.
-
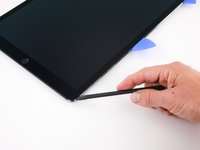
Insert an opening pick or a halberd spudger blade just past the front-facing camera.
-
Use the opening pick to slice through the adhesive in the upper right corner.
-
If the slicing becomes hard, reheat the edge and try again.
-
-
-
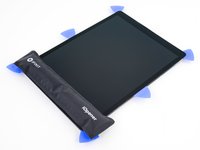
Soften the adhesive by heating the right edge of the iPad using an iOpener.
-
Use an opening pick or halberd spudger to slice along the right edge of the iPad, till you reach the lower right corner.
-
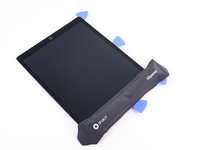
Leave an opening pick in the middle of the right edge to prevent the adhesive from resealing.
-
-
-
-
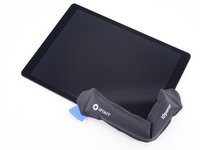
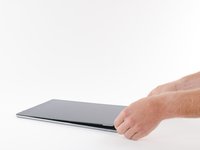
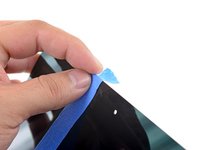
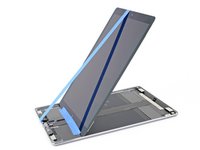
Attach a long strip of masking tape to the top edge of the screen. Fold the tape over the edge and make sure that the tape is attached securely.
-
Attach the other end of the strip to the bottom edge of the iPad frame to hold the screen at an angle. Make sure the tape attaches securely to the frame.
-
-
-
Use a Phillips screwdriver to remove the nine screws securing the logic board EMI shield:
-
Eight 1.2 mm screws
-
One 2.4 mm screw
-
-
-
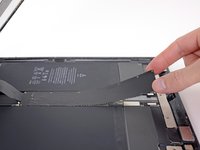
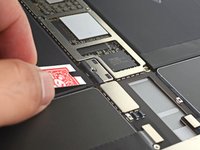
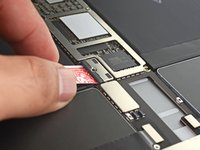
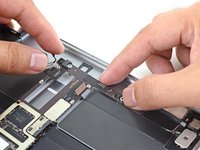
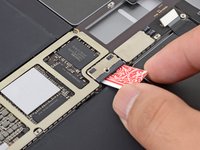
Make a battery blocker using a playing card and slide it underneath the logic board connector to disconnect the battery.
-
Leave the blocker there to prevent the battery connector leads from making contact until you have completed your repairs.
-
-
-
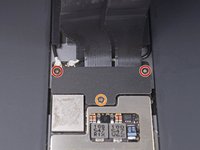
Use a Phillips screwdriver to remove the three screws securing the display cable bracket:
-
Two 2.4 mm screws
-
One 1.2 mm screw
-
Remove the display cable bracket.
-
-
-
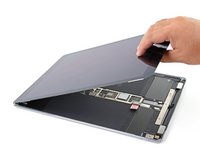
Remove the screen.
-
If your screen didn't come with pre-applied adhesives, use our screen adhesive application guide to install fresh pre-cut adhesive strips when reassembling your iPad.
-
-
-
Use a Phillips screwdriver to remove the three screws securing the top bracket:
-
One 1.2 mm screw
-
Two 2.3 mm screws
-
-
-
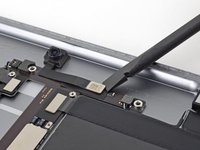
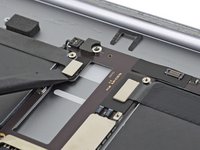
Use the flat end of a spudger to pry up and disconnect the front facing camera connector.
-
-
-
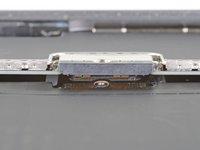
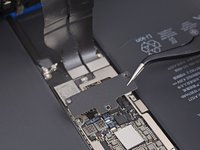
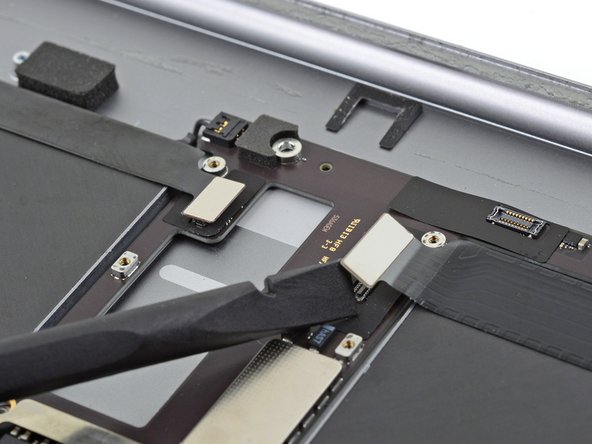
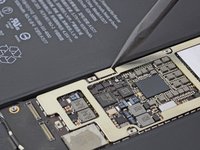
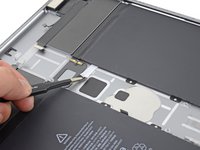
Use a spudger to pry up and disconnect the two press connectors near the top of the logic board.
-
-
-
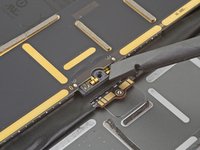
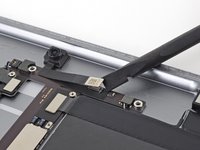
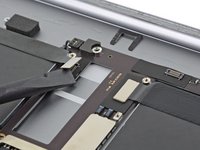
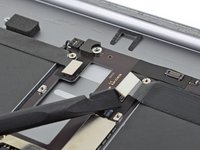
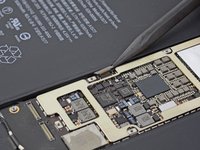
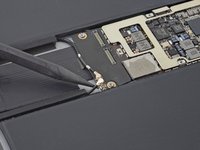
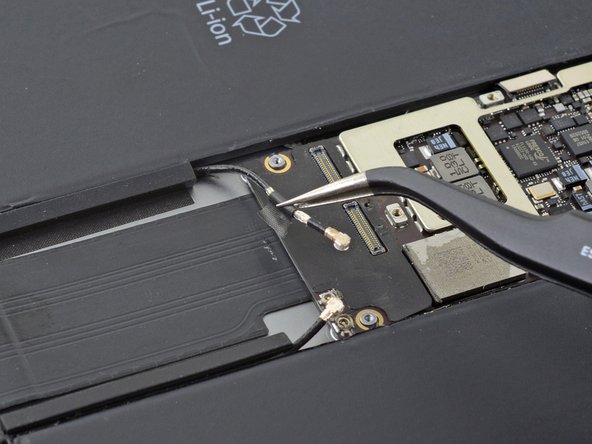
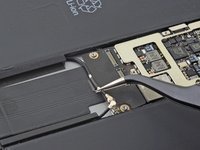
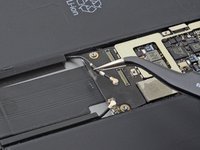
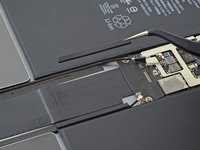
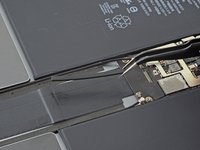
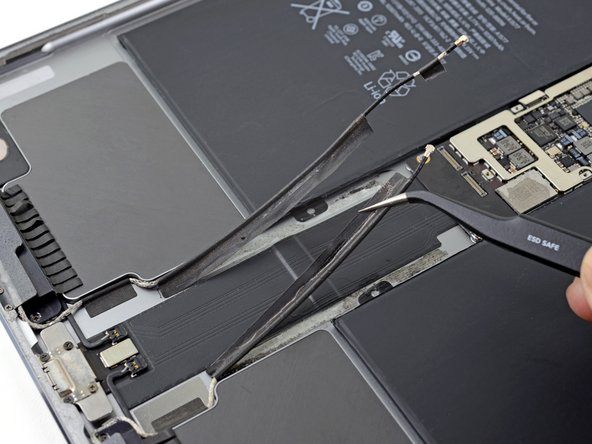
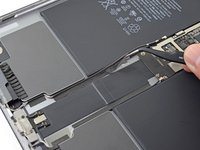
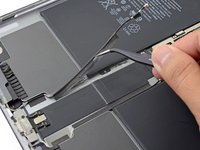
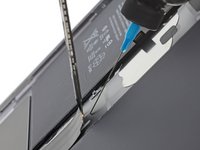
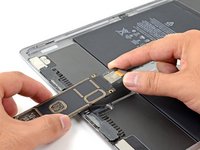
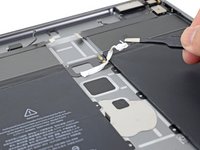
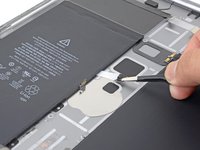
Use the point of a spudger to pry up and disconnect the two antenna cables from the bottom right corner of the logic board.
-
-
-
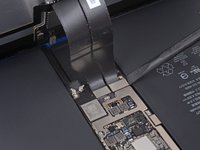
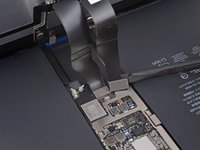
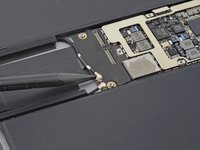
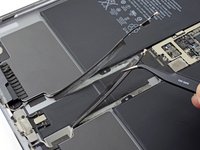
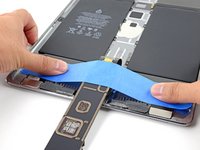
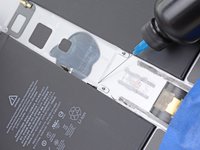
Heat an iOpener and apply it to the antenna cables below the logic board for a minute.
-
-
-
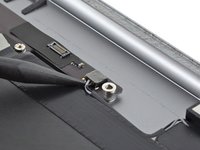
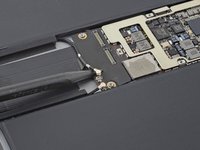
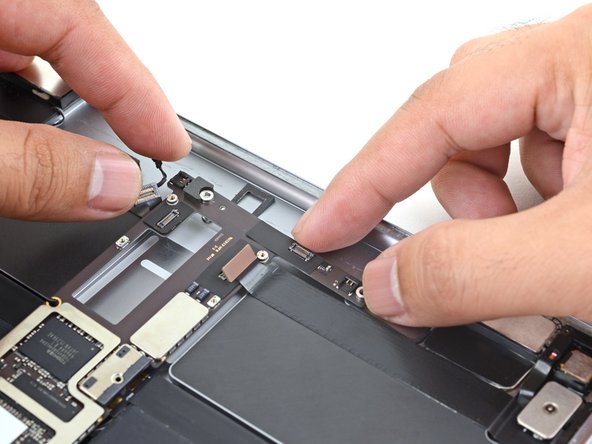
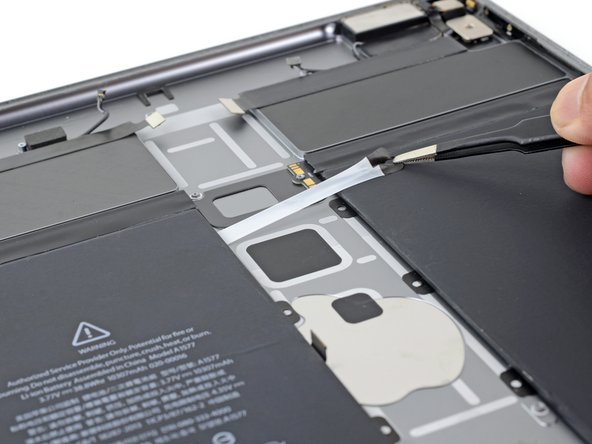
Be careful not to trap the Smart Connector connector underneath the logic board.
-
Be careful not to trap the two flex connectors and the two speaker connecters underneath the logic board.
-
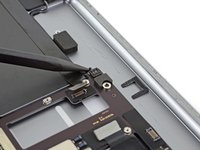
Reinsert the battery blocker into position.
-
-
-
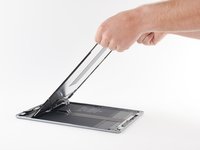
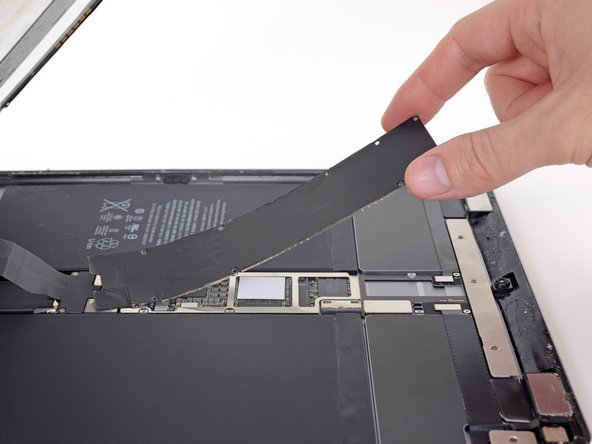
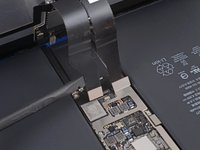
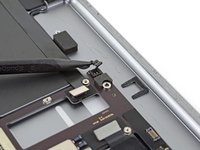
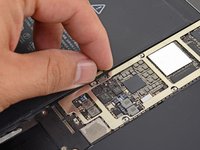
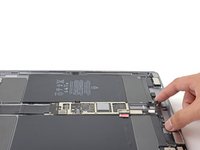
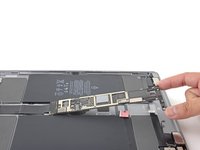
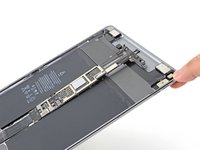
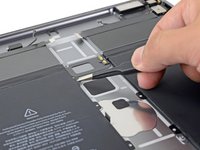
Lift the top edge of the logic board slightly to free it from the top connectors.
-
Remove the loose battery blocker and save it for reassembly.
-
-
Gereedschap gebruikt in deze stap:Tesa 61395 Tape$8.95
-
Eight stretch-release adhesive strips
-
Two regular adhesive strips
-
-
-
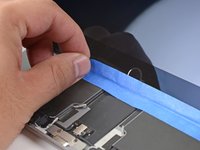
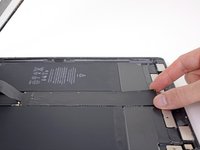
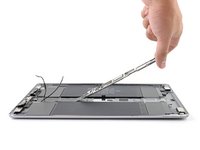
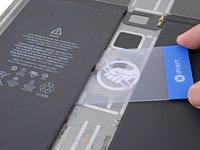
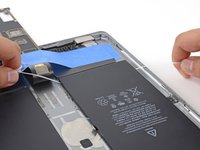
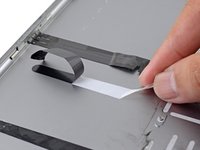
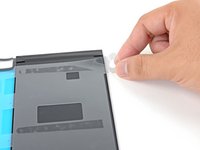
Use tweezers or your fingers to grasp the black pull-tab on one of the adhesive strips.
-
Pull the strip out slowly and steadily at a low angle. Give it plenty of time to stretch and un-stick from under the battery.
-
If the adhesive strip breaks off, try to retrieve it using your fingers or blunt tweezers, and continue pulling—but do not pry under the battery.
-
-
-
Tilt the iPad and apply a few drops of high concentration (>90%) isopropyl alcohol to the broken strip. Wait for a minute to let the alcohol penetrate the adhesive.
-
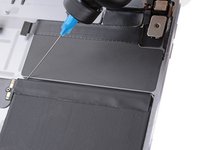
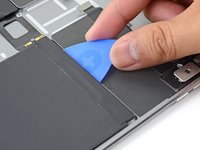
Slowly slide an opening card under the battery to loosen the adhesive.
-
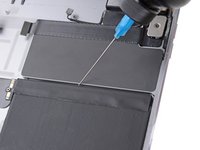
Alternatively, you can use dental floss to slice through the adhesive. Wrap the floss around a bit driver handle or your fingers and thread it back and forth under the battery.
-
-
-
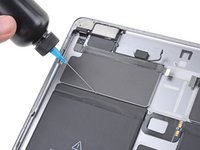
Tilt the iPad up and apply a few drops of isopropyl alcohol to the top right edge of the battery.
-
Keep the iPad tilted for a minute to let the alcohol penetrate the adhesive.
-
-
-
Tilt the iPad up and apply a few drops of isopropyl alcohol to the top left edge of the battery.
-
Keep the iPad tilted for a minute to let the alcohol penetrate the adhesive.
-
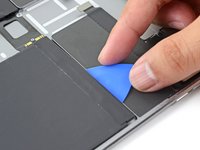
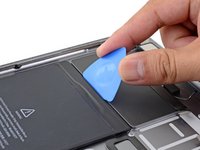
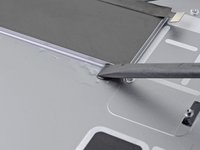
Insert the flat edge of an opening pick into the crevice above the top left edge of the battery.
-
Slowly press the pick under the battery to loosen the adhesive.
-
Slide the pick along the top left edge of the battery to loosen the adhesive.
-
-
-
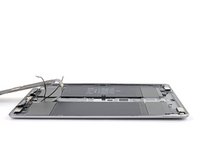
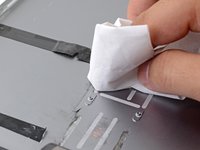
Peel and remove any remaining adhesive strips.
-
Remove all adhesive residue from the iPad frame. Use isopropyl alcohol and a spudger to scrape off any adhesive chunks. Wipe away the adhesive residue with a lint-free cloth.
-
If there's any alcohol solution remaining in the iPad, carefully wipe it off or allow it to air dry.
-
-
-
Peel off the clear plastic liners on your replacement battery to expose the adhesive strips.
-
Align the battery connector with the iPad's battery post and lay the battery in the iPad.
-
Press down on the battery for a minute to stick the battery in place.
-


To reassemble your device, follow these instructions in reverse order.
For optimal performance, after completing this guide, calibrate your newly installed battery.
Take your e-waste to an R2 or e-Stewards certified recycler.
Repair didn’t go as planned? Try some basic troubleshooting, or ask our Answers community for help.
Annuleren: ik heb deze handleiding niet afgemaakt.
51 andere personen hebben deze handleiding voltooid.


10Gids Commentaar
Thanks for instructions!
I changed the battery successfully but while heating in order to remove the screen, 12 small magnets for the Smart Cover came off… any idea how to put them back?
Thanks a lot!