Ga door naar hoofdinhoud

Canon EOS Rebel T3 Shutter Assembly Replacement

Engels
Nederlands
Stap 4
Canon EOS Rebel T3 Shutter Assembly Replacement, Desoldering Shutter Assembly Cable: stap 0, afbeelding 1 van 3 Canon EOS Rebel T3 Shutter Assembly Replacement, Desoldering Shutter Assembly Cable: stap 0, afbeelding 2 van 3 Canon EOS Rebel T3 Shutter Assembly Replacement, Desoldering Shutter Assembly Cable: stap 0, afbeelding 3 van 3
Desoldering Shutter Assembly Cable
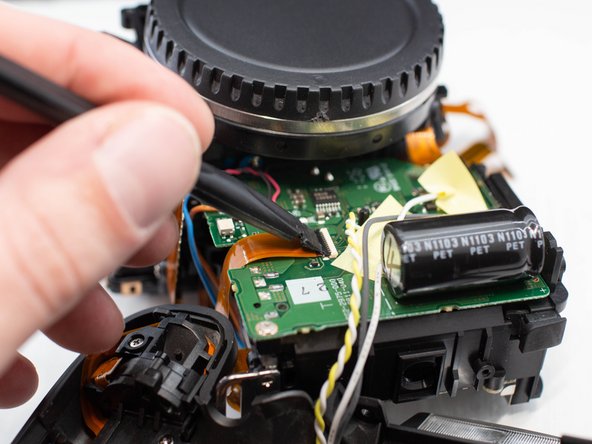
  • Electric Shock Warning: If you have not already done so, use a capacitor discharge tool on the high voltage capacitor located on the DC PCB board before proceeding.

  • On the DC PCB board, peel off the tape covering the shutter assembly power cable.

  • Using a plastic spudger tool, lift up the black locking tab on the ribbon cable connector.

  • Disconnect the ribbon cable and tuck the end of it away where it'll be safe while soldering.

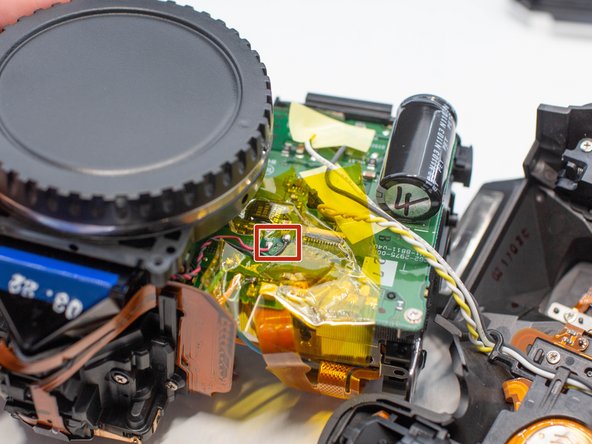
  • Place polyimide tape on the PCB board around the shutter assembly power cables. This is to help protect the components on the PCB board while desoldering the cables.

  • Using a soldering iron and desoldering wick, desolder the two shutter assembly power cables from the DC PCB board. The wires should be red and black.

  • iFixit desoldering guide

Vertaling hier toevoegen

Vertaling hier toevoegen

Vertaling hier toevoegen

Vertaling hier toevoegen

Vertaling hier toevoegen

Vertaling hier toevoegen

Vertaling hier toevoegen

Je bijdragen zijn gelicentieerd onder de open source Creative Commons-licentie.