Ga door naar hoofdinhoud

Samsung Galaxy A72 Loudspeaker Replacement

Wat je nodig hebt

  1. Samsung Galaxy A72 Loudspeaker Replacement, Heat the back cover: stap 1, afbeelding 1 van 1
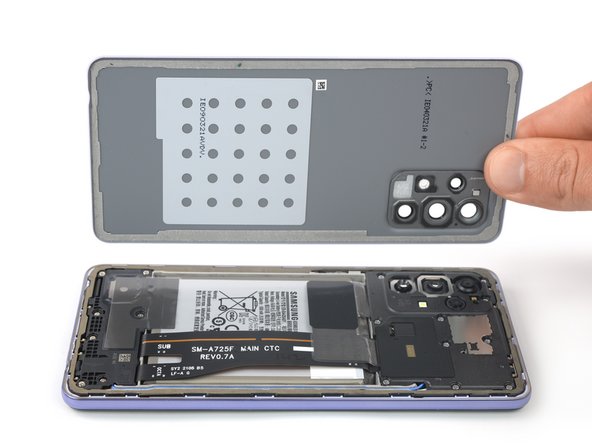
    • Prepare an iOpener and apply it to the back cover for at least two minutes to loosen the adhesive underneath.

    • A hair dryer, heat gun, or hot plate may also be used, but be careful not to overheat the phone—the display and internal battery are both susceptible to heat damage.

  2. Samsung Galaxy A72 Loudspeaker Replacement, Insert an opening pick: stap 2, afbeelding 1 van 3 Samsung Galaxy A72 Loudspeaker Replacement, Insert an opening pick: stap 2, afbeelding 2 van 3 Samsung Galaxy A72 Loudspeaker Replacement, Insert an opening pick: stap 2, afbeelding 3 van 3
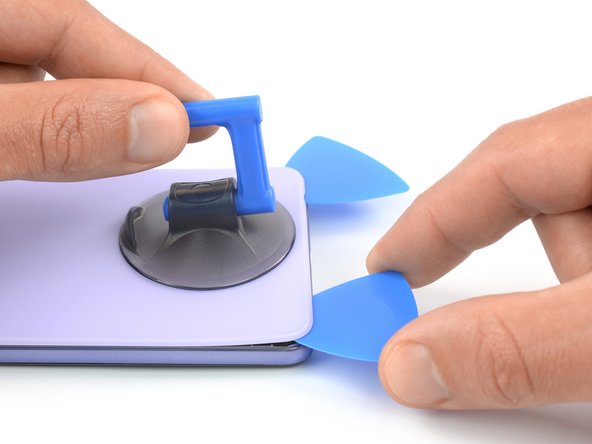
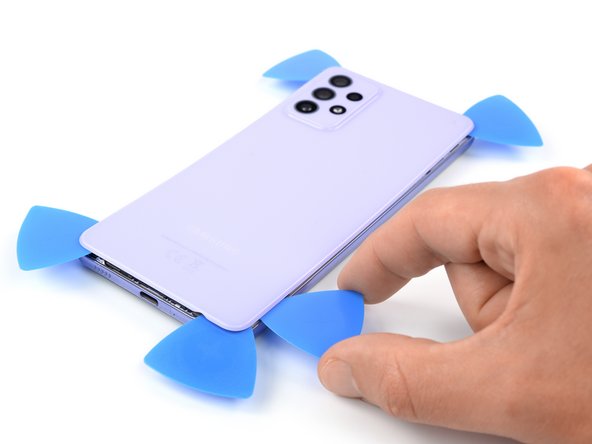
    • Secure a suction handle to the bottom edge of the back cover, as close to the edge as possible.

    • If the back cover is cracked, the suction handle may not stick. Try lifting it with strong tape, or superglue the suction handle in place and allow it to cure so you can proceed.

    • Lift the back cover with the suction handle to create a small gap between the back cover and the frame.

    • In case you have trouble creating a gap, apply more heat to further soften the adhesive. Follow the iOpener instructions to avoid overheating.

    • Insert an opening pick into the gap you created.

    • Slide the opening pick to the bottom right corner to slice the adhesive.

    • Leave the opening pick in place to prevent the adhesive from resealing.

  3. Samsung Galaxy A72 Loudspeaker Replacement, Slice the adhesive: stap 3, afbeelding 1 van 2 Samsung Galaxy A72 Loudspeaker Replacement, Slice the adhesive: stap 3, afbeelding 2 van 2
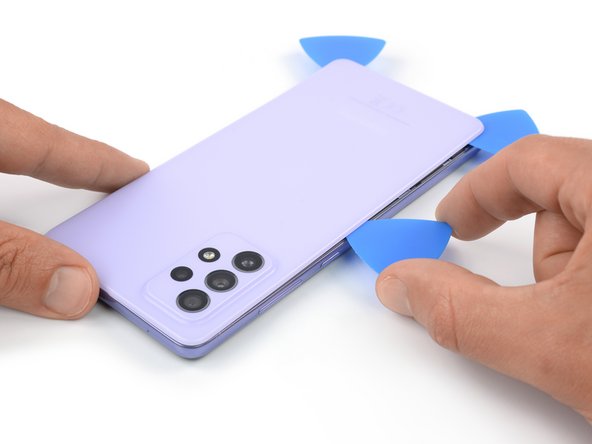
    • Insert a second opening pick at the bottom edge of your phone.

    • Slide the opening pick to the bottom left corner to slice the adhesive.

    • Leave the opening picks in place to prevent the adhesive from resealing.

  4. Samsung Galaxy A72 Loudspeaker Replacement, Slice the adhesive: stap 4, afbeelding 1 van 3 Samsung Galaxy A72 Loudspeaker Replacement, Slice the adhesive: stap 4, afbeelding 2 van 3 Samsung Galaxy A72 Loudspeaker Replacement, Slice the adhesive: stap 4, afbeelding 3 van 3
    • If the adhesive becomes hard to cut, it has most likely cooled down. Use your iOpener for one to two minutes to reheat it.

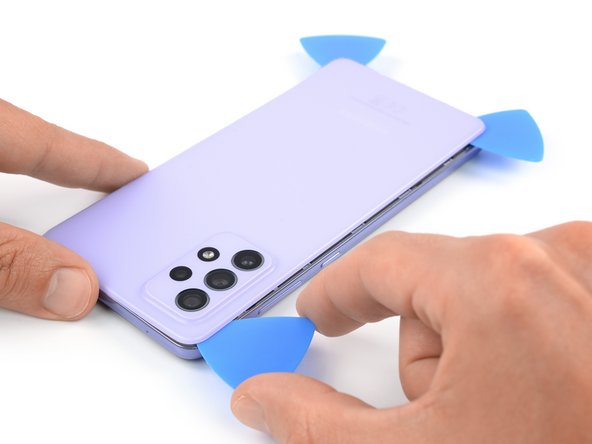
    • Insert a third opening pick at the bottom left corner of your phone.

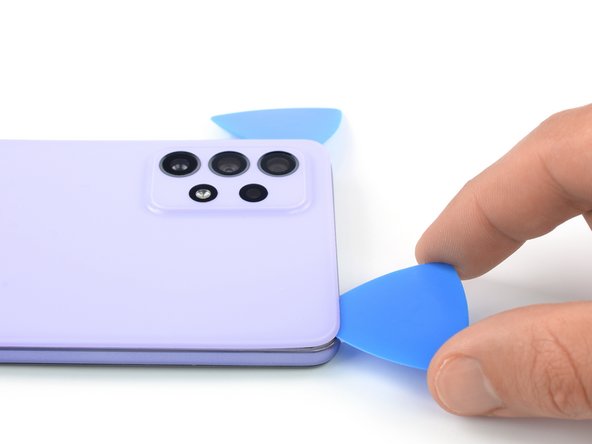
    • Slide the opening pick along the left edge of your phone to slice the adhesive.

    • Leave the opening pick in the top left corner to prevent the adhesive from resealing.

  5. Samsung Galaxy A72 Loudspeaker Replacement: stap 5, afbeelding 1 van 2 Samsung Galaxy A72 Loudspeaker Replacement: stap 5, afbeelding 2 van 2
    • Insert a fourth opening pick underneath the top left corner of your phone.

    • Slide the opening pick along the top edge to slice the adhesive.

    • Leave the opening pick in the top right corner to prevent the adhesive from resealing.

  6. Samsung Galaxy A72 Loudspeaker Replacement: stap 6, afbeelding 1 van 2 Samsung Galaxy A72 Loudspeaker Replacement: stap 6, afbeelding 2 van 2
    • Insert a fifth opening pick underneath the top right corner.

    • Slide the opening pick along the right edge of the back cover to slice the remaining adhesive.

  7. Samsung Galaxy A72 Loudspeaker Replacement, Remove the back cover: stap 7, afbeelding 1 van 2 Samsung Galaxy A72 Loudspeaker Replacement, Remove the back cover: stap 7, afbeelding 2 van 2
    • Remove the back cover.

    • Apply new adhesive where necessary after cleaning the relevant areas with isopropyl alcohol (>90%).

    • Secure the new back cover with pre-cut adhesive or double-sided adhesive tape. After installing the back cover, apply strong, steady pressure to your phone for several minutes to help the adhesive form a good bond—a stack of heavy books works well.

  8. Samsung Galaxy A72 Loudspeaker Replacement, Unfasten the motherboad cover screws: stap 8, afbeelding 1 van 1
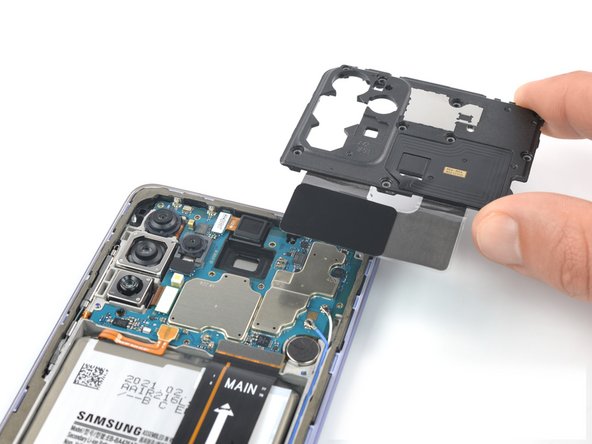
    • Use a Phillips screwdriver to remove the ten 4.5 mm-long screws securing the motherboard cover.

  9. Samsung Galaxy A72 Loudspeaker Replacement, Pry up the motherboard cover: stap 9, afbeelding 1 van 2 Samsung Galaxy A72 Loudspeaker Replacement, Pry up the motherboard cover: stap 9, afbeelding 2 van 2
    • Insert the pointed end of a spudger underneath the right edge of the motherboard cover.

    • Use your spudger to pry up the motherboard cover by tilting the spudger downwards.

  10. Samsung Galaxy A72 Loudspeaker Replacement, Remove the motherboard cover: stap 10, afbeelding 1 van 2 Samsung Galaxy A72 Loudspeaker Replacement, Remove the motherboard cover: stap 10, afbeelding 2 van 2
    • Remove the motherboard cover.

  11. Samsung Galaxy A72 Loudspeaker Replacement, Disconnect the battery cable: stap 11, afbeelding 1 van 2 Samsung Galaxy A72 Loudspeaker Replacement, Disconnect the battery cable: stap 11, afbeelding 2 van 2
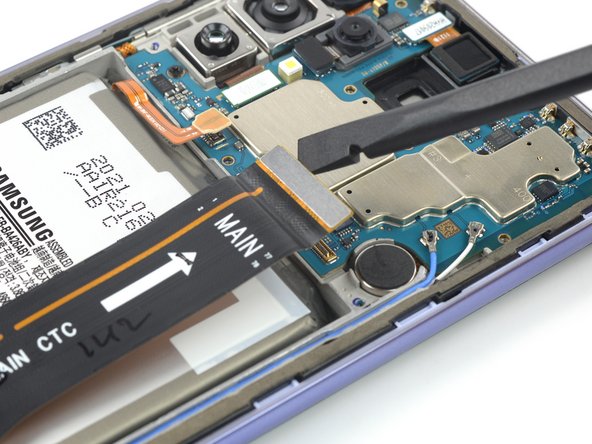
    • Use a spudger to disconnect the battery cable by prying the connector straight up from its socket.

  12. Samsung Galaxy A72 Loudspeaker Replacement, Disconnect the interconnect cable: stap 12, afbeelding 1 van 2 Samsung Galaxy A72 Loudspeaker Replacement, Disconnect the interconnect cable: stap 12, afbeelding 2 van 2
    • Use a spudger to disconnect the interconnect cable by prying the connector straight up from its socket.

  13. Samsung Galaxy A72 Loudspeaker Replacement, Unfasten the loudspeaker assembly screws: stap 13, afbeelding 1 van 1
    • Use a Phillips screwdriver to remove the seven 4.5 mm-long screws securing the loudspeaker assembly.

  14. Samsung Galaxy A72 Loudspeaker Replacement, Pry up the loudspeaker assembly: stap 14, afbeelding 1 van 2 Samsung Galaxy A72 Loudspeaker Replacement, Pry up the loudspeaker assembly: stap 14, afbeelding 2 van 2
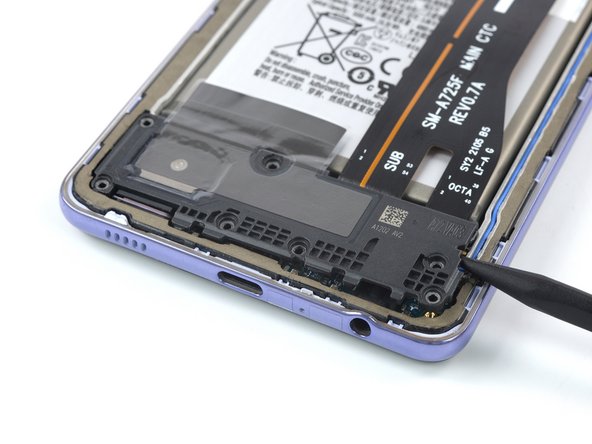
    • Insert the pointed end of a spudger underneath the right edge of the loudspeaker assembly.

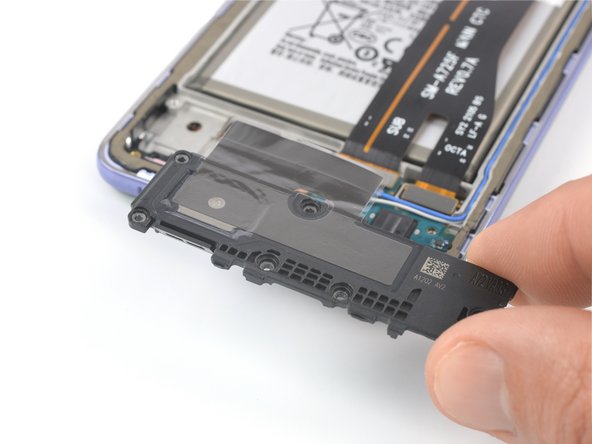
    • Use your spudger to pry up the loudspeaker assembly by tilting the spudger downwards.

  15. Samsung Galaxy A72 Loudspeaker Replacement, Remove the loudspeaker assembly: stap 15, afbeelding 1 van 2 Samsung Galaxy A72 Loudspeaker Replacement, Remove the loudspeaker assembly: stap 15, afbeelding 2 van 2
    • Remove the loudspeaker assembly.

    • During reassembly apply new adhesive where it's necessary after cleaning the relevant areas with isopropyl alcohol (>90%).

Conclusie

To reassemble your device, follow these instructions in reverse order. If possible, turn on your device and test your repair before installing new adhesive and resealing.

Compare your new replacement part to the original part—you may need to transfer remaining components or remove adhesive backings from the new part before installing.

To reassemble your device, follow these instructions in reverse order.

Take your e-waste to an R2 or e-Stewards certified recycler.

Repair didn’t go as planned? Try some basic troubleshooting, or ask our Answers community for help.

Één andere persoon heeft deze handleiding voltooid.

Dominik Schnabelrauch

Lid sinds: 11/23/16

203.353 Reputatie

682 handleidingen geschreven

Team

iFixit Lid van iFixit

Staff

135 Leden

16.817 handleidingen geschreven

0 opmerkingen

Voeg opmerking toe

Weergavestatistieken:

Afgelopen 24 uren: 0

Afgelopen 7 dagen: 4

Afgelopen 30 dagen: 24

Altijd: 565