Inleiding
Use this guide to replace a dead or low battery.
Before you begin, download the Rescue and Smart Assistant app to backup your device and diagnose whether your problem is software or hardware related.
If your battery is swollen, take appropriate precautions.
Wat je nodig hebt
-
-
If possible, drain the battery before disassembly. When the battery is charged, there's an increased risk of a dangerous thermal event if the battery is overheated or damaged during repairs.
-
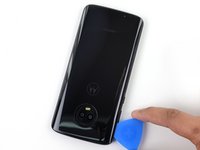
Prepare an iOpener and heat the back of the phone along its bottom edge for about two minutes, or until it's slightly too hot to touch. This will help soften the adhesive securing the rear glass.
-
-
-
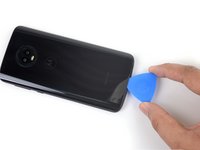
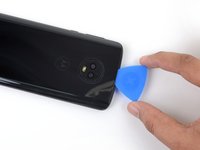
Apply a suction cup to the bottom edge of the rear glass.
-
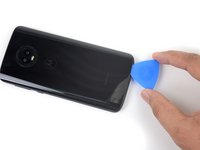
Pull up on the suction cup with firm, constant pressure to create a slight gap between the rear glass and the frame.
-
If you have trouble, apply more heat to further soften the adhesive, and try again. The adhesive cools quickly, so you may need to heat it repeatedly.
-
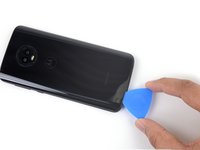
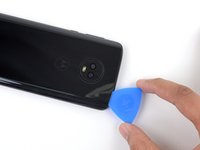
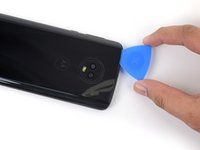
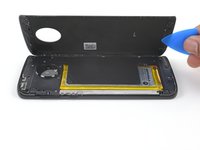
Insert an opening pick into the gap you created under the rear glass.
-
-
-
Gereedschap gebruikt in deze stap:Tweezers$4.99
-
Use a pair of tweezers to carefully peel up the black tape covering the battery.
-
Remove the tape.
-
-
-
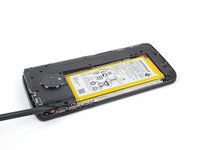
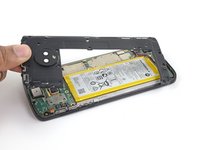
Use a Phillips driver to remove seventeen screws securing the plastic cover:
-
Eleven grey 3 mm-long screws
-
Five black 2.5 mm-long screws
-
One silver 3.5 mm-long screw
-
-
-
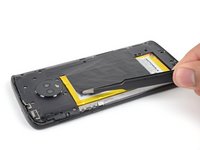
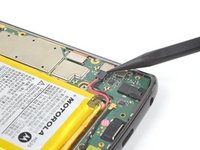
Use the pointed end of a spudger to pry up the battery connector and disconnect it.
-
-
-
Prepare an iOpener and apply it to the right half of the screen for at least two minutes, in order to soften the battery adhesive underneath. Reheat and reapply the iOpener as needed.
-
-
-
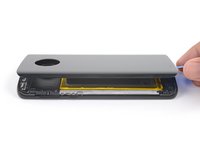
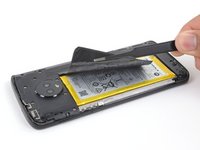
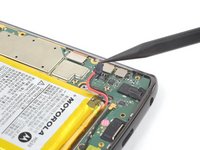
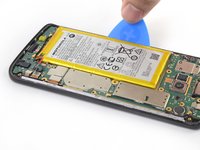
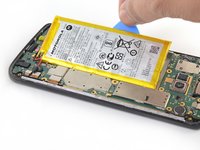
Use an opening pick to steadily pry the battery up, starting from the outer edge of the battery.
-
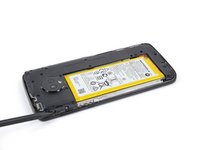
Remove the battery.
-


Compare your new replacement part to the original part—you may need to transfer remaining components or remove adhesive backings from the new part before installing.
To reassemble your device, follow the above steps in reverse order.
For optimal performance, after completing this guide, calibrate your newly installed battery.
Take your e-waste to an R2 or e-Stewards certified recycler.
Repair didn’t go as planned? Try some basic troubleshooting, or ask our Motorola Moto G6 Answers community for help.
Annuleren: ik heb deze handleiding niet afgemaakt.
35 andere personen hebben deze handleiding voltooid.

8Gids Commentaar
This is a beautifully done tutorial. I have written over 100 service manuals, and have seen few procedures described better than this.
One of the best instructions that I have used and the Ifixit tool kit was perfect and the price for everything was very good.
One of the best tutorials I have followed. Even this 73 year old was able to easily follow and finish the project without difficulty. Thank you, I now have a new battery in my cell phone. Happy customer.
Moto G6 charging problem
thank you for writing this up. I could follow your steps without any issue. The telephone is glued together really well, it took me many attempts to take off the back cover glass and also the battery. Just keep (re)heating the phone and slowly work with the picks, it will come off eventually.