
Intel NUC11TNKi5 CPU Fan Replacement

Inleiding
Ga naar stap 1This guide depicts a way how to replace the Intel NUC11TNKi5 CPU fan.
Wat je nodig hebt
Onderdelen


Gereedschap


Toon meer…
-
-
Unscrew 4 screws located in corners of back-plate.
-
Remove the back-plate.
-
-
-
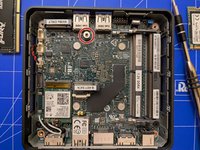
Unscrew the screw holding the NVME module.
-
Remove the NVME module, so there is an access to WiFi module.
-
-
-
Unplug WiFi antenna pigtails. Lift them carefully.
-
Unplug the RTC/CMOS battery header. Be aware, that BIOS settings will be erased immediately and need to be restored manually, once NUC is power on again.
-
-
-
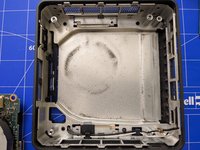
Insert spudger tool inside the top cover opening area and lift the top cover and remove it.
-
-
-
-
Now, the motherboard can be removed by pulling the B-Key SATA screw lock.
-
-
-
Unscrew 2 screws holding the fan.
-
Unplug wires from the motherboard.
-
Remove the fan.
-
-
-
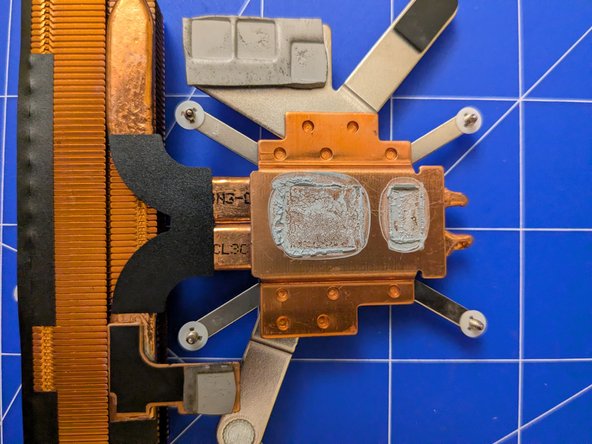
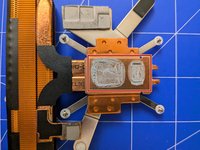
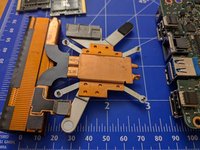
Unscrew 4 screws holding the fan passive block.
-
Remove the passive block. Be aware there is a thermal paste below.
-
-
-
Apply isopropyl alcohol (at least 90% purity) to cotton swabs.
-
Remove the old thermal paste form chips by using cotton swabs. Repeat cleaning until all paste is removed.
-
Remove the old thermal paste form passive block by using cotton swabs. Repeat cleaning until all paste is removed.
-
-
-
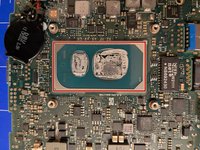
Apply new thermal paste on marked chips. Use small amount of paste and spread it with a firm paper. Do not apply any thermal paste on passive block.
-
-
-
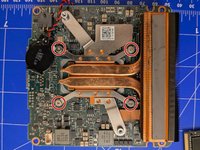
Carefully, put back the passive block.
-
Screw 4 screws.
-
-
-
Put back the fan.
-
Screw 2 screws.
-
Plug fan wires to the motherboard.
-
Apply electrical tape on fan, so it's firmly attached to the fan as well as to the passive block.
-
-
-
To reassemble your NUC, follow disassembling instructions in reverse order.
-
When you first run the NUC, the BIOS settings and time settings have gone because battery was unplugged. Therefore, enter the BIOS and save the settings you would like to use. Don't forget to check the fan speed and its settings!
-


To reassemble your device, follow these instructions in reverse order.
To reassemble your device, follow these instructions in reverse order.
Annuleren: ik heb deze handleiding niet afgemaakt.
Één andere persoon heeft deze handleiding voltooid.

Één opmerking
Pretty sure not all of those screws need to be removed from the top, but there doesn't seem to be any harm either. I also don't think the RTC power needed to be disconnected?
Is there a trick to getting those antenna cables back in? They were the most annoying part of reassembly by far.