
Disassembling Logitech MBJ58 Mouse Scroll wheel from mount
Inleiding
Ga naar stap 1This guide shows how to disassemble and remove the scroll wheel of the Logitech MBJ58 optical scroll mouse. This might be necessary if the wheel is stuck, difficult to turn, or dislodged. If it becomes dislodged, it can cause additional damage to the mouse’s motherboard, which is located beneath the wheel.
The scroll wheel may become jammed if the support spring that holds it in place is dislodged. To see how to repair that, as well as how to deconstruct other parts of the mouse, see the Logitech MBJ58 mouse troubleshooting guide.
Wat je nodig hebt
Gereedschap
-
-
Hold the mouse so that the bottom is facing up.
-
Remove the single Phillips #1 screw from the bottom half of the mouse.
-
-
-
Place the mouse so that the bottom is resting against a hard surface.
-
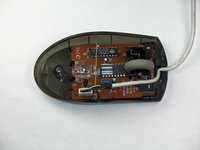
Lift the top cover of the mouse gently, and remove it.
The cover doesn’t lift straight up on my model - once you raise the back slightly as shown, gently pull it backward (parallel to the table top, away from the cord) to disengage two plastic clips that connect the bottom to the top.
-
-
-
-
Locate the scroll wheel on the mouse.
-
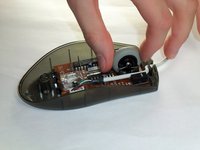
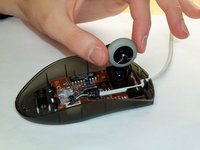
Grab the scroll wheel with your thumb and index finger.
-
Gently lift up, to remove the scroll wheel from the mouse.
Good information!
My mouse is like new again.
Many thanks
-
-
-
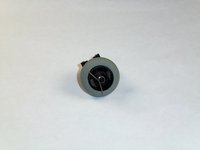
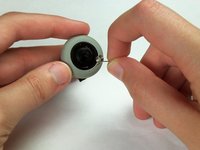
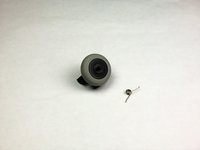
Locate the spring on the scroll wheel, and carefully remove the spring.
-
-
-
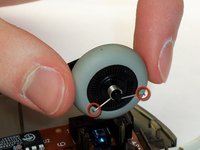
Place the replacement spring on the correct side of the wheel (shown in the images) with the prongs pointing down.
-
-
-
Use the images to locate where the resistance spring is.
-
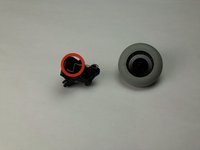
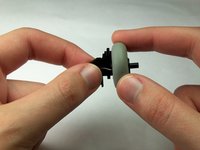
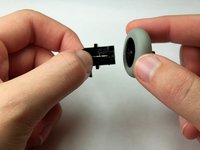
Grab the scroll wheel and its mount and gently pull them apart.
-
To reassemble your device, follow these instructions in reverse order.
To reassemble your device, follow these instructions in reverse order.
Annuleren: ik heb deze handleiding niet afgemaakt.
14 andere personen hebben deze handleiding voltooid.
7Gids Commentaar
Excellent! I took an MBJ58 apart to remove accumulated gunk, and the resistance spring jumped onto my worktable before I noticed where it came from. Thanks for the help, well done!
Heh, me too. Couldn't for the life of me figure out how it went back in. Thanks for the guide!
Same thing happened to me...saved me a trip to the store for a new mouse!!
thanks for taking the time to post these photos!
huh, thank you very much, amazing guide, the only for this product in Internet , and amazingly accurate
Guida utile e ben dettagliata che mi ha consentito di prolungare la vita del mio mouse e soprattutto capire come sistemare le molle !








باز کردن پیچ زیر موس
h sh - Antwoord
There may be a sticker covering the screw hole.
Eric Jensen - Antwoord