Ga door naar hoofdinhoud
Acer Chromebook C731-C8VE Display Assembly Replacement

Acer Chromebook C731-C8VE Display Assembly Replacement

Justin Menninger

Justin Menninger en 3 andere bijdragers

Voor het laatst geüpdatet op October 19, 2022

5 minuten
Gemiddeld

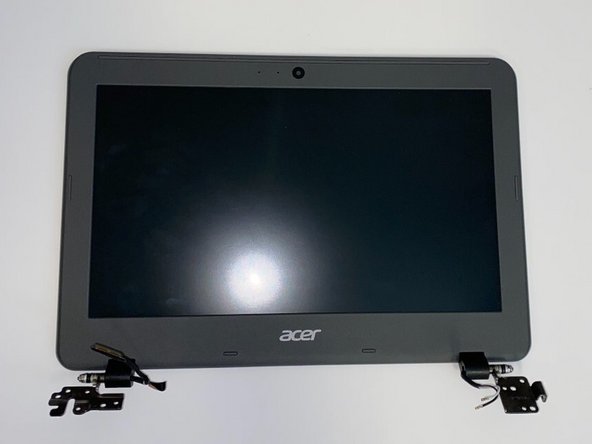
This is the display assembly replacement guide for the Acer Chromebook C731-C8VE. By following the guide, you should be able to completely remove the screen from your device.

Make sure to follow all hazard warnings for your safety.

Wat je nodig hebt

Gereedschap

  1. Acer Chromebook C731-C8VE Display Assembly Replacement, Display Assembly: stap 1, afbeelding 1 van 1
    • Place the Chromebook face down.

  2. Acer Chromebook C731-C8VE Display Assembly Replacement: stap 2, afbeelding 1 van 2 Acer Chromebook C731-C8VE Display Assembly Replacement: stap 2, afbeelding 2 van 2
    • Make sure to completely turn off the device before beginning this step.

    • Use a JIS #00 screwdriver to remove the 11 screws on the underside of the laptop.

    • The 2 mm screws marked orange have washers attached and must be placed in these specific areas.

    • These 2 mm screws do not have washers and will be located on the left and right of the device.

  3. Acer Chromebook C731-C8VE Display Assembly Replacement: stap 3, afbeelding 1 van 3 Acer Chromebook C731-C8VE Display Assembly Replacement: stap 3, afbeelding 2 van 3 Acer Chromebook C731-C8VE Display Assembly Replacement: stap 3, afbeelding 3 van 3
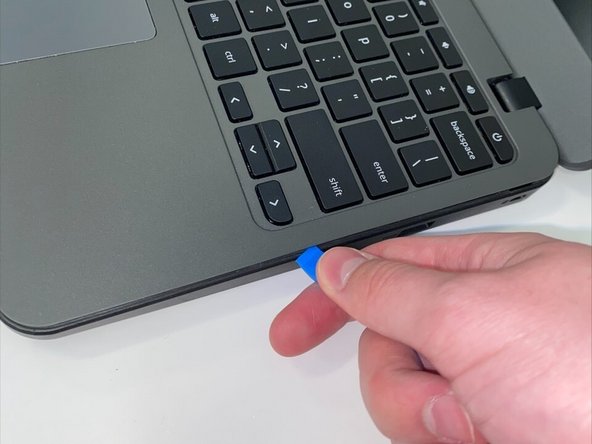
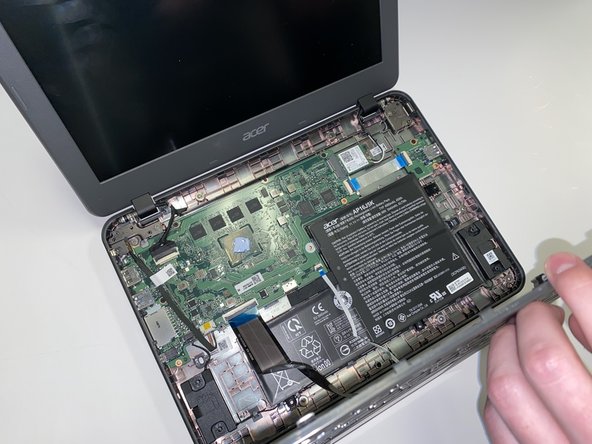
    • Use the iFixit opening tool to remove the keyboard from the device by prying it loose from the base.

  4. Acer Chromebook C731-C8VE Display Assembly Replacement: stap 4, afbeelding 1 van 3 Acer Chromebook C731-C8VE Display Assembly Replacement: stap 4, afbeelding 2 van 3 Acer Chromebook C731-C8VE Display Assembly Replacement: stap 4, afbeelding 3 van 3
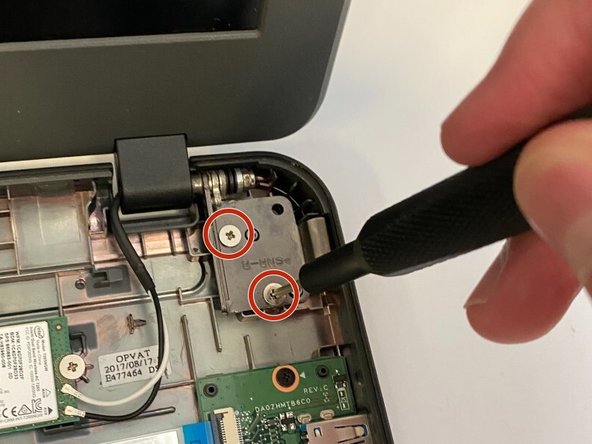
    • Use the JIS #00 screwdriver to remove the four 1.5mm screws that connect the base of the laptop to the screen. There are two screws on each latch.

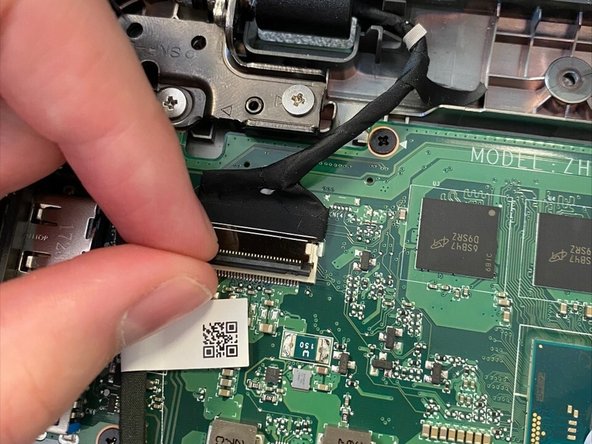
    • Carefully detach the cables that connect the screen to the motherboard. This includes a black display cable that connects to the mother board and two wires that connect to the Wi-Fi card.

  5. Acer Chromebook C731-C8VE Display Assembly Replacement: stap 5, afbeelding 1 van 2 Acer Chromebook C731-C8VE Display Assembly Replacement: stap 5, afbeelding 2 van 2
    • Do this step slowly to ensure that you do not damage the screen or the motherboard.

    • Remove the screen from the base of the device.

Conclusie

To reassemble your device, follow these instructions in reverse order.

Één andere persoon heeft deze handleiding voltooid.

Justin Menninger

Lid sinds: 03/21/22

400 Reputatie

3 handleidingen geschreven

0Gids Commentaar

Voeg opmerking toe

Weergavestatistieken:

Afgelopen 24 uren: 0

Afgelopen 7 dagen: 1

Afgelopen 30 dagen: 8

Altijd: 316