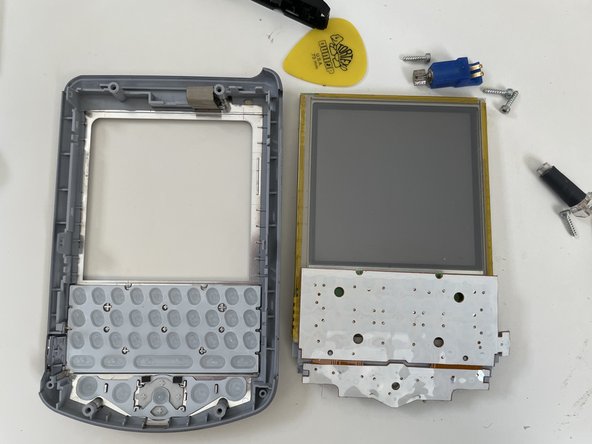
Ga door naar hoofdinhoud

Palm's Tungsten W (i710) is a fine PDA, a good data communicator, and a handy Web device that can also be used as a phone. Unlike other recent convergence devices, it does the work of a PDA first, then focuses on voice communication.

Wat je nodig hebt

Gereedschap

Toon meer…

Deze demontage is geen reparatiehandleiding. Om je Palm Tungsten W (i710) te repareren, gebruik onze reparatiehandleidingen.

  1. Palm Tungsten W (i710) Teardown, Unscrew the visible screws: stap 1, afbeelding 1 van 1
    • First, we unscrew the four T6 torx screws

  2. Palm Tungsten W (i710) Teardown, Peel out the back enclosure: stap 2, afbeelding 1 van 2 Palm Tungsten W (i710) Teardown, Peel out the back enclosure: stap 2, afbeelding 2 van 2
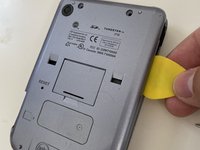
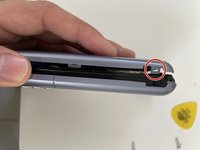
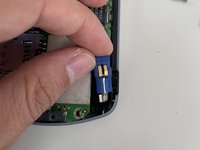
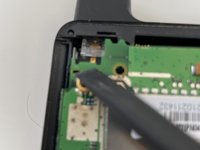
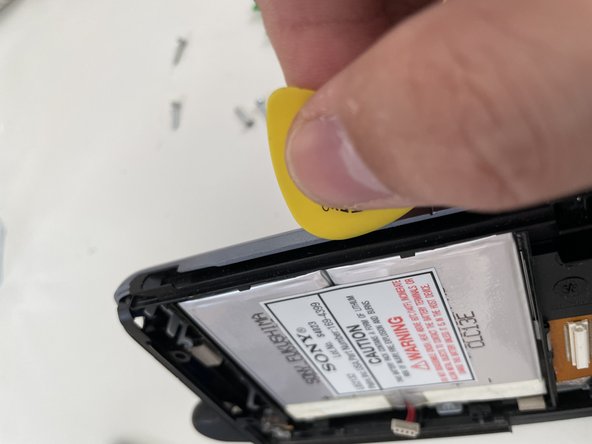
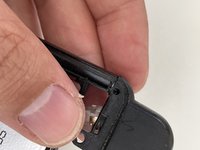
    • Using a pick, slide it carefully by the side where the SD card is inserted.

    • Check the last photo to locate where are the tabs.

  3. Palm Tungsten W (i710) Teardown, Peel the other side: stap 3, afbeelding 1 van 2 Palm Tungsten W (i710) Teardown, Peel the other side: stap 3, afbeelding 2 van 2
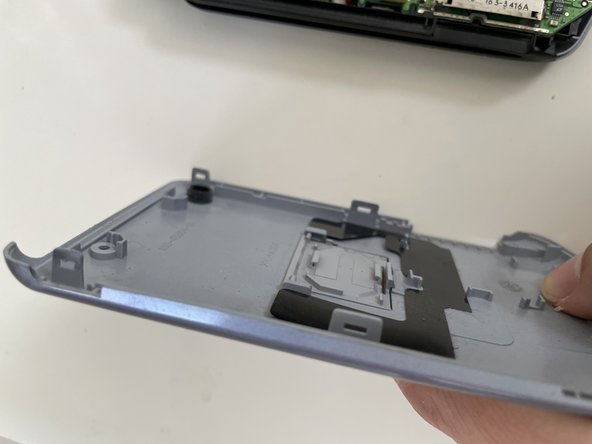
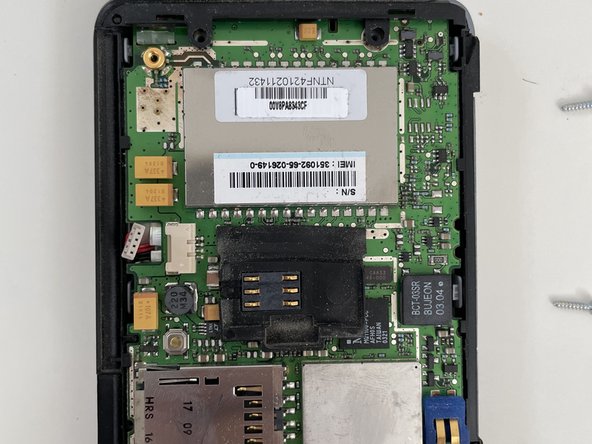
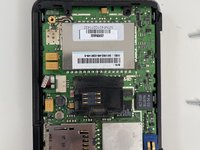
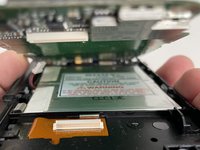
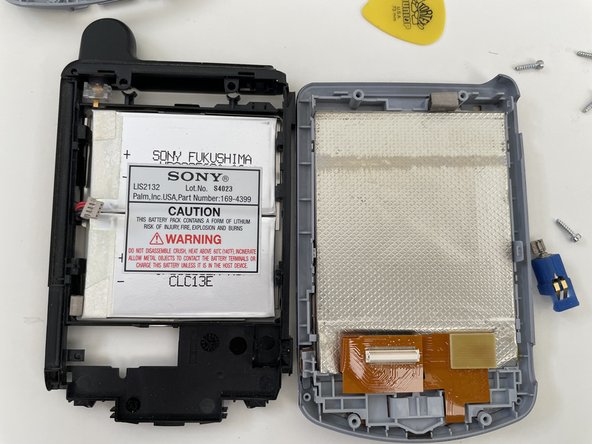
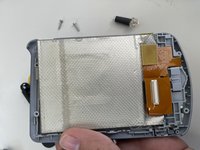
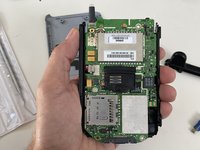
    • Now you can see the internals for the first time.
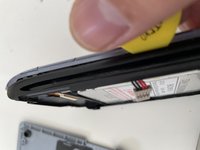
    • Be careful in this side, as the tabs are a little bit deep and is very tricky to pull them. The better is to push the pick and turn it.

    • Don't do like me, I broke one tab 🤦‍♂️

  4. Palm Tungsten W (i710) Teardown, First sight on the internals: stap 4, afbeelding 1 van 1
    • First sight on the internals.

  5. Palm Tungsten W (i710) Teardown, Disconnect the battery: stap 5, afbeelding 1 van 3 Palm Tungsten W (i710) Teardown, Disconnect the battery: stap 5, afbeelding 2 van 3 Palm Tungsten W (i710) Teardown, Disconnect the battery: stap 5, afbeelding 3 van 3
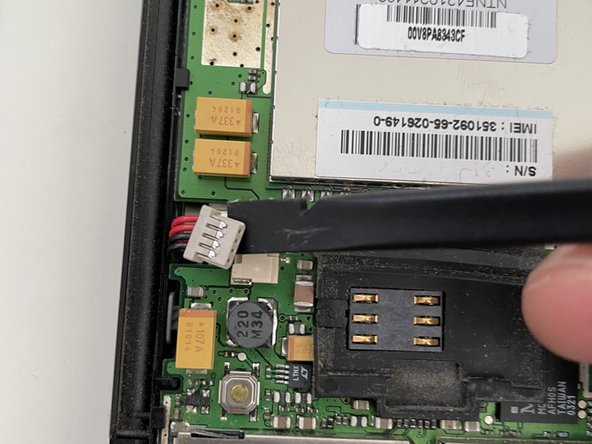
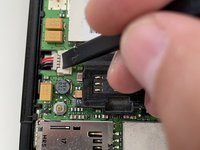
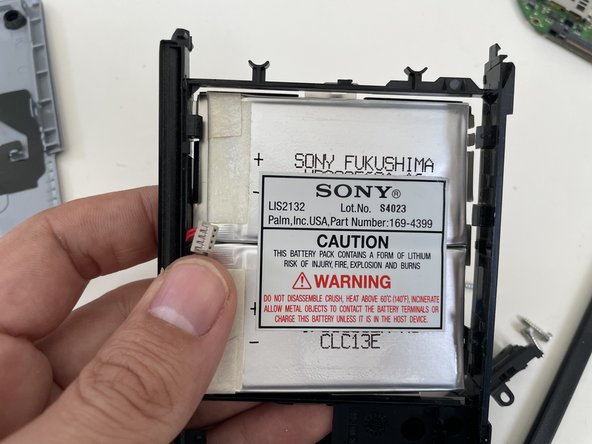
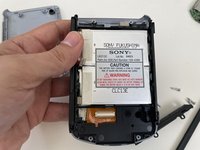
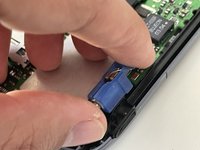
    • Carefully, disconnect the battery connector by pulling it back.

  6. Palm Tungsten W (i710) Teardown, Remove the vibrator: stap 6, afbeelding 1 van 2 Palm Tungsten W (i710) Teardown, Remove the vibrator: stap 6, afbeelding 2 van 2
    • The vibrator is held by pressure.

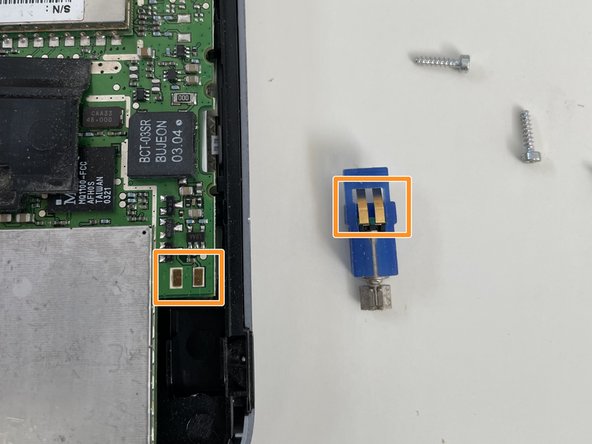
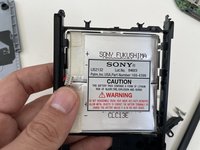
    • To liberate it, just pull it.

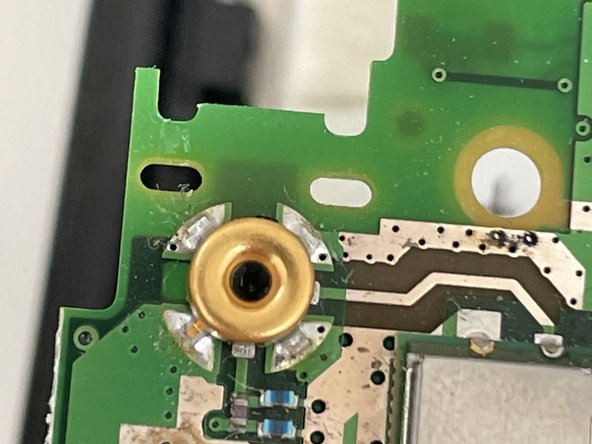
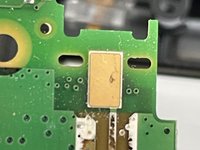
    • You can see the details of the contacts.

  7. Palm Tungsten W (i710) Teardown, Starting to take out the main board: stap 7, afbeelding 1 van 3 Palm Tungsten W (i710) Teardown, Starting to take out the main board: stap 7, afbeelding 2 van 3 Palm Tungsten W (i710) Teardown, Starting to take out the main board: stap 7, afbeelding 3 van 3
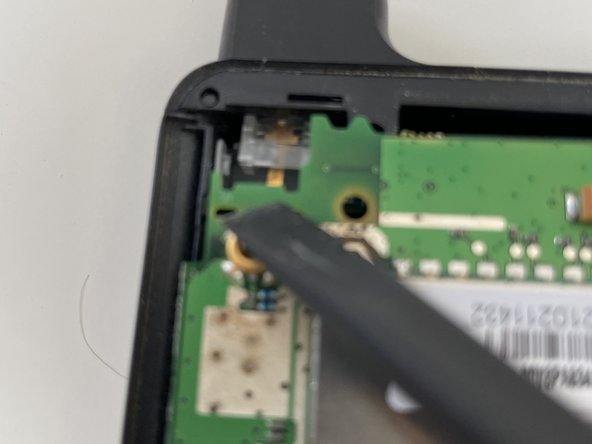
    • To take out the main board, we first need to liberate the side tabs.

    • Start to pull it from the bottom, but don't pull it completely. Let the upper side still sitting on the device.

    • Take care on the top, as the antenna is still attached. We will liberate it in the next step.

  8. Palm Tungsten W (i710) Teardown, Remove the antenna: stap 8, afbeelding 1 van 3 Palm Tungsten W (i710) Teardown, Remove the antenna: stap 8, afbeelding 2 van 3 Palm Tungsten W (i710) Teardown, Remove the antenna: stap 8, afbeelding 3 van 3
    • The antenna is held by a clear plastic piece.

    • To liberate the antenna, take a spudger and pull the plastic up.

    • You can disassembly the black plastic body without taking out the antenna at this step, and remove the antena afterwards (I didn't know it at the moment of this teardown).

  9. Palm Tungsten W (i710) Teardown, Detail of the antenna connector: stap 9, afbeelding 1 van 3 Palm Tungsten W (i710) Teardown, Detail of the antenna connector: stap 9, afbeelding 2 van 3 Palm Tungsten W (i710) Teardown, Detail of the antenna connector: stap 9, afbeelding 3 van 3
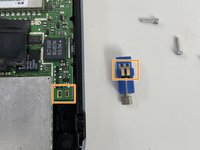
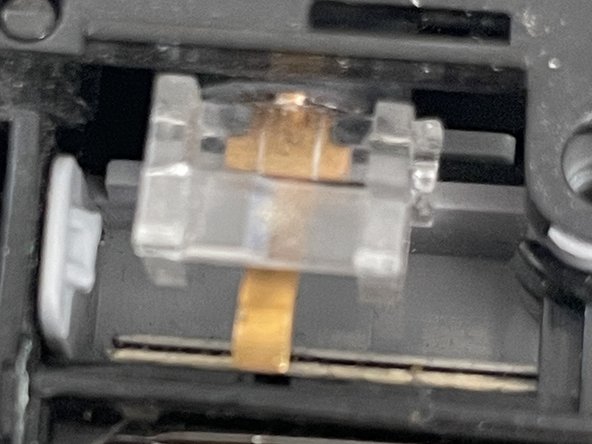
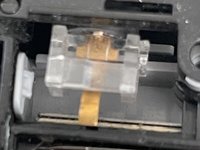
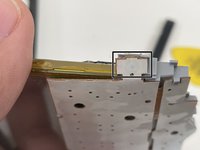
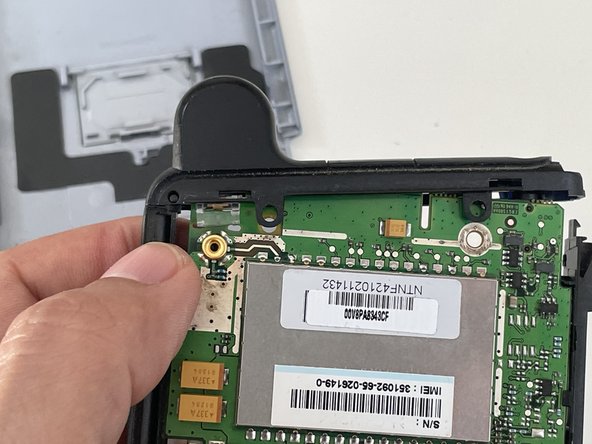
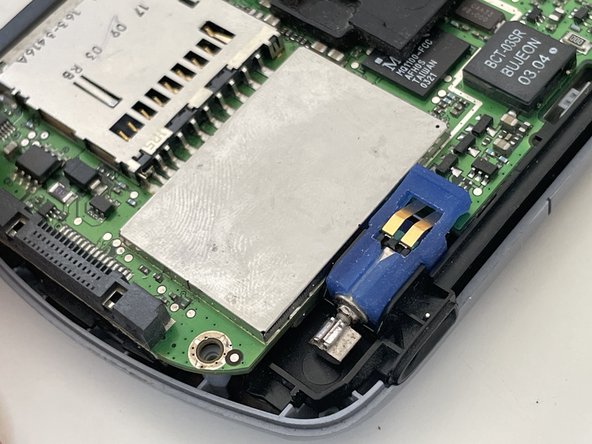
    • We can see the contact of the antena with the board.

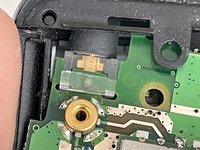
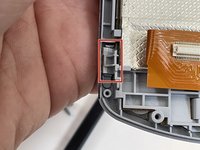
    • At the other side we can see a "normal" connector for an external antenna.

    • Now you can understand why that black plastic cover is in the back. You can take it out and connect a more powerful external antenna.

  10. Palm Tungsten W (i710) Teardown, Main board liberated: stap 10, afbeelding 1 van 1
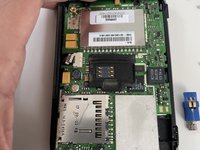
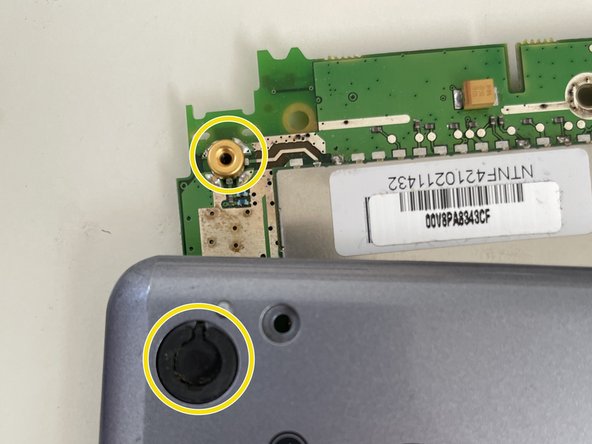
    • The antenna connector is now liberated and you con take out completely the main board.

  11. Palm Tungsten W (i710) Teardown, Front cover: stap 11, afbeelding 1 van 3 Palm Tungsten W (i710) Teardown, Front cover: stap 11, afbeelding 2 van 3 Palm Tungsten W (i710) Teardown, Front cover: stap 11, afbeelding 3 van 3
    • Now we are going to take out the front cover.

    • As with the front cover, the side where the SD card is located is easier to take out. Be careful with the other side, which is more tricky.

  12. Palm Tungsten W (i710) Teardown, Upper plastic piece 1/2: stap 12, afbeelding 1 van 2 Palm Tungsten W (i710) Teardown, Upper plastic piece 1/2: stap 12, afbeelding 2 van 2
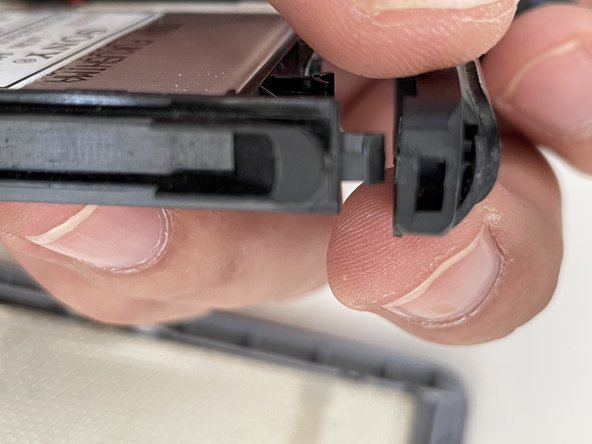
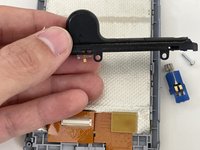
    • We now liberate the upper black plastic piece of the.

    • The piece has two different sides like a "door". One is like a hinge, the other is like a latch.

    • We start by opening the "latch" side.

  13. Palm Tungsten W (i710) Teardown, Upper plastic piece 2/2: stap 13, afbeelding 1 van 3 Palm Tungsten W (i710) Teardown, Upper plastic piece 2/2: stap 13, afbeelding 2 van 3 Palm Tungsten W (i710) Teardown, Upper plastic piece 2/2: stap 13, afbeelding 3 van 3
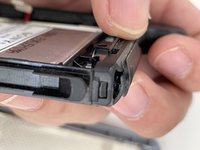
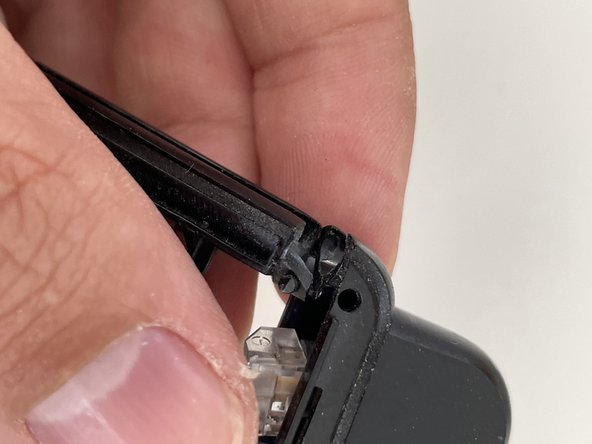
    • Now with the hinge side.

    • I opted to take out both sides one by one.

    • Look at the plastic piece of the antenna still inside that bump.

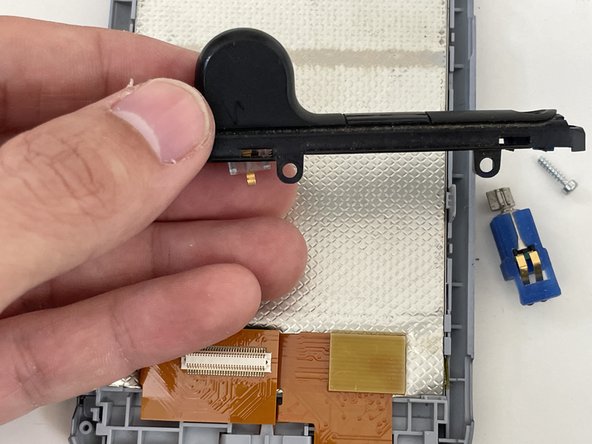
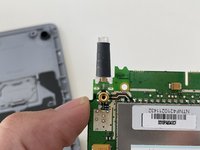
    • You can also take out the antenna and put it aside.

  14. Palm Tungsten W (i710) Teardown, Disassembly the battery: stap 14, afbeelding 1 van 2 Palm Tungsten W (i710) Teardown, Disassembly the battery: stap 14, afbeelding 2 van 2
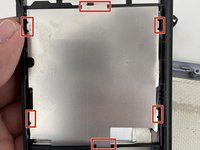
    • The battery is held by 6 tabs. To liberate it, bend them.

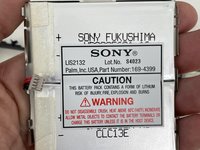
    • You can see now the two parallel batteries this Palm has in its internals.

  15. Palm Tungsten W (i710) Teardown, Screen: stap 15, afbeelding 1 van 2 Palm Tungsten W (i710) Teardown, Screen: stap 15, afbeelding 2 van 2
    • The screen is free to take it from the plastic front cover.

    • Take care not to loose the buttons.

  16. Palm Tungsten W (i710) Teardown, Screen detail: stap 16, afbeelding 1 van 1
    • The screen cannot be detached from the keyboard (at least with high risks).

    • When reassembling the device, take special care with the plastic of the keyboard.

    • These tabs needs to "hug" the screen.

  17. Palm Tungsten W (i710) Teardown, Reassembling precautions - Power button: stap 17, afbeelding 1 van 3 Palm Tungsten W (i710) Teardown, Reassembling precautions - Power button: stap 17, afbeelding 2 van 3 Palm Tungsten W (i710) Teardown, Reassembling precautions - Power button: stap 17, afbeelding 3 van 3
    • To reassemble the PDA, it is mainly a matter of reversing the previous steps, but with some precautions.

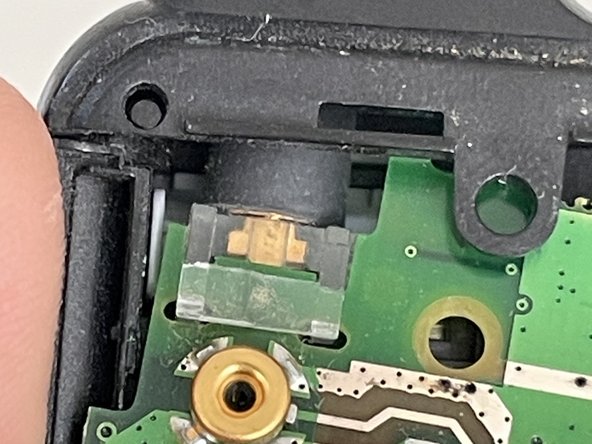
    • Put special care on the power on button. The tabs needs to be properly set.

  18. Palm Tungsten W (i710) Teardown, Reassembling precautions - Battery: stap 18, afbeelding 1 van 2 Palm Tungsten W (i710) Teardown, Reassembling precautions - Battery: stap 18, afbeelding 2 van 2
    • For the battery, pay attention to the metal tabs.

  19. Palm Tungsten W (i710) Teardown, Reassembling precautions - Antenna: stap 19, afbeelding 1 van 3 Palm Tungsten W (i710) Teardown, Reassembling precautions - Antenna: stap 19, afbeelding 2 van 3 Palm Tungsten W (i710) Teardown, Reassembling precautions - Antenna: stap 19, afbeelding 3 van 3
    • Put the antenna in its place first, before doing any other assembly of the board.

    • Add the plastic enclosure to the board.

    • And finally add the upper plastic part.

  20. Palm Tungsten W (i710) Teardown, Reassembling precautions - Vibrator: stap 20, afbeelding 1 van 2 Palm Tungsten W (i710) Teardown, Reassembling precautions - Vibrator: stap 20, afbeelding 2 van 2
    • Now it is time of the vibrator.

    • From this point, no more precautions, just complete the assembly

Alvaro Gutierrez Romero

Lid sinds: 03/25/12

712 Reputatie

3 handleidingen geschreven

0 opmerkingen

Voeg opmerking toe

Weergavestatistieken:

Afgelopen 24 uren: 0

Afgelopen 7 dagen: 8

Afgelopen 30 dagen: 44

Altijd: 274