Inleiding
Ga naar stap 1We picked up the new Mac mini from our local Apple store and took it apart!
Wat je nodig hebt


-
-
The Mac mini for this First Look was graciously provided by our friends at macminicolo, a Mac mini colocation service. They allow your Mac mini to be used as a surprisingly powerful and inexpensive server.
-
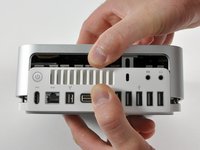
Ladies and gentlemen, without further ado, allow us to introduce the new and improved Mac mini!
-
We immediately tried to open the mini using our iMac opening tool, used in yesterday's iMac First Look.
-
It did not work.
-
-
-
Let's rock this thing!
-
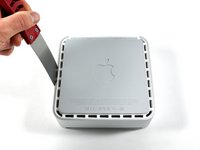
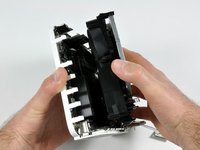
Carefully insert a putty knife into the crevice in between the top cover and bottom housing. Start on the left side first.
-
Gently enlarge the existing crevice by twisting the putty knife downward and away from the mini.
-
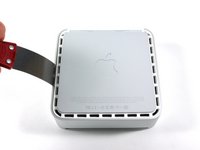
Repeat the prying motion until a portion of the bottom housing has been nudged upward.
-
-
-
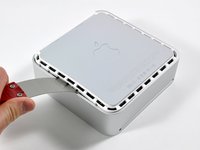
Repeat the same prying procedure on the right side.
-
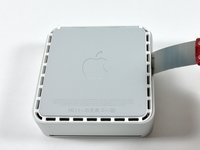
The top cover should now be marginally separated from the bottom housing. Use your fingers to completely separate the two, starting with the I/O side of the mini.
-
The top cover does not have any cables attaching it to the bottom housing; it should now be completely detached from the bottom.
-
-
-
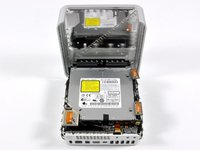
Can you hear me now? Excellent.
-
The wireless board contains a Broadcom BCM4312KFBGH WiFi transceiver on it.
-
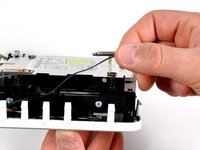
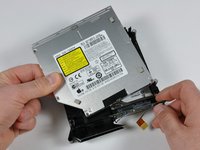
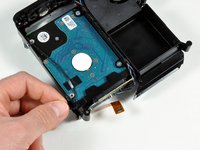
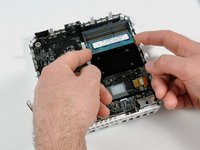
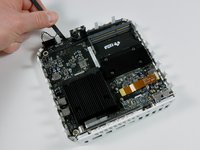
The new mini houses three wireless communications antennas, one for use with the built-in Bluetooth and two for the Airport Extreme wireless 802.11n card.
-
All three antennas need to be removed before accessing the hardware underneath.
-
-
-
-
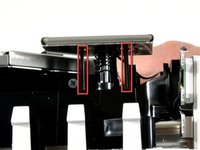
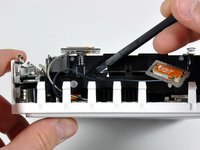
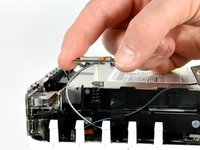
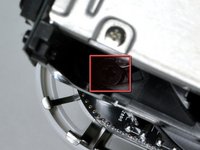
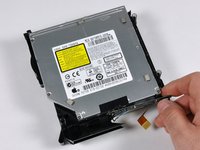
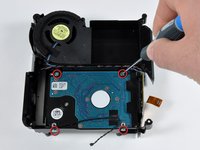
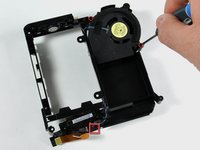
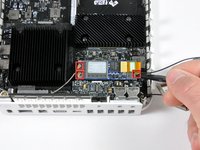
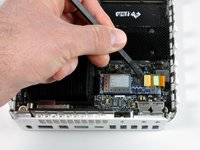
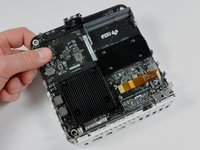
On to the AirPort/Bluetooth board removal. A couple of steps are needed to remove the board:
-
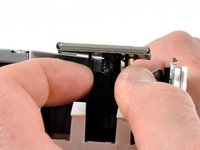
Disconnect the three antennas (marked in red).
-
Disconnect the AirPort/Bluetooth communication cable (second photo).
-
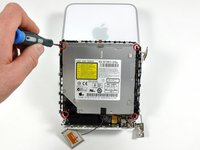
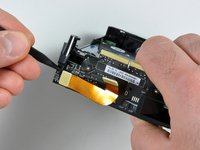
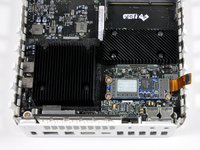
Remove three Phillips screws (third photo) and then completely remove the AirPort/Bluetooth board.
-
-
-
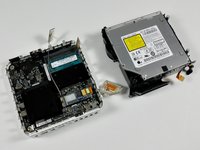
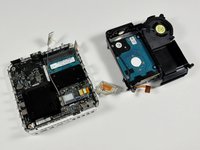
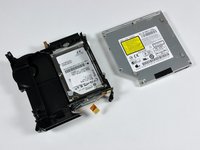
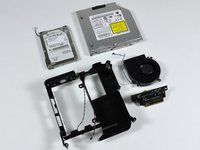
All the goodies of the disassembly in one place. Taking apart the Mac mini was a lot simpler than the iMac we took apart yesterday.
-
Putting the mini back together was easy too, it's running great. In fact, we've figured out how to add one terabyte of internal storage to our mini.
-
We also did these product teardowns recently:
-
Shameless plug: We sell both Mac parts, iPod parts, and tools.
-


5 opmerkingen
Is the CPU a standard pin configuration? If so one should be able to desolder it and either fit a socket or solder in a upgrade.
Does anybody have boardview schematics for this specific model? Revision C. I can only find Rev A boards online and even then they’re not full board views. My Mini is having some bad logic board problems (fans spin up to max speed immediately upon plugging in, no power button required), diagnostic LEDs don’t turn on, and other than the fan it’s the only sign of life it has. The Mini will just sit there for however long on full speed fans unless I unplug the machine, no display, and unresponsive to me either pressing the power button or jumping the pins. If I’m lucky I can leave it sit for a couple hours, unplug it and replug it a few times, switch a RAM stick to the other slot or some other obscure fix, and then get the diagnostic LED to turn back on but the Mini just panics upon starting and won’t get into OS X. After it panics it’ll reboot and the diagnostic LEDs are gone again, and it’s back to the fan turning itself on and not turning off. lts really hit and miss at this point and unless my one wire circuit is destroyed I’m not sure why my fan is being turned on by ghosts. I’ve gotten the device to boot with my RAM (6GB DDR3) so I don’t think that’s the issue but I’m leaning towards the idea it’s a bad SMC. Of course that’s not a super easy repair so a schematic or board view would help a bunch. If anyone else has dealt with any similar problems I’d appreciate some insight!