Ga door naar hoofdinhoud

iPhone 8 Rear Camera Replacement

Wat je nodig hebt

  1. iPhone 8 Rear Camera Replacement, Remove the pentalobe screws: stap 1, afbeelding 1 van 1
    • Before you begin, discharge your iPhone battery below 25%. A charged lithium-ion battery can catch fire and/or explode if accidentally punctured.

    • Power off your iPhone before beginning disassembly.

    • Remove the two 3.5 mm pentalobe screws on the bottom edge of the iPhone.

    • Opening the iPhone's display will compromise its waterproof seals. Have replacement seals ready before you proceed past this step, or take care to avoid liquid exposure if you reassemble your iPhone without replacing the seals.

  2. iPhone 8 Rear Camera Replacement, Heat the display: stap 2, afbeelding 1 van 1
    • Heating the lower edge of the iPhone will help soften the adhesive securing the display, making it easier to open.

    • Use a hairdryer or prepare an iOpener and apply it to the lower edge of the phone for about 90 seconds in order to soften up the adhesive underneath.

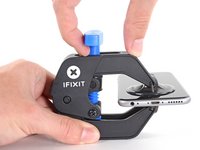
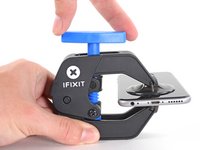
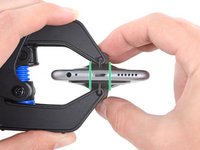
  3. iPhone 8 Rear Camera Replacement, Anti-Clamp instructions: stap 3, afbeelding 1 van 3 iPhone 8 Rear Camera Replacement, Anti-Clamp instructions: stap 3, afbeelding 2 van 3 iPhone 8 Rear Camera Replacement, Anti-Clamp instructions: stap 3, afbeelding 3 van 3
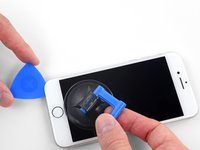
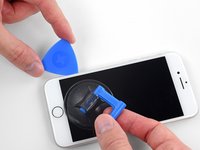
    • The next two steps demonstrate the Anti-Clamp, a tool we designed to make the opening procedure easier. If you aren't using the Anti-Clamp, skip down two steps for an alternate method.

    • For complete instructions on how to use the Anti-Clamp, check out this guide.

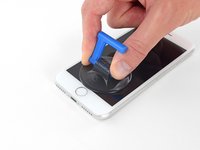
    • Pull the blue handle towards the hinge to disengage opening mode.

    • Position the suction cups just above the home button on the screen—one on the front, and one on the back.

    • Push down on the cups to apply suction to the desired area.

    • If you find that the surface of your device is too slippery for the Anti-Clamp to hold onto, you can use packing tape to create a grippier surface.

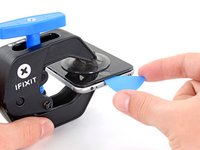
  4. iPhone 8 Rear Camera Replacement: stap 4, afbeelding 1 van 3 iPhone 8 Rear Camera Replacement: stap 4, afbeelding 2 van 3 iPhone 8 Rear Camera Replacement: stap 4, afbeelding 3 van 3
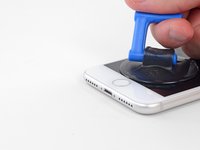
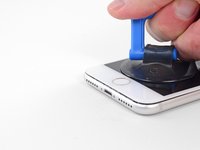
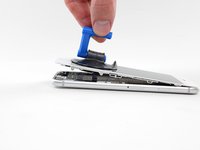
    • Push the blue handle away from the hinge to engage opening mode.

    • Turn the handle clockwise until you see the cups start to stretch.

    • Make sure the suction cups remain aligned to each other. If they begin to slip out of alignment, loosen the suction cups slightly and realign the arms.

    • Wait one minute to give the adhesive a chance to release and for the bottom of the screen to open.

    • If the Anti-Clamp doesn't create a sufficient gap, apply more heat to the area and rotate the handle clockwise half a turn.

    • Don't crank more than a half a turn at a time, and wait one minute between turns. Let the Anti-Clamp and time do the work for you.

    • Skip the next two steps.

  5. iPhone 8 Rear Camera Replacement, Separate the display: stap 5, afbeelding 1 van 2 iPhone 8 Rear Camera Replacement, Separate the display: stap 5, afbeelding 2 van 2
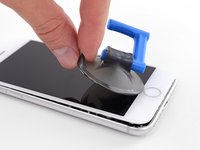
    • Apply a suction cup to the lower half of the front panel, just above the home button.

    • Be sure the suction cup does not overlap with the home button, as this will prevent a seal from forming between the suction cup and front glass.

    • If your display is badly cracked, covering it with a layer of clear packing tape may allow the suction cup to adhere. Alternatively, very strong tape may be used instead of the suction cup. If all else fails, you can superglue the suction cup to the broken screen.

  6. iPhone 8 Rear Camera Replacement: stap 6, afbeelding 1 van 3 iPhone 8 Rear Camera Replacement: stap 6, afbeelding 2 van 3 iPhone 8 Rear Camera Replacement: stap 6, afbeelding 3 van 3
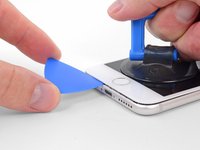
    • Pull up on the suction cup with firm, constant pressure to create a slight gap between the front panel and rear case.

    • Insert an opening pick into the gap.

    • The watertight adhesive holding the display in place is very strong; creating this initial gap takes a significant amount of force. If you're having a hard time opening a gap, apply more heat, and gently rock the screen up and down to weaken the adhesive until you create enough of a gap to insert your tool.

  7. iPhone 8 Rear Camera Replacement: stap 7, afbeelding 1 van 3 iPhone 8 Rear Camera Replacement: stap 7, afbeelding 2 van 3 iPhone 8 Rear Camera Replacement: stap 7, afbeelding 3 van 3
    • Slide the opening pick up the left edge of the phone starting at the lower edge and moving towards the volume control buttons and silent switch, breaking up the adhesive holding the display in place.

    • Stop near the top left corner of the display.

    • Do not try to pry the top edge of the display away from the rear case, as it is held in place by plastic clips that may break.

  8. iPhone 8 Rear Camera Replacement: stap 8, afbeelding 1 van 3 iPhone 8 Rear Camera Replacement: stap 8, afbeelding 2 van 3 iPhone 8 Rear Camera Replacement: stap 8, afbeelding 3 van 3
    • Re-insert your tool at the lower right corner of the iPhone, and slide it around the corner and up the right side of the phone to separate the adhesive.

    • Don't insert the pick very far, or you may damage the display cables along this side of the iPhone. Insert it only a few millimeters, or about the width of the display bezel.

  9. iPhone 8 Rear Camera Replacement: stap 9, afbeelding 1 van 2 iPhone 8 Rear Camera Replacement: stap 9, afbeelding 2 van 2
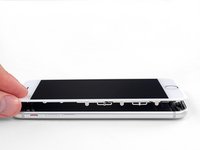
    • Gently pull up on the suction cup to lift up the bottom edge of the display.

    • Do not raise the display more than 15º or you'll risk straining or tearing the ribbon cables connecting the display.

    • Pull on the small nub on the suction cup to remove it from the front panel.

  10. iPhone 8 Rear Camera Replacement: stap 10, afbeelding 1 van 3 iPhone 8 Rear Camera Replacement: stap 10, afbeelding 2 van 3 iPhone 8 Rear Camera Replacement: stap 10, afbeelding 3 van 3
    • Slide an opening pick underneath the display around the top left corner and along the top edge of the phone to loosen the last of the adhesive.

  11. iPhone 8 Rear Camera Replacement: stap 11, afbeelding 1 van 2 iPhone 8 Rear Camera Replacement: stap 11, afbeelding 2 van 2
    • Slide the display assembly slightly down (away from the top edge of the phone) to disengage the clips holding it to the rear case.

  12. iPhone 8 Rear Camera Replacement: stap 12, afbeelding 1 van 3 iPhone 8 Rear Camera Replacement: stap 12, afbeelding 2 van 3 iPhone 8 Rear Camera Replacement: stap 12, afbeelding 3 van 3
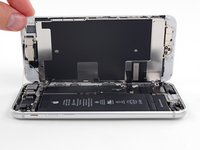
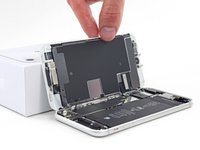
    • Open the iPhone by swinging the display up from the left side, like the back cover of a book.

    • Don't try to fully separate the display yet, as several fragile ribbon cables still connect it to the iPhone's logic board.

    • Lean the display against something to keep it propped up while you're working on the phone.

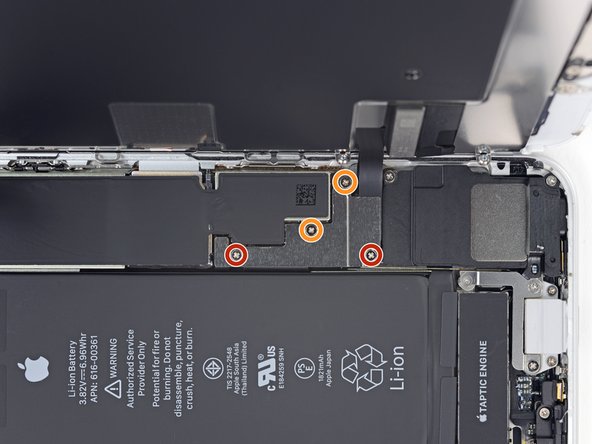
    • Remove four Phillips screws securing the lower display cable bracket to the logic board, of the following lengths:

    • Two 1.3 mm screws

    • Two 2.8 mm screws

    • Throughout this guide, keep careful track of your screws so that each one goes back where it came from during reassembly. Installing a screw in the wrong place can cause permanent damage.

    • Remove the bracket.

  13. iPhone 8 Rear Camera Replacement: stap 14, afbeelding 1 van 2 iPhone 8 Rear Camera Replacement: stap 14, afbeelding 2 van 2
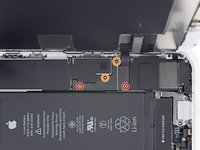
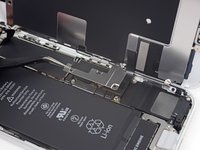
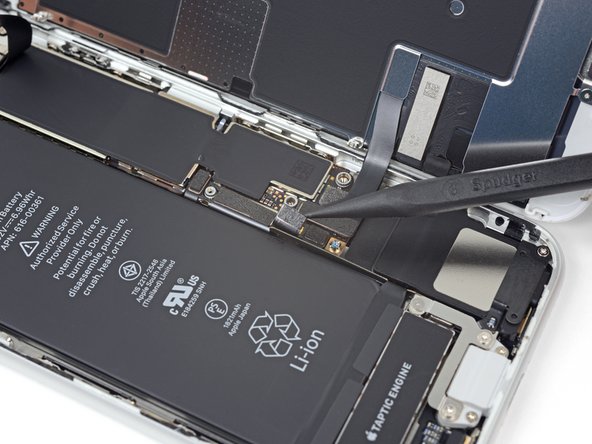
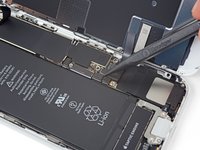
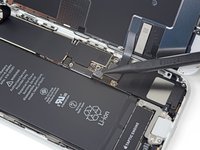
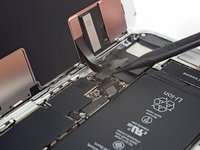
    • Use the point of a spudger to pry the battery connector out of its socket in the logic board.

    • Bend the battery connector cable slightly away from the logic board to prevent it from accidentally making contact with the socket and providing power to the phone during your repair.

  14. iPhone 8 Rear Camera Replacement, Disconnect the display and digitizer: stap 15, afbeelding 1 van 2 iPhone 8 Rear Camera Replacement, Disconnect the display and digitizer: stap 15, afbeelding 2 van 2
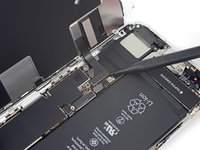
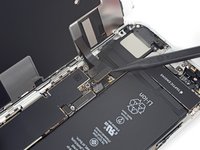
    • Use the point of a spudger to pry the lower display connector out of its socket.

    • To re-attach press connectors like this one, press down on one side until it clicks into place, then repeat on the other side. Do not press down on the middle. If the connector is even slightly misaligned, the connector can bend, causing permanent damage.

  15. iPhone 8 Rear Camera Replacement: stap 16, afbeelding 1 van 2 iPhone 8 Rear Camera Replacement: stap 16, afbeelding 2 van 2
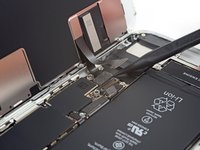
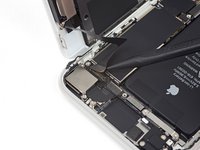
    • Use the point of a spudger to disconnect the second lower display cable.

  16. iPhone 8 Rear Camera Replacement: stap 17, afbeelding 1 van 2 iPhone 8 Rear Camera Replacement: stap 17, afbeelding 2 van 2
    • Remove the three 1.3 mm Phillips screws securing the bracket over the front panel sensor assembly connector.

    • Remove the bracket.

  17. iPhone 8 Rear Camera Replacement: stap 18, afbeelding 1 van 2 iPhone 8 Rear Camera Replacement: stap 18, afbeelding 2 van 2
    • Use the point of a spudger to disconnect the front panel sensor assembly connector.

  18. iPhone 8 Rear Camera Replacement, Remove the display assembly: stap 19, afbeelding 1 van 1
  19. iPhone 8 Rear Camera Replacement, Disconnect the rear camera: stap 20, afbeelding 1 van 2 iPhone 8 Rear Camera Replacement, Disconnect the rear camera: stap 20, afbeelding 2 van 2
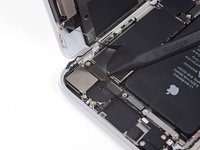
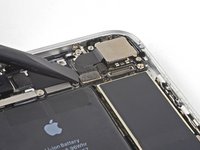
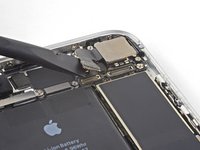
    • Use the flat end of a spudger to disconnect the camera cable connector by prying it straight up from its socket.

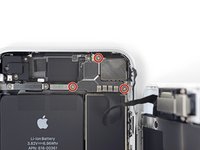
    • Remove the two screws securing the rear-facing camera bracket:

    • One 3.0 mm standoff screw

    • One 3.1 mm Phillips screw

    • Standoff screws are best removed using a standoff screwdriver or bit.

    • In a pinch, a small flathead screwdriver will do the job—but use extra caution to ensure it doesn't slip and damage surrounding components.

  20. iPhone 8 Rear Camera Replacement: stap 22, afbeelding 1 van 1
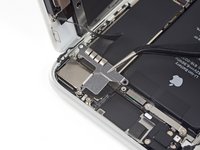
    • Remove the rear-facing camera bracket.

  21. iPhone 8 Rear Camera Replacement, Remove the rear camera: stap 23, afbeelding 1 van 2 iPhone 8 Rear Camera Replacement, Remove the rear camera: stap 23, afbeelding 2 van 2
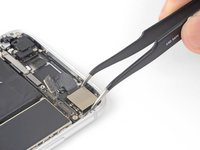
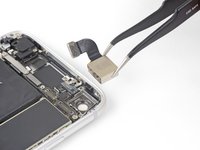
    • Remove the rear camera by lifting it straight up out of its recess.

Conclusie

To reassemble your device, follow these instructions in reverse order.

Take your e-waste to an R2 or e-Stewards certified recycler.

Repair didn’t go as planned? Check out our iPhone 8 Answers community for troubleshooting help.

32 andere personen hebben deze handleiding voltooid.

Arthur Shi

Lid sinds: 01/03/18

216.446 Reputatie

440 handleidingen geschreven

Team

iFixit Lid van iFixit

Community

139 Leden

16.857 handleidingen geschreven

7 opmerkingen

Does the rear camera assembly include the camera glass?

Jacob Mattrella - Antwoord

Hi Jacob,

The rear camera assembly is only the module itself. It does not include the glass mounted on the rear case.

Arthur Shi -

Is the iPhone still waterproof after the repair?

Thorn Deil - Antwoord

Many people say that it’s not…

Even if you replace the adhesives securing the display.

The same goes with the rubber protecting the hole where the cable enter, or the rubbers or what ever that It’s protecting the buttons to keep the water away …

With time this protective things gets old and fail to do it’s job, it’s normal.

But I Guess that it’s better than not replacing the adhesives at all…

David Novo - Antwoord

Does this camera module also works for the iPhone 7? Or should I only stick to the iPhone 7 one? That could be a nice upgrade if I already need to change it

Carlos gonzalez - Antwoord

Voeg opmerking toe

Weergavestatistieken:

Afgelopen 24 uren: 47

Afgelopen 7 dagen: 261

Afgelopen 30 dagen: 1,232

Altijd: 75,141