Inleiding
Follow this guide to remove or replace the left Bluetooth and Wi-Fi antenna in an iPad 7.
Note: this guide is for the LTE version only. For the Wi-Fi version, click here.
Some of the instructions in this guide were taken from a previous model. There are small differences between models, but the overall procedure is very similar.
You'll need replacement adhesive in order to complete this repair.
Wat je nodig hebt
-
-
Heat an iOpener and apply it to the left edge of the device for two minutes.
-
-
-
While you're waiting for the adhesive to loosen, note the following areas that are sensitive to prying:
-
Front camera
-
Antennas
-
Display cables
-
-
Gereedschap gebruikt in deze stap:Clampy - Anti-Clamp$24.95
-
Pull the blue handle backwards to unlock the Anti-Clamp's arms.
-
Place an object under your iPad so it rests level between the suction cups.
-
Position the suction cups near the middle of the left edge—one on the top, and one on the bottom.
-
Hold the bottom of the Anti-Clamp steady and firmly press down on the top cup to apply suction.
-
-
-
Wait one minute to give the adhesive a chance to release and present an opening gap.
-
If your screen isn't getting hot enough, you can use a hair dryer to heat along the left edge of the iPad.
-
Insert an opening pick under the digitizer when the Anti-Clamp creates a large enough gap.
-
Skip the next step.
-
-
-
Once the screen is warm to touch, apply a suction handle to the left edge of the screen and as close to the edge as possible.
-
Lift the screen with the suction handle to create a small gap between the digitizer and the frame.
-
Insert an opening pick into the gap between the digitizer and the frame.
-
-
-
Insert a second opening pick into the gap you just created.
-
Slide the pick toward the bottom-left corner of the device to separate the adhesive.
-
Leave the pick in the bottom-left corner to prevent the adhesive from re-sealing.
-
-
-
Heat an iOpener and apply it to the top edge of the device for two minutes.
-
-
-
Rotate the pick around the top-left corner of the device to separate the adhesive.
-
-
-
Slide the opening pick along the top edge of the device, stopping just before you reach the front camera.
-
-
-
Heat an iOpener and apply it to the right edge of the device for two minutes.
-
-
-
Rotate the pick around the top-right corner of the device to separate the adhesive.
-
-
-
Insert a new opening pick and slide it to the middle of the iPad's right edge.
-
-
-
Heat an iOpener and apply it to the bottom edge of the device for two minutes.
-
-
-
-
Slide the bottom-left pick to the bottom-left corner to separate the adhesive.
-
Leave the pick in the bottom-left corner before moving to the next step.
-
-
-
Insert a new opening pick into the gap you just created on the bottom edge of the iPad.
-
Slide the pick over the antenna, stopping just before the home button.
-
Leave the pick to the left of the home button before continuing.
-
-
-
Heat an iOpener and apply it to the right edge of the device for two minutes.
-
-
-
While supporting the digitizer, slide an opening pick between the two display cables to separate the last of the adhesive.
-
-
Gereedschap gebruikt in deze stap:Magnetic Project Mat$19.95
-
Use a Phillips screwdriver to remove the four 4.3 mm-long screws securing the LCD to the frame.
-
Remove any tape obscuring the LCD screws.
-
-
-
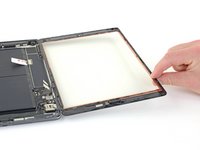
Use the flat end of a spudger to pry the LCD out of its recess just enough to grab it with your fingers.
-
Flip the iPad LCD like a page in a book, lifting near the camera and turning it over the home button end of the rear case.
-
Lay the LCD down onto a clean, soft, lint-free surface to allow access to the display cables.
-
-
-
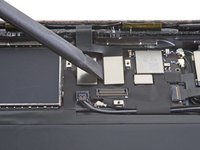
Use a Phillips screwdriver to remove the single 2.3 mm-long screw securing the battery connector to the logic board.
-
-
-
Slide the battery blocker underneath the logic board's battery connector at a 35 degree angle.
-
Leave the battery blocker in place as you work.
-
-
-
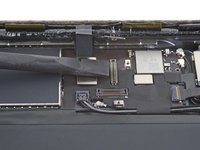
Use a Phillips screwdriver to remove the three 1.4 mm-long screws securing the display cable bracket.
-
-
-
Use the flat end of a spudger to disconnect the LCD cable by lifting straight up on the press connector.
-
-
Gereedschap gebruikt in deze stap:Tweezers$4.99
-
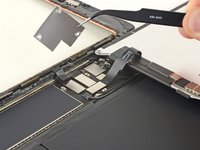
Use a pair of tweezers to peel off the tape covering the home button cable ZIF connector.
-
-
-
Use the tip of a spudger, an opening tool, or your fingernail to flip up the small, hinged locking flap on the home button cable ZIF connector.
-
-
-
Use the flat end of a spudger to disconnect the two digitizer cables by lifting straight up on the press connectors.
-
-
-
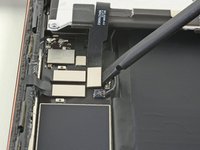
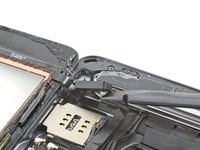
Use the flat end of a spudger to pry up the vibration isolator below the SIM card reader.
-
Remove the vibration isolator.
-
-
Gereedschap gebruikt in deze stap:Polyimide Tape$9.99
-
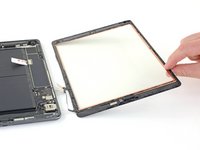
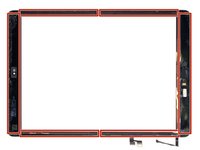
Remove the front panel assembly.
-
If you experience "ghost" or "phantom" touch input issues with your new display, this can be resolved by adding a layer of very thin insulating tape, such as Kapton (polyimide) tape, to the highlighted areas on the back of the panel. iFixit replacement digitizers come with the proper insulation and should not require the addition of any tape.
-
-
-
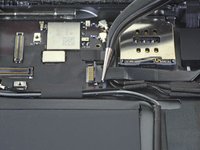
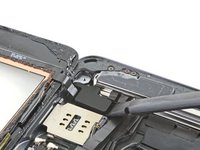
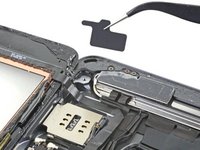
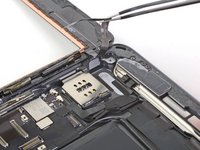
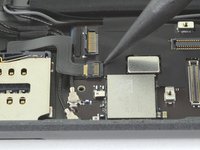
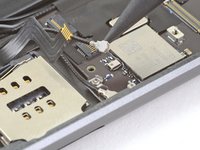
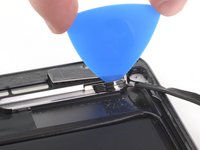
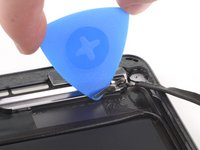
Use the tip of a spudger, an opening tool, or your fingernail to flip up the small, hinged locking flap on the SIM card reader cable ZIF connector.
-
-
-
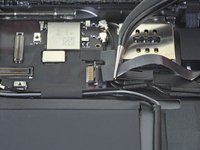
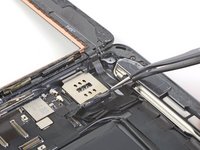
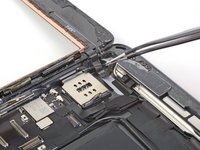
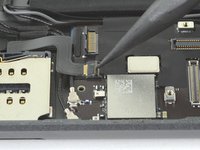
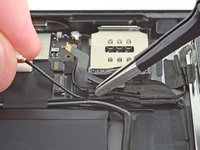
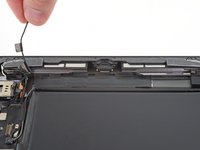
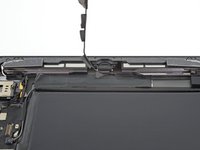
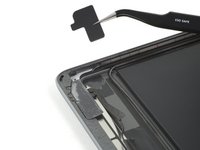
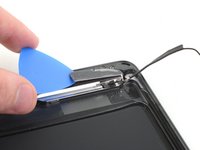
Insert the pointed end of a spudger under the left antenna cable and lift straight up to disconnect it.
-
-
-
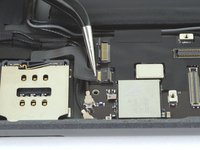
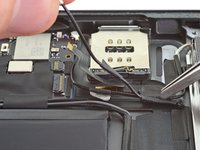
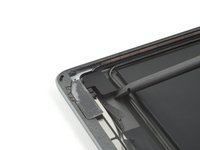
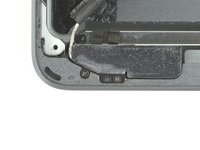
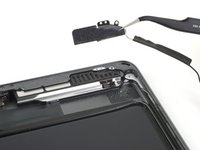
Use the flat end of a spudger to pry up the vibration isolator at the bottom left corner of the iPad.
-
Use a pair of tweezers to remove the vibration isolator.
-
-
-
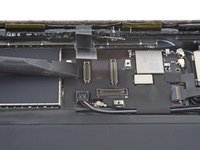
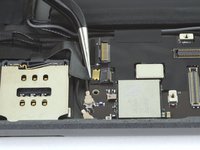
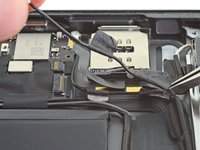
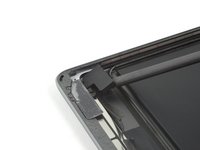
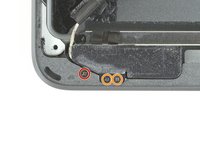
Use a Phillips screwdriver to remove the three screws securing the right antenna:
-
One 2.3 mm-long screw
-
Two 1.4 mm-long screws
-


To reassemble your device, follow these instructions in reverse order.
Take your e-waste to an R2 or e-Stewards certified recycler.
Repair didn’t go as planned? Try some basic troubleshooting, or ask our iPad 7 Answers community for help.
To reassemble your device, follow these instructions in reverse order.
Take your e-waste to an R2 or e-Stewards certified recycler.
Repair didn’t go as planned? Try some basic troubleshooting, or ask our iPad 7 Answers community for help.

Één opmerking
Great guide! I'm replacing the bluetooth antenna in my iPad 7, hoping that resolves my bluetooth connection issues. I just finished the disassembly. Steps I could not do the same way shown in the guide were: (1) Step 44: Where is this cable?? Since there were no more cables in the way, I just moved on. (2) Step 51: That metal bracket was just packed too closely for me to get an opening pick or any kind of tool into that crevice. Instead, I just removed the black tape and moved on to Step 52, and the bracket came away with the antenna without applying force.