
iMac Intel 21.5" EMC 2389 Logic Board Replacement

Inleiding
Ga naar stap 1Use this guide to remove your logic board assembly.
Wat je nodig hebt
Onderdelen

Gereedschap


Toon meer…
-
-
Unplug your iMac's AC cord along with any peripheral devices.
-
Lay your iMac face-down on a soft, clean surface as shown.
-
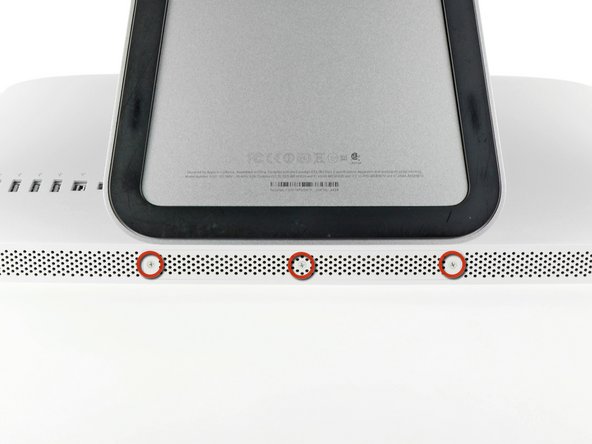
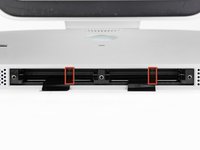
Loosen the three Phillips screws securing the access door to the bottom edge of your iMac.
-
Remove the access door.
-
-
-
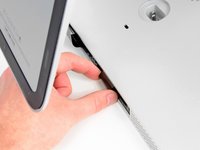
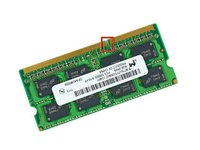
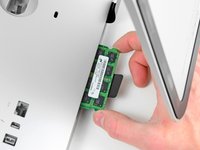
Gently slide the black plastic RAM pull tab out from the RAM slot.
-
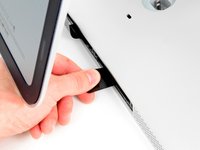
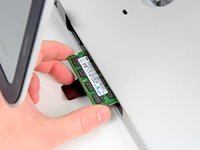
Pull the black plastic tab away from the bottom edge of the iMac to eject the module(s) on that side of the RAM bay.
-
-
Gereedschap gebruikt in deze stap:Heavy-Duty Suction Cups (Pair)$14.95
-
Stick a suction cup near each of the two top corners of the glass panel.
-
If your suction cups refuse to stick, try cleaning both the glass panel and the suction cup with a mild solvent.
-
-
-
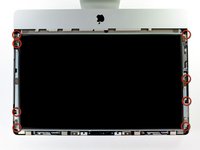
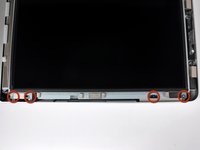
Remove the eight 8 mm T10 Torx screws securing the display to the outer case.
-
-
-
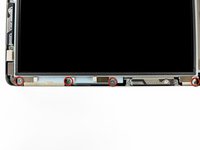
Remove the following four screws:
-
One 9.3 mm T10 Torx screw with a large head
-
Three 9.3 mm T10 Torx screws with a normal sized head
-
-
-
-
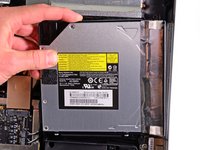
Lift the inner edge of the optical drive and maneuver its connector past the GPU frame attached to the logic board.
-
Carefully pull the optical drive off its mounting pins on the right side of the outer case to gain clearance for disconnecting the optical drive cable.
-
Allow the optical drive to hang down as you de-route the optical drive thermal sensor connector from behind the GPU heat sink.
-
-
-
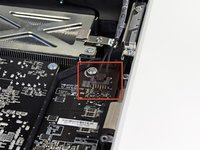
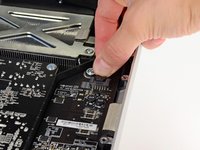
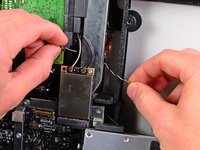
Remove the single 13 mm T10 Torx screw securing the optical drive fan to the outer case.
-
-
-
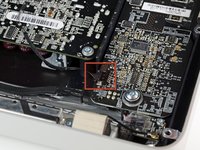
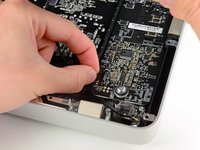
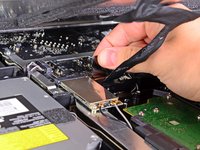
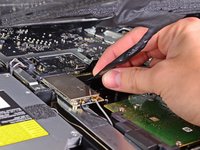
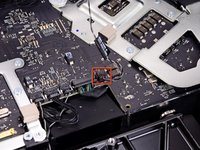
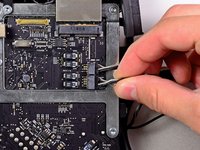
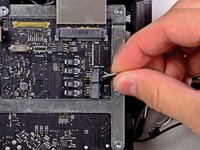
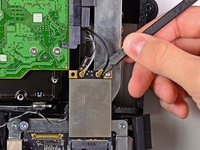
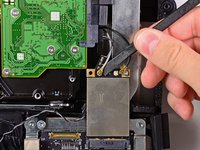
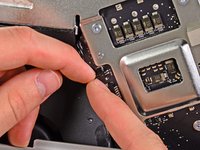
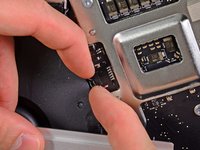
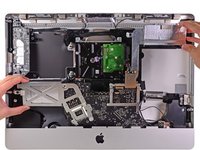
In the proceeding steps, you will disconnect the following cables:
-
SD Board and microphone
-
Left/Right Speaker
-
Wi-Fi Antenna
-
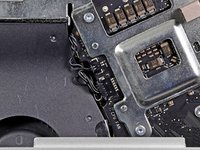
Bluetooth/Ambient Light Sensor/Camera/Left Temperature Sensor, Hard Drive Temperature Sensor and Hard Drive Fan
-
CPU Fan/Ambient Temperature and Power Button
-
IR Sensor
-
-
-
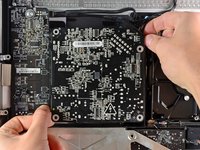
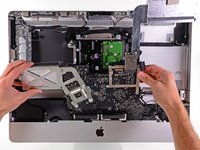
Remove the following four screws:
-
One 9.3 mm T10 coarse-threaded screw
-
One 25 mm T10 coarse-threaded screw
-
Two 22 mm fine-threaded screws
-
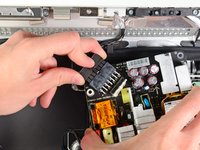
Pull the upper right and lower left corners of the power supply away from the rear case to dislodge the mounting posts attached to the power supply's corners.
-
-
-
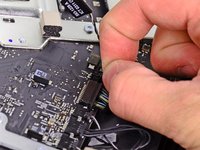
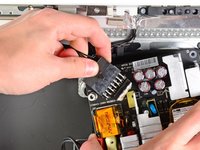
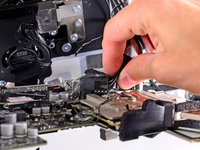
Carefully lift the power supply out of the outer case and rotate it to expose the cable lock as shown, minding the DC-out and AC-in cables still attaching it to the iMac.
-
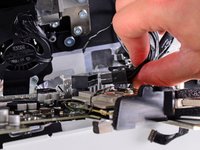
Disconnect the DC-out cable by depressing the locking mechanism on the connector while you pull the connector away from its socket on the power supply.
-
Once the locking mechanism has cleared the socket, pull the DC-in connector away from the power supply.
-


To reassemble your device, follow these instructions in reverse order.
To reassemble your device, follow these instructions in reverse order.
Annuleren: ik heb deze handleiding niet afgemaakt.
38 andere personen hebben deze handleiding voltooid.

7 opmerkingen
Hi. I replaced the logic board and when I started to put it back together there was a half round cable that I have no clue where it goes. I really hope you can help me. Also the DVD drive was replaced cause it didn't work. It plays but it won't eject the DVD. It only ejects when it's tilted.
Yuuuuuuuuuuuuuupiiiiiiiiiii :) great guide
can we use logic board from imac 21.5 late 2012 to replace the one in imac 21.5 mid 2010? or even more put all internal thing from imac 21.5 late 2012 into imac 21.5 mid 2010 aluminium case?