
iMac Intel 21.5" EMC 2389 Hard Drive Replacement

Inleiding
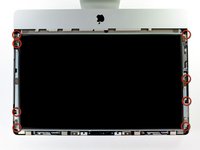
Ga naar stap 1Use this guide to replace or upgrade your hard drive.
This guide also includes steps to upgrade your iMac's hard drive with a SSD. It describes how to install the SSD's temperature sensor so that the Mac's fans will operate at the correct speed.
Before beginning any work on your iMac: Unplug the computer and press and hold the power button for ten seconds to discharge the power supply's capacitors.
Be very careful not to touch the capacitor leads or any exposed solder joints on the back of the power supply.
Wat je nodig hebt
Reparatieset
Deze set bevat alle onderdelen en tools om deze handleiding te voltooien.

Onderdelen


Gereedschap


Toon meer…
-
Gereedschap gebruikt in deze stap:Heavy-Duty Suction Cups (Pair)$14.95
-
Stick a suction cup near each of the two top corners of the glass panel.
-
If your suction cups refuse to stick, try cleaning both the glass panel and the suction cup with a mild solvent.
-
-
-
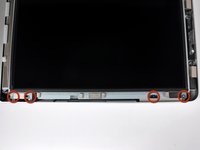
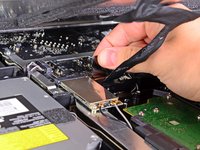
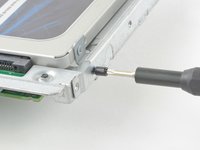
Remove the eight 8 mm T10 Torx screws securing the display to the outer case.
-
-
-
-
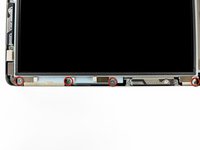
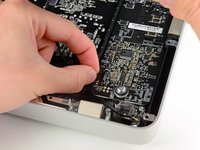
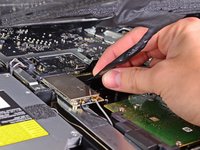
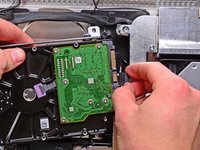
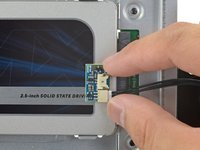
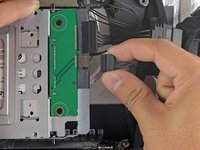
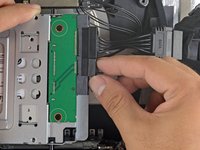
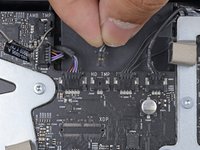
Pull the hard drive temperature sensor connector toward the top edge of the iMac to disconnect it from its socket on the logic board.
-
-
-
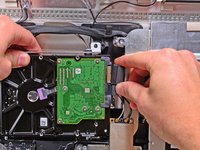
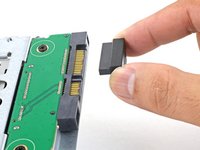
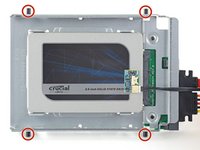
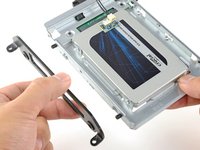
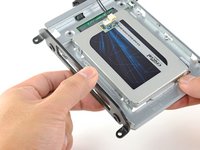
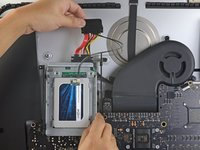
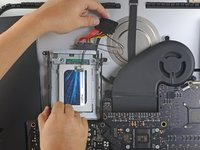
Line up the SSD connectors with the metal enclosure's sockets.
-
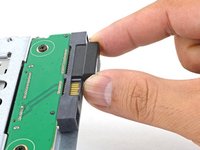
Press the drive against the enclosure sockets until the SSD is firmly seated.
-
-
-
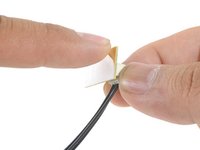
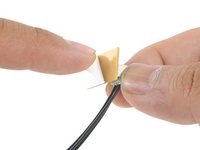
Peel the white liner off the back of the small temperature sensor board in order to expose the adhesive.
-
Adhere the temperature sensor board to an exposed, metal surface of the SSD, close to the SATA connector.
-
Fold the excess temperature sensor wires so that they are out of the way while you install the enclosure.
-
-
-
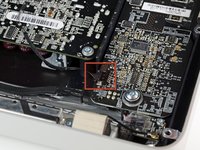
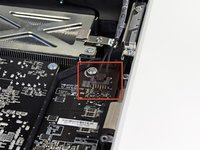
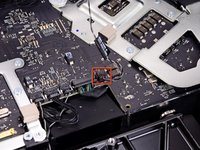
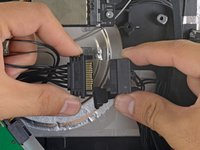
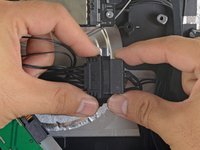
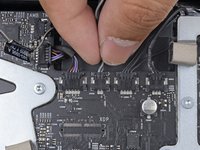
Find the connector on the motherboard labeled HD TMP or HDD TEMP.
-
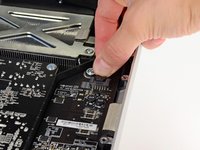
If the previous temperature cable is still connected to the board here, disconnect and remove it. You will no longer need it.
-
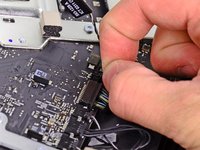
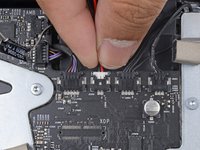
Connect the temperature sensor's two-wire red-black cable to the motherboard plug labeled HD TMP or HDD TEMP.
-
Route the excess wire so it does not interfere with any other components.
-


To reassemble your device, follow these instructions in reverse order.
To reassemble your device, follow these instructions in reverse order.
Annuleren: ik heb deze handleiding niet afgemaakt.
252 andere personen hebben deze handleiding voltooid.

44 opmerkingen
I went through all the steps and now when I attempt to boot, I hear the apple chime, but I get nothing on screen.
I thought this might have to do with a loose cord, but when I reattached the suspect cord (the display data cable) it did not resolve the problem.
Anyone have any ideas as to what could be causing the display to malfunction?
I had this problem as well, caused by a small cable coming from the display. It is a Sync Cable with a small 2 Pin Molex connector, and it popped up and got hidden when I removed the display, which caused me to forget to re-attach it during reassembly.
capone99 -
Question for capone99: where did this cable come from? Was it one of the five specified for unplugging in this guide? Or are you saying it came loose by itself during installation?
Did anyone ever solve this? Having the same issue.
In step 14, the Apple connector for the hard drive has a locking mechanise that doesn't fit most replacement hard drives. I got an identical hard drive that doesn't have a provision for the connector. A little bit of shaving or filing of the plastic connector did the trick.