Inleiding
This guide shows how to remove and replace the battery for the Samsung Galaxy S10+.
The battery is held in place with strong adhesive. High concentration (over 90%) isopropyl alcohol will make the battery removal process much easier.
If your battery is swollen, take appropriate precautions and do not heat your phone.
For your safety, discharge your battery below 25% before disassembling your phone. This reduces the risk of a dangerous thermal event if the battery is accidentally damaged during the repair.
Wat je nodig hebt
Video overzicht
-
-
Unplug and power off your phone before you begin.
-
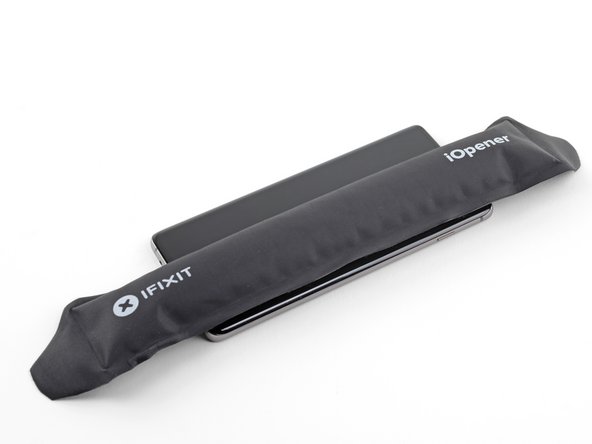
Heat an iOpener and apply it to the back cover's right edge for two minutes.
-
As you wait, take a look at the image of the removed back cover and take note of where the adhesive is located.
-
-
-
Apply a suction cup to the back of the phone, as close to the center of the right edge as possible (where the adhesive is narrowest).
-
Pull on the suction cup with strong, steady force to create a gap between the back cover and the frame.
-
Insert the point of an opening pick into the gap.
-
If you are having trouble creating a gap, your best bet is to apply more heat to the edge and try the previous step again.
-
You can try applying a few drops of high concentration (over 90%) isopropyl alcohol into the seam to help loosen the adhesive.
-
-
-
Rest the heated right edge of the phone on something that is about 0.5 inches (13 mm) thick. This angles the phone for the opening tool.
-
Brace the left edge of the phone with your fingers so that the phone won't slide. Pull on the suction cup with firm pressure.
-
Press the edge of an opening tool into the seam between the back cover and the frame.
-
Slide the opening tool back and forth along the seam a few times.
-
-
-
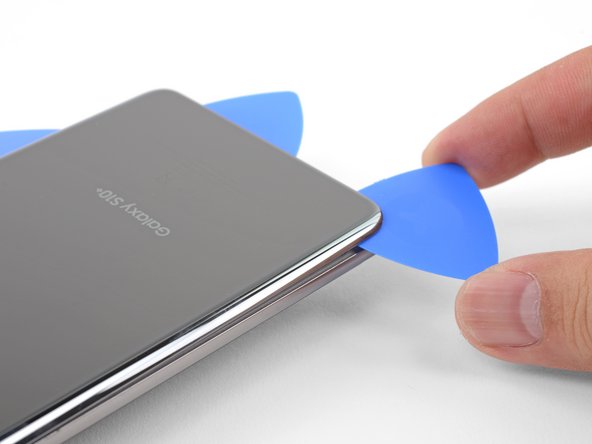
Slide the opening pick along the edge of the phone, slicing through the adhesive.
-
Leave a pick in the seam to prevent the adhesive from re-sealing.
-
-
-
-
Remove the nine 4 mm Phillips screws securing the top midframe to the phone.
-
-
-
Lift the midframe from the top corners and remove it from the phone.
-
Align the midframe's top edge to the phone and lay the frame down on the phone.
-
Use fingers to apply pressure along the midframe perimeter to snap the midframe clips back into place. The edges should sit flush against the phone edge.
-
-
-
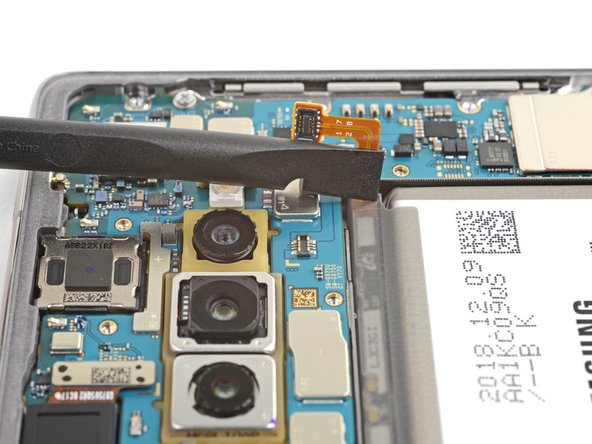
Insert the flat end of a spudger underneath the battery connector, which is attached to the motherboard below the rear-facing camera.
-
Pry upwards to disconnect the connector from its socket.
-
Gently push the battery's flex cable away from the motherboard socket to prevent accidental contact.
-
-
-
The battery is heavily glued in place. Note the marked areas under the battery:
-
The frame, where the battery is held by strong adhesive
-
A cutout in the frame, exposing the fragile display assembly underneath. Be careful when prying in this area, or you may damage the display.
-
-
-
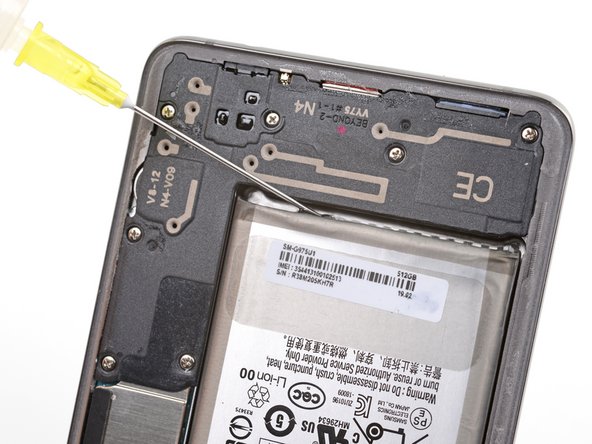
Lift the bottom edge of the phone up and hold the phone in a tilted position.
-
Apply drops of isopropyl alcohol into the crevice between the battery and the phone's bottom midframe.
-
Hold the phone in a tilted position for a minute to allow the isopropyl alcohol to soak into the adhesive.
-
Alternatively, heat an iOpener and apply it to the right side of the front of the phone for two minutes.
-
-
-
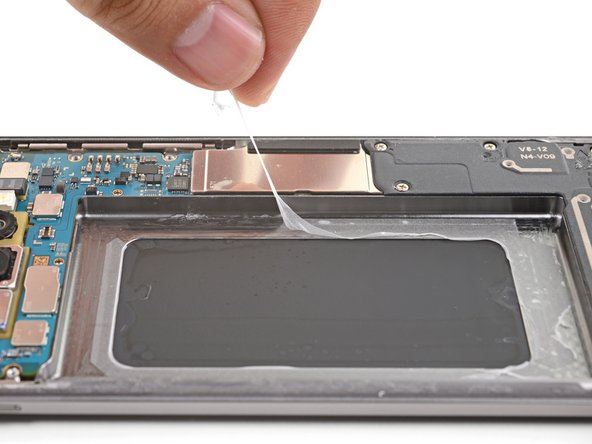
Insert the corner of an opening card into the crevice between the battery and the bottom midframe.
-
Pry the battery out of its recess.
-
Use an opening pick, an opening tool, or a spudger to pry the battery out. Do not use metal tools.
-
Repeat the isopropyl alcohol application step and try again.
-
Try applying more heat with an iOpener.
-


To reassemble your device, follow these instructions in reverse order.
For optimal performance, calibrate your newly installed battery after completing this guide.
Take your e-waste to an R2 or e-Stewards certified recycler.
Repair didn’t go as planned? Check out our Answers community for troubleshooting help.
Annuleren: ik heb deze handleiding niet afgemaakt.
45 andere personen hebben deze handleiding voltooid.


15 opmerkingen
Worked great to replace my swollen battery, and thanks to it being swollen I could actually skip the steps to pry open the back cover. Anyway, from my experience everything is correct, the only downside is that I used a little more than a few drops to loosen the battery and after the whole annoyance of removing the glue and placing the new battery I turned on the phone to check everything was working and my back cameras were blurry.... yeah, too much alcohol, had to clean them up very well.... but the sad part is that some of the alcohol made it's way to the front cameras... now they are both blurry.
I agree with isely - the toughest part was removing all the left over adhesive. Removing the battery was a bit of a pain as well, even with isopropyl alcohol. I recommend using heat to remove the battery.
To get rid of the excess adhesive, I recommend using a heat gun and peeling it up with your thumb. As long as it's malleable, you can slowly peel it up to create a ball of adhesive and hopefully get most of it off at once. I was trying Q-Tips with isopropyl alcohol and that mostly just spread around the adhesive and got fluff from the Q-Tip over the phone.
Finally, I recommend buying a precut adhesive card to glue it back in place. It took me quite a while to cut a bunch of strips with my 2mm double sided tape.
And my phone is ruined because, presumably, the alcohol leaked somehow and destroyed the lens. Gonna have to get a new phone now anyway. Please add proper precautions to the instructions to avoid wrecking the lens. I didn't make any careless splashes or drips.