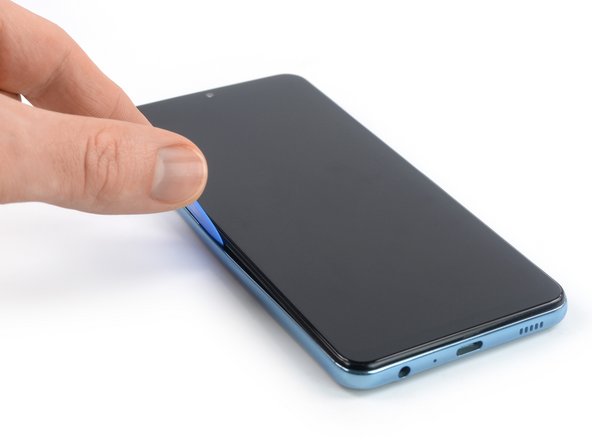
Ga door naar hoofdinhoud

Samsung Galaxy A32 5G Screen Replacement

Wat je nodig hebt

  1. Samsung Galaxy A32 5G Screen Replacement, Heat the back cover: stap 1, afbeelding 1 van 1
    • Prepare an iOpener and apply it to the back cover for at least two minutes to loosen the adhesive underneath.

    • A hair dryer, heat gun, or hot plate may also be used, but be careful not to overheat the phone—the display and internal battery are both susceptible to heat damage.

  2. Samsung Galaxy A32 5G Screen Replacement, Insert an opening pick: stap 2, afbeelding 1 van 3 Samsung Galaxy A32 5G Screen Replacement, Insert an opening pick: stap 2, afbeelding 2 van 3 Samsung Galaxy A32 5G Screen Replacement, Insert an opening pick: stap 2, afbeelding 3 van 3
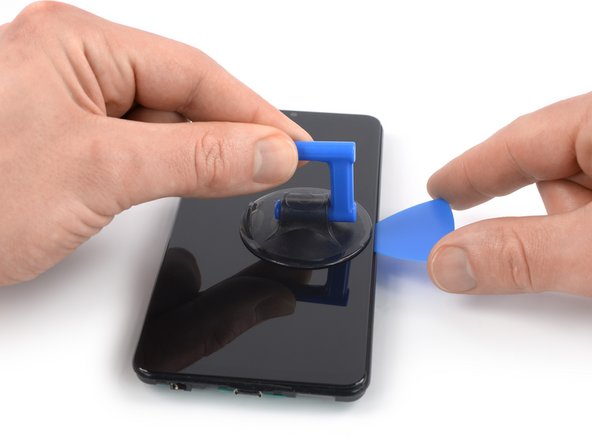
    • Secure a suction handle to the bottom edge of the back cover, as close to the edge as possible.

    • If the back cover is cracked, the suction handle may not stick. Try lifting it with strong tape, or superglue the suction handle in place and allow it to cure so you can proceed.

    • Lift the back cover with the suction handle to create a small gap between the back cover and the frame.

    • In case you have trouble creating a gap, apply more heat to further soften the adhesive. Follow the iOpener instructions to avoid overheating.

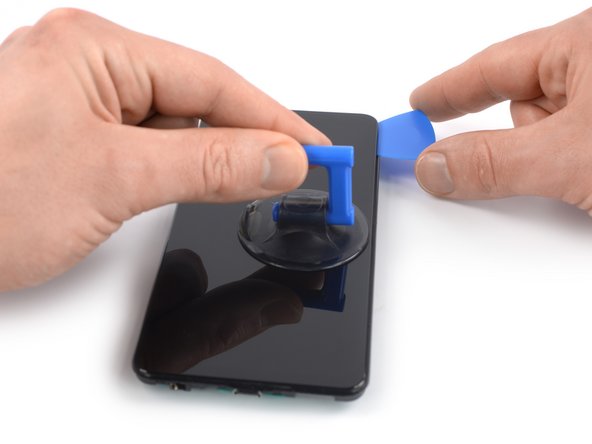
    • Insert an opening pick into the gap you created.

    • Slide the opening pick to the bottom right corner to slice the adhesive.

    • Leave the opening pick in place to prevent the adhesive from resealing.

  3. Samsung Galaxy A32 5G Screen Replacement, Slice the adhesive: stap 3, afbeelding 1 van 2 Samsung Galaxy A32 5G Screen Replacement, Slice the adhesive: stap 3, afbeelding 2 van 2
    • Insert a second opening pick at the bottom edge of your phone.

    • Slide the opening pick to the bottom left corner to slice the adhesive.

    • Leave the opening picks in place to prevent the adhesive from resealing.

  4. Samsung Galaxy A32 5G Screen Replacement, Slice the adhesive: stap 4, afbeelding 1 van 3 Samsung Galaxy A32 5G Screen Replacement, Slice the adhesive: stap 4, afbeelding 2 van 3 Samsung Galaxy A32 5G Screen Replacement, Slice the adhesive: stap 4, afbeelding 3 van 3
    • If the adhesive becomes hard to cut, it has most likely cooled down. Use your iOpener for one to two minutes to reheat it.

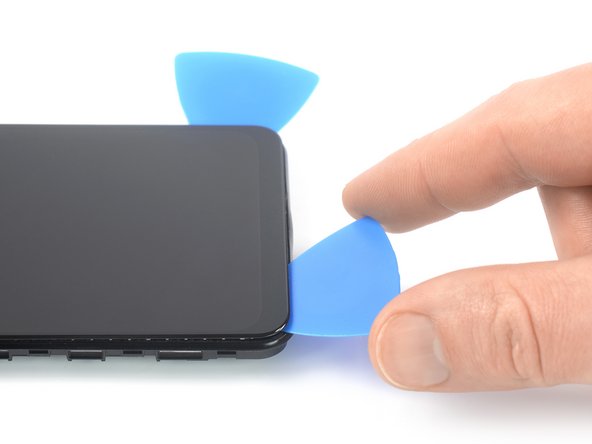
    • Insert a third opening pick at the bottom left corner of your phone.

    • Slide the opening pick along the left edge of your phone to slice the adhesive.

    • Leave the opening pick in the top left corner to prevent the adhesive from resealing.

  5. Samsung Galaxy A32 5G Screen Replacement: stap 5, afbeelding 1 van 2 Samsung Galaxy A32 5G Screen Replacement: stap 5, afbeelding 2 van 2
    • Insert a fourth opening pick underneath the top left corner of your phone.

    • Slide the opening pick along the top edge to slice the adhesive.

    • Leave the opening pick in the top right corner to prevent the adhesive from resealing.

  6. Samsung Galaxy A32 5G Screen Replacement: stap 6, afbeelding 1 van 2 Samsung Galaxy A32 5G Screen Replacement: stap 6, afbeelding 2 van 2
    • Insert a fifth opening pick underneath the top right corner.

    • Slide the opening pick along the right edge of the back cover to slice the remaining adhesive.

  7. Samsung Galaxy A32 5G Screen Replacement, Remove the back cover: stap 7, afbeelding 1 van 2 Samsung Galaxy A32 5G Screen Replacement, Remove the back cover: stap 7, afbeelding 2 van 2
    • Remove the back cover.

    • Apply new adhesive where necessary after cleaning the relevant areas with isopropyl alcohol (>90%).

    • Secure the new back cover with pre-cut adhesive or double-sided adhesive tape. After installing the back cover, apply strong, steady pressure to your phone for several minutes to help the adhesive form a good bond—a stack of heavy books works well.

  8. Samsung Galaxy A32 5G Screen Replacement, Eject the SIM card tray: stap 8, afbeelding 1 van 3 Samsung Galaxy A32 5G Screen Replacement, Eject the SIM card tray: stap 8, afbeelding 2 van 3 Samsung Galaxy A32 5G Screen Replacement, Eject the SIM card tray: stap 8, afbeelding 3 van 3
    • Insert a SIM card eject tool, a SIM eject bit, or a straightened paper clip into the hole on the SIM tray located at the left edge of the phone.

    • Press directly into the hole to eject the SIM card tray.

    • Remove the SIM card tray.

  9. Samsung Galaxy A32 5G Screen Replacement, Unfasten the midframe screws: stap 9, afbeelding 1 van 2 Samsung Galaxy A32 5G Screen Replacement, Unfasten the midframe screws: stap 9, afbeelding 2 van 2
    • Use a Phillips screwdriver to remove the sixteen 4.1 mm-long screws securing the midframe.

  10. Samsung Galaxy A32 5G Screen Replacement, Disconnect the power and volume button flex cable: stap 10, afbeelding 1 van 2 Samsung Galaxy A32 5G Screen Replacement, Disconnect the power and volume button flex cable: stap 10, afbeelding 2 van 2
    • Use a spudger to disconnect the power and volume button flex cable by prying the connector straight up from its socket.

  11. Samsung Galaxy A32 5G Screen Replacement, Insert an opening pick: stap 11, afbeelding 1 van 2 Samsung Galaxy A32 5G Screen Replacement, Insert an opening pick: stap 11, afbeelding 2 van 2
    • The midframe of the Samsung Galaxy A32 5G is held in place by plastic clips.

    • Insert an opening pick between the midframe and front panel assembly on the left edge of the phone where the SIM tray slot is located.

  12. Samsung Galaxy A32 5G Screen Replacement, Release the plastic clips: stap 12, afbeelding 1 van 3 Samsung Galaxy A32 5G Screen Replacement, Release the plastic clips: stap 12, afbeelding 2 van 3 Samsung Galaxy A32 5G Screen Replacement, Release the plastic clips: stap 12, afbeelding 3 van 3
    • The plastic clips of the midframe are sitting in place tightly. Releasing them might require some force.

    • Slide the opening pick along the left edge of the phone to release the plastic clips.

  13. Samsung Galaxy A32 5G Screen Replacement: stap 13, afbeelding 1 van 3 Samsung Galaxy A32 5G Screen Replacement: stap 13, afbeelding 2 van 3 Samsung Galaxy A32 5G Screen Replacement: stap 13, afbeelding 3 van 3
    • Slide the opening pick around the bottom left corner.

    • Slide the opening pick along the bottom edge of the phone to release the plastic clips.

  14. Samsung Galaxy A32 5G Screen Replacement: stap 14, afbeelding 1 van 3 Samsung Galaxy A32 5G Screen Replacement: stap 14, afbeelding 2 van 3 Samsung Galaxy A32 5G Screen Replacement: stap 14, afbeelding 3 van 3
    • Slide the opening pick around the bottom right corner.

    • Slide the opening pick along the right edge of the phone to release the plastic clips.

  15. Samsung Galaxy A32 5G Screen Replacement: stap 15, afbeelding 1 van 3 Samsung Galaxy A32 5G Screen Replacement: stap 15, afbeelding 2 van 3 Samsung Galaxy A32 5G Screen Replacement: stap 15, afbeelding 3 van 3
    • Slide the opening pick around the top right corner.

    • Slide the opening pick along the top edge of the phone to release the remaining plastic clips.

  16. Samsung Galaxy A32 5G Screen Replacement, Remove the midframe: stap 16, afbeelding 1 van 2 Samsung Galaxy A32 5G Screen Replacement, Remove the midframe: stap 16, afbeelding 2 van 2
    • Place your phone with the display facing downwards on your working surface.

    • Remove the midframe.

  17. Samsung Galaxy A32 5G Screen Replacement, Disconnect the battery cable: stap 17, afbeelding 1 van 2 Samsung Galaxy A32 5G Screen Replacement, Disconnect the battery cable: stap 17, afbeelding 2 van 2
    • Use a spudger to disconnect the battery cable by prying the connector straight up from its socket.

  18. Samsung Galaxy A32 5G Screen Replacement, Disconnect the display cable: stap 18, afbeelding 1 van 2 Samsung Galaxy A32 5G Screen Replacement, Disconnect the display cable: stap 18, afbeelding 2 van 2
    • Use a spudger to disconnect the display cable by prying the connector straight up from its socket.

  19. Samsung Galaxy A32 5G Screen Replacement, Disconnect the digitizer cable: stap 19, afbeelding 1 van 2 Samsung Galaxy A32 5G Screen Replacement, Disconnect the digitizer cable: stap 19, afbeelding 2 van 2
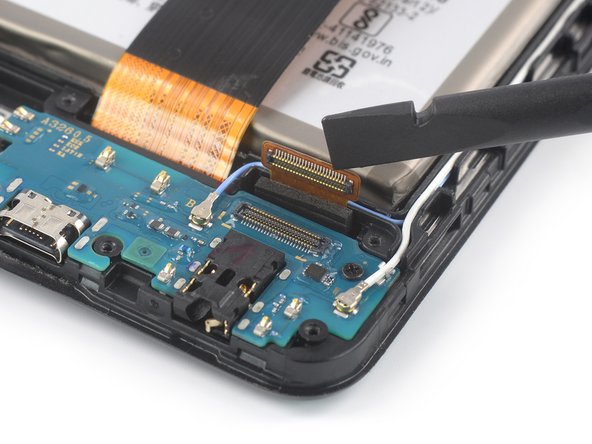
    • Use a spudger to disconnect the digitizer cable by prying the connector straight up from its socket.

  20. Samsung Galaxy A32 5G Screen Replacement, Loosen the display adhesive: stap 20, afbeelding 1 van 1
    • Apply a heated iOpener to the screen to loosen the adhesive underneath. Apply the iOpener for at least 5 minutes.

    • The display adhesive of the Galaxy A32 5G is strong, and it's likely you need to reheat and reapply the iOpener several times before starting the display removal and during the removal procedure.

    • A hair dryer, heat gun, or hot plate may also be used, but be careful not to overheat the device.

  21. Samsung Galaxy A32 5G Screen Replacement, Create a gap: stap 21, afbeelding 1 van 3 Samsung Galaxy A32 5G Screen Replacement, Create a gap: stap 21, afbeelding 2 van 3 Samsung Galaxy A32 5G Screen Replacement, Create a gap: stap 21, afbeelding 3 van 3
    • Once the screen is warm to touch, apply a suction cup to the right edge of the screen.

    • If your screen is badly cracked, covering it with a layer of clear packing tape may allow the suction cup to adhere. Alternatively, very strong tape may be used instead of the suction cup. If all else fails, you can superglue the suction cup to the screen.

    • Lift the screen with the suction handle to create a small gap between the screen and the front panel assembly.

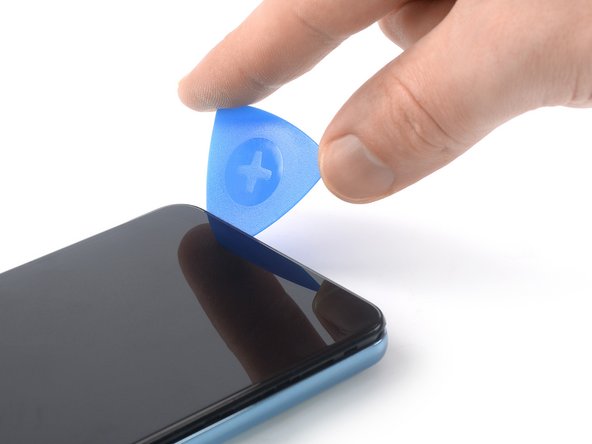
    • Insert an opening pick in the gap between the front panel assembly and the screen.

    • Slide the opening pick to the top right corner of the screen to slice its adhesive.

    • Leave the opening pick in place to prevent the adhesive from resealing.

  22. Samsung Galaxy A32 5G Screen Replacement, Slice the adhesive: stap 22, afbeelding 1 van 2 Samsung Galaxy A32 5G Screen Replacement, Slice the adhesive: stap 22, afbeelding 2 van 2
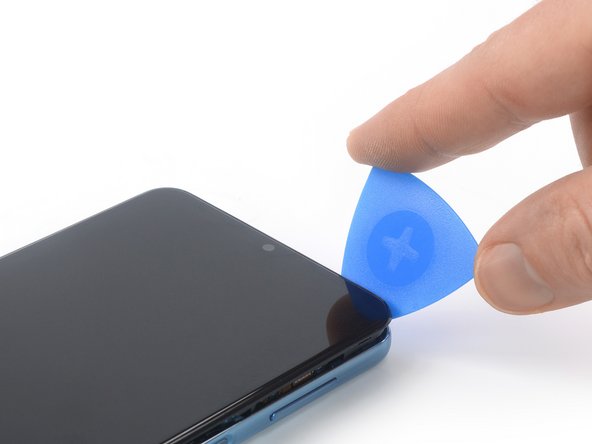
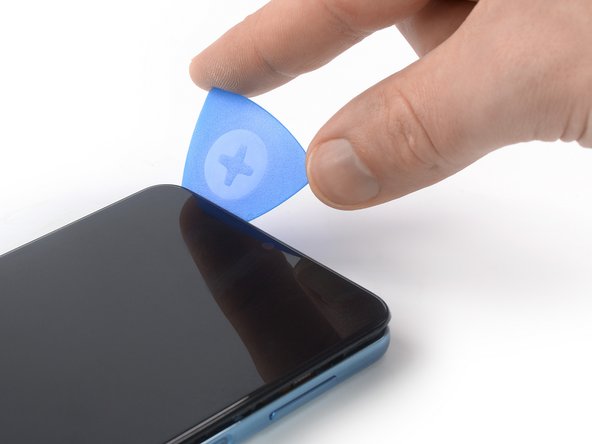
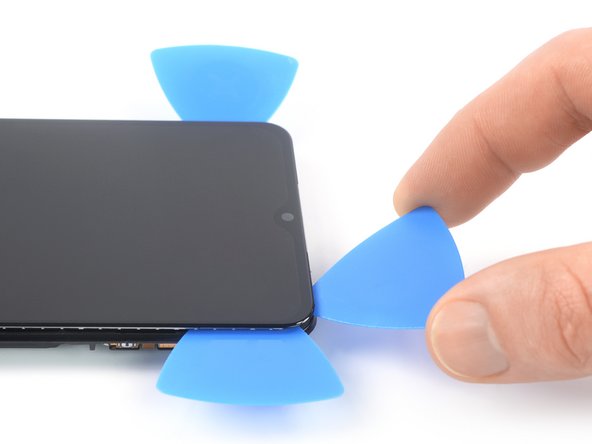
    • Insert a second opening pick in the gap between the front panel assembly and the screen.

    • Slide the opening pick to the bottom right corner of the screen to slice its adhesive.

    • Leave the opening pick in place to prevent the adhesive from resealing.

  23. Samsung Galaxy A32 5G Screen Replacement: stap 23, afbeelding 1 van 2 Samsung Galaxy A32 5G Screen Replacement: stap 23, afbeelding 2 van 2
    • If the adhesive becomes hard to cut, it has most likely cooled down. Use your iOpener or heat gun for 1-2 minutes to reheat it.

    • Insert a third opening pick underneath the bottom right corner of the screen.

    • Slide the opening pick to the bottom left corner of the screen to slice its adhesive.

    • Leave the opening pick in its place to prevent the adhesive from resealing.

  24. Samsung Galaxy A32 5G Screen Replacement: stap 24, afbeelding 1 van 2 Samsung Galaxy A32 5G Screen Replacement: stap 24, afbeelding 2 van 2
    • Insert a fourth opening pick underneath the bottom left corner and slide it along the left edge of the phone to slice the adhesive.

    • Leave the opening pick in its place to prevent the adhesive from resealing.

  25. Samsung Galaxy A32 5G Screen Replacement: stap 25, afbeelding 1 van 2 Samsung Galaxy A32 5G Screen Replacement: stap 25, afbeelding 2 van 2
    • When you slice near the front facing camera, insert only the tip of the opening pick (~2-3 mm) to avoid damaging or smearing the camera.

    • Insert a fifth opening pick at the top left corner of the screen.

    • Slide the opening pick along the top edge of the phone to slice the remaining adhesive.

    • Do not try to remove the display all the way yet, the screen and the digitizer cable are still threaded through the front panel assembly.

  26. Samsung Galaxy A32 5G Screen Replacement, Free the display cables: stap 26, afbeelding 1 van 3 Samsung Galaxy A32 5G Screen Replacement, Free the display cables: stap 26, afbeelding 2 van 3 Samsung Galaxy A32 5G Screen Replacement, Free the display cables: stap 26, afbeelding 3 van 3
    • Thread the screen and the digitizer flex cables through the gap in the front panel assembly.

  27. Samsung Galaxy A32 5G Screen Replacement, Remove the screen: stap 27, afbeelding 1 van 1
    • Remove the screen.

    • Apply new adhesive where it's necessary after cleaning the relevant areas with isopropyl alcohol (>90%).

    • During reassembly, follow this guide in case you're using a pre-cut adhesive card.

Conclusie

If possible, turn on your device and test your repair before installing new adhesive and resealing.

Compare your new replacement part to the original part—you may need to transfer remaining components or remove adhesive backings from the new part before installing.

To reassemble your device, follow these instructions in reverse order.

The best way to secure the new screen is to apply a sheet of custom-cut double-sided tape to the back of the screen.

Take your e-waste to an R2 or e-Stewards certified recycler.

Repair didn’t go as planned? Try some basic troubleshooting, or ask our Answers community for help.

26 andere personen hebben deze handleiding voltooid.

Dominik Schnabelrauch

Lid sinds: 11/23/16

202.836 Reputatie

682 handleidingen geschreven

Team

iFixit Lid van iFixit

Staff

135 Leden

16.732 handleidingen geschreven

8 opmerkingen

I am wondering why it would be necessary to detach more than just the screen and digi flex cables. It seems as though removing the extra cabling and screws is just an additional step that isn't needed. Please advise.

Bryan Hascall - Antwoord

Hi Bryan,
in this guide you only disconnect the power and volume button flex cable which is mandatory to remove the midframe. Without removing the midframe it is impossible to disconnect the display cables. The only other cable you need to disconnect besides those three is the battery cable to prevent a short causing damage to other components during the display replacement.

Dominik Schnabelrauch -

What display did you use as the replacement? It doesn’t look like Ifixit has an option for the a32

Computerfreak122 - Antwoord

Same question. Where is the display part and adhesive?

Benjamin Kirby -

I’ve been repairing phones since 2009, so I am very careful, so I’m experienced and careful.

I’ve replaced the screen twice with new parts from a reputable dealer and both result in a black screen. I’ve tried the reset options to get out of the BSOD to no avail. If I put the old broken screen back on, I can at least see lines and a partial picture, as it is smashed, of course. Has anyone experienced this problem and/or figured out why it happened? The ribbon cables look slightly different and the numbers are A326U for the original screen and A326B for both replacement screens. Could this be an issue or nothing?

Mike Davis - Antwoord

Voeg opmerking toe

Weergavestatistieken:

Afgelopen 24 uren: 48

Afgelopen 7 dagen: 338

Afgelopen 30 dagen: 1,511

Altijd: 36,233