
Parrot AR.Drone 2.0 Motor Replacement

Inleiding
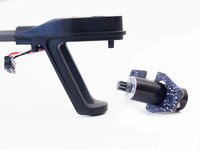
Ga naar stap 1Use this guide to diagnose and replace a faulty motor on your Parrot AR.Drone 2.0.
AR.Drone 2.0 spare parts and mounting tools are available from several Parrot retailers.
Wat je nodig hebt
Onderdelen
Gereedschap


Toon meer…
Video overzicht


To reassemble your device, follow these instructions in reverse order.
To reassemble your device, follow these instructions in reverse order.
Annuleren: ik heb deze handleiding niet afgemaakt.
5 andere personen hebben deze handleiding voltooid.

Team

Cal Poly, Team 25-89, Amido Spring 2010 Lid van Cal Poly, Team 25-89, Amido Spring 2010
CPSU-AMIDO-S10S25G89
4 Leden
61 handleidingen geschreven
2Gids Commentaar
I need to know this also. replaced cross.member but did not put motors in original spots now my drone goes crazy and erratic