Inleiding
Volg deze reparatiehandleiding om een defect of beschadigd moederbord in de Nintendo Switch Lite te vervangen.
De Switch Lite gebruikt JIS-schroeven, maar in noodgevallen kun je ook een kruiskopschroevendraaier gebruiken. Wees zeer voorzichtig dat je de schroeven niet stript. De kruiskopbits van iFixit zijn ontworpen om compatibel te zijn met schroeven in JIS-stijl.
Let op: Deze procedure vereist het verwijderen van de afdekplaat en het koellichaam. De warmtewerende lijm moet van beide onderdelen—evenals van de CPU—worden verwijderd en opnieuw worden aangebracht voordat je de afdekplaat en het koellichaam terugplaatst.
Wat je nodig hebt
-
-
-
Gebruik een Y00-schroevendraaier om de vier 6.3 mm lange schroeven die het achterste paneel bevestigen los te schroeven.
 Vraag FixBot
-
-
-
Gebruik een JIS 000- of een iFixit Phillips 000-schroevendraaier om de volgende schroeven, waarmee het achterste paneel bevestigd is, te verwijderen:
-
Twee 3.6 mm lange schroeven aan de bovenkant van het toestel.
-
Twee 3.6 mm lange schroeven aan de onderkant van het toestel.
-
-
-
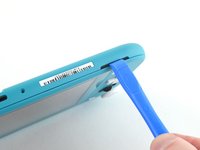
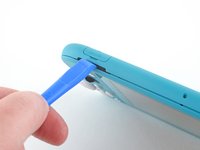
Steek een openingstool in de linker speakergrill, aan de onderkant van het toestel.
-
Kantel je openingstool om de klemmen die het achterste paneel bevestigen los te maken.
-
-
-
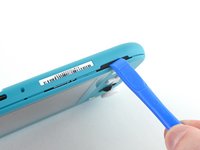
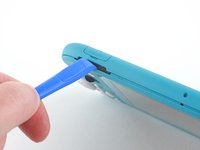
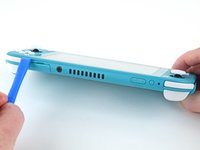
Schuif je openingstool langs de linker onderhoek om de klemmen aan de linkerkant van het toestel los te klikken.
-
-
-
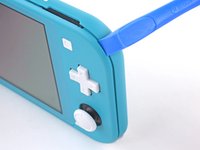
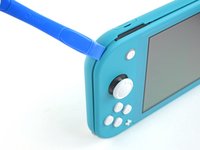
Steek een openingstool in de rechter speakergrill die zich aan de onderkant van het toestel bevindt.
-
Kantel je openingstool om de klemmen los te klikken.
-
-
-
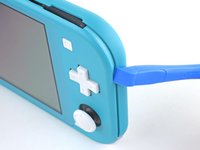
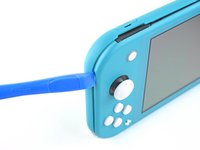
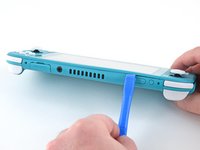
Schuif je openingstool richting en om de rechter onderhoek en duw ondertussen de behuizing van het toestel open. Als het goed is komen de klemmen aan de rechterkant van het toestel los.
-
-
-
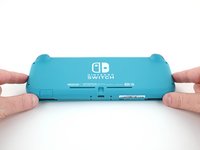
Schuif je openingstool langs de opening aan de bovenkant van het toestel en wrik de behuizing onderwijl open om de klemmen ook hier los te maken.
-
-
-
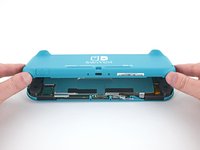
Til de onderkant van het achterste paneel omhoog, waardoor het toestel zich opent als een boek.
-
Verwijder het achterste paneel.
-
-
-
-
-
Gebruik een JIS 000- of een iFixit PH 000-schroevendraaier om de vier schroeven te verwijderen die de beschermplaat vastzetten:
-
Drie 3.1 mm lange schroeven
-
Eén 4.5 mm lange schroef
-
-
-
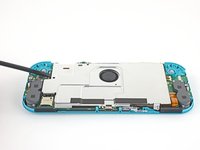
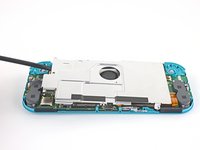
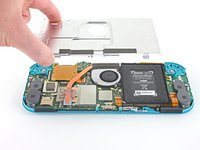
Gebruik een spudger of je vingers om de beschermplaat uit het toestel omhoog te tillen en te verwijderen.
-
Verwijder de beschermplaat.
-
-
-
-
-
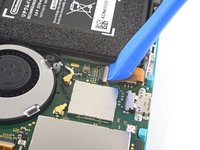
Gebruik een Openingsgereedschap of je nagel om de kleine, gescharnierde bevestigingsklem op de ZIF-aansluiting van de verbindingskabel van het moederbord open te klappen.
-
-
-
Gebruik een nylon of keramische pincet om de verbindingskabel uit de connector op het moederbord te schuiven.
-
-
-
-
Gebruik de punt van een spudger om de batterijaansluiting in een rechte beweging uit het contact op het moederbord te duwen.
-
-
-
-
-
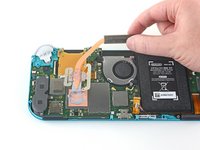
Gebruik je vingers of het platte einde van een spudger om het schuim dat aan de ventilator bevestigd is eraf te trekken.
-
-
-
Gebruik een JIS 000- of een iFixit PH 000-schroevendraaier om de drie 3 mm lange schroeven die het koellichaam op het moederbord bevestigen te verwijderen.
-
-
-
Gebruik je vingers of een spudger om het koellichaam omhoog te tillen van het moederbord en deze te verwijderen.
-
-
-
-
-
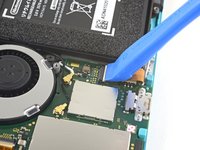
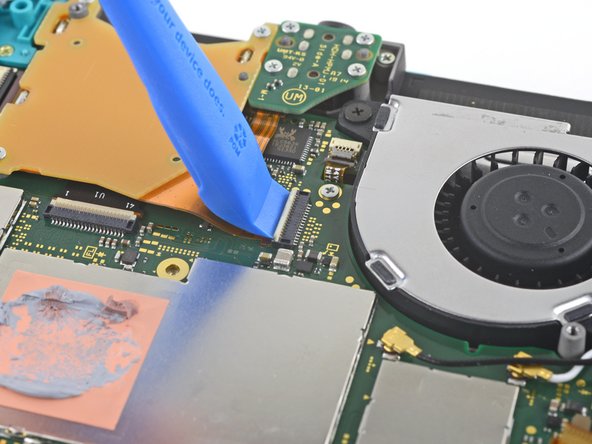
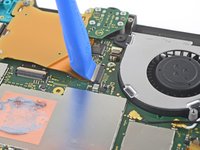
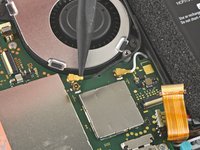
Gebruik een openingstool of je nagel om de kleine, gescharnierde sluitklep op de ZIF-aansluiting van de gamekaartlezerkabel omhoog te klappen.
-
-
-
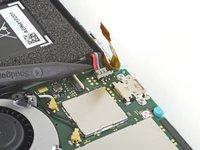
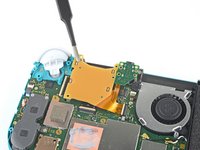
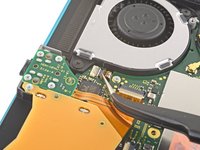
Gebruik een JIS 000- of een iFixit PH 000-schroevendraaier om de zeven 3.1 mm lange schroeven, die de gamekaartlezer en aansluiting koptelefoon bevestigen, te verwijderen.
-
-
Gereedschap gebruikt in deze stap:Tweezers$4.99
-
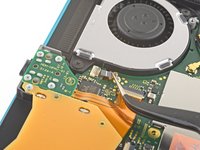
Gebruik een pincet of je vingers om de gamekaartlezer voorzichtig omhoog te tillen en deze naar links te bewegen om de kabel uit de (kabel)aansluiting te kunnen schuiven.
-
Verwijder de gamekaartlezer en hoofdtelefoonjack.
-
-
-
-
-
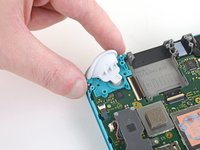
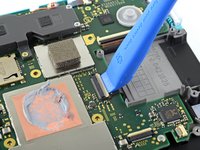
Gebruik een JIS 000-schroevendraaier of een iFixit PH 000-schroevendraaier om de twee 4.5 mm lange schroeven die de rechter triggerknopmodule aan het moederbord bevestigen te verwijderen.
-
-
Gereedschap gebruikt in deze stap:Tweezers$4.99
-
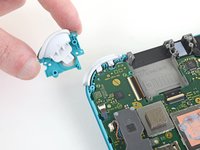
Gebruik een pincet of je vingers om het rubberen kussen van de rechter triggerknopmodule te verwijderen als deze niet aan de knopmodule is blijven hangen.
-
-
-
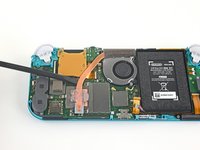
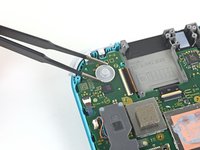
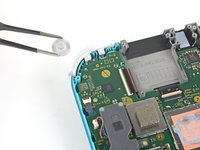
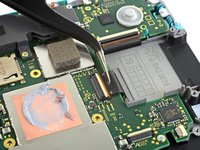
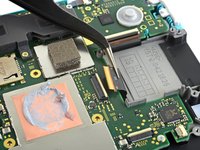
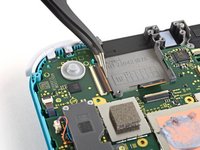
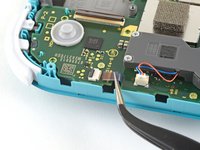
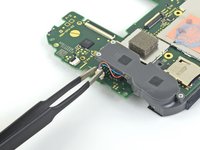
Gebruik de punt van je spudger om de zwarte antennekabel coax-connector in een rechte beweging uit het stopcontact op het moederbord omhoog te duwen.
-
Herhaal hetzelfde proces voor de witte antennekabel.
-
-
-
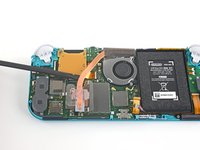
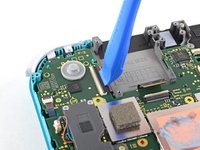
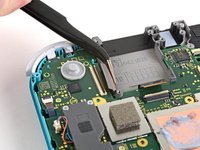
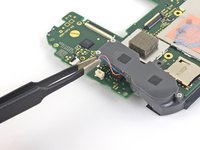
Gebruik een openingstool of je nagel om de kleine, gescharnierde bevestigingsklem op de ZIF-aansluiting van de ventilatorkabel omhoog te klappen.
-
-
-
Gebruik een pincet om de ventilatorkabel uit het contact op het moederbord te schuiven.
-
-
-
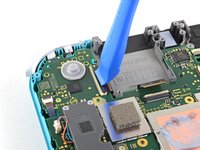
Gebruik een openingstool of je nagel om de kleine, gescharnierde bevestigingsklem op de ZIF-aansluiting van de schermkabel omhoog te klappen.
-
-
-
Gebruik een pincet om de schermkabel uit het contact op het moederbord te schuiven.
-
-
-
Gebruik een openingstool of je nagel om de kleine, gescharnierde bevestigingsklem op de ZIF-aansluiting van de digitizerkabel omhoog te klappen.
-
-
-
Gebruik een pincet om de digitizerkabel uit het contact op het moederbord te schuiven.
-
-
-
Gebruik een openingstool of je nagel om de kleine, gescharnierde bevestigingsklem op de ZIF-aansluiting van de rechter joystickkabel omhoog te klappen.
-
-
-
Gebruik een pincet om de rechter joystickkabel uit het contact op het moederbord te schuiven.
-
-
-
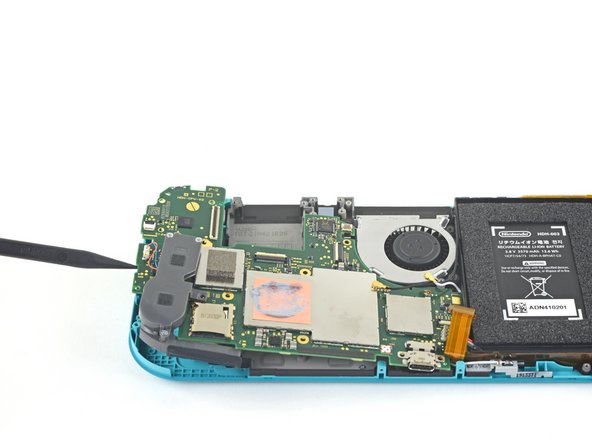
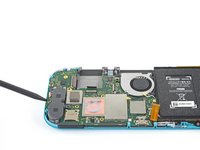
Gebruik een JIS 000-schroevendraaier of een iFixit PH 000-schroevendraaier om de volgende zes schroeven, die het moederbord bevestigen, te verwijderen:
-
Drie 3.1 mm lange schroeven
-
Drie 4.5 mm lange schroeven
-
-
-
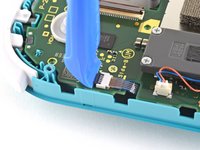
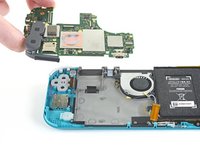
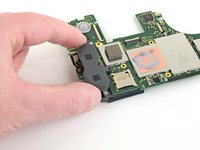
Steek een spudger in de opening tussen het frame en het moederbord en til het moederbord uit de inkeping omhoog.
-
Verwijder de moederbordmodule.
-
-
-
-
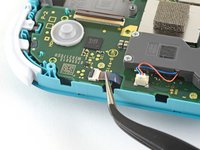
Gereedschap gebruikt in deze stap:Tweezers$4.99
-
Gebruik een pincet of uw vingers om de kabel van de rechterluidspreker recht omhoog uit het stopcontact op het moederbord te trekken.
-
-


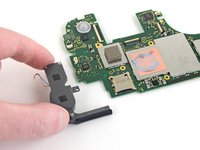

Volg deze instructies in omgekeerde volgorde om je apparaat weer in elkaar te zetten.
Breng je e-afval naar een R2- of e-Stewards-gecertificeerde recycleaar.
Is de reparatie niet volgens plan verlopen? Probeer wat basisprobleemoplossing, of vraag onze Nintendo Switch Lite-antwoordenforum om hulp.
Annuleren: ik heb deze handleiding niet afgemaakt.
29 andere personen hebben deze handleiding voltooid.
Met dank aan deze vertalers:
100%

Translation Bot helpt ons de wereld te repareren! Doe je mee?
Begin met vertalen ›

10Gids Commentaar
It stops at motherboard removal, is there a section for replacing the USB charging port on the switch lite?