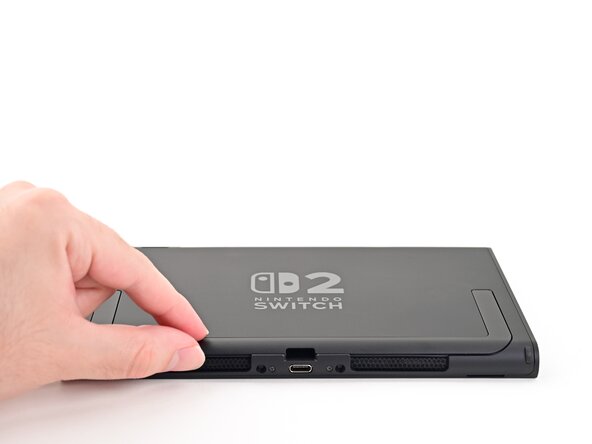
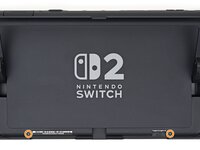
Ga door naar hoofdinhoud
Word lid van de reparatiegemeenschap - Account aanmaken

Nintendo Switch 2 Kickstand Replacement

Wat je nodig hebt

  1. Nintendo Switch 2 Kickstand Replacement, Power off the console: stap 1, afbeelding 1 van 3 Nintendo Switch 2 Kickstand Replacement, Power off the console: stap 1, afbeelding 2 van 3 Nintendo Switch 2 Kickstand Replacement, Power off the console: stap 1, afbeelding 3 van 3
    • For your safety, discharge the battery below 25% before disassembling the console. This reduces the risk of a fire if the battery is damaged during the repair. If the battery is swollen, take appropriate precautions.

    • Remove any game cards and disconnect any cables, controllers, or other accessories from the console.

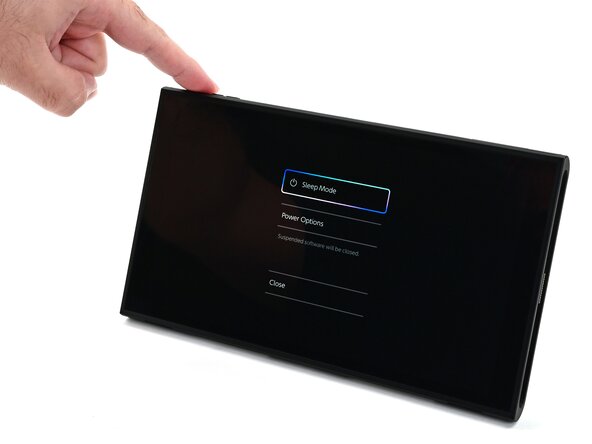
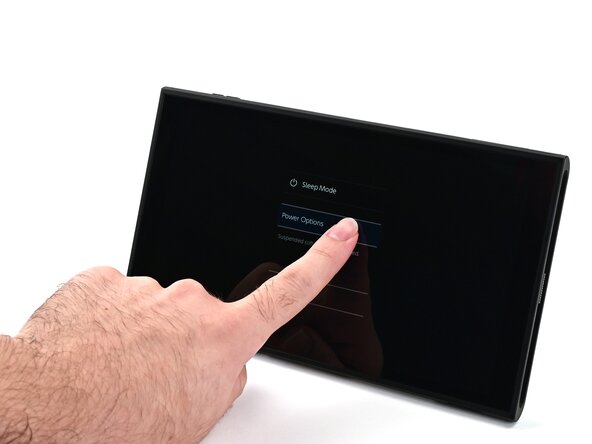
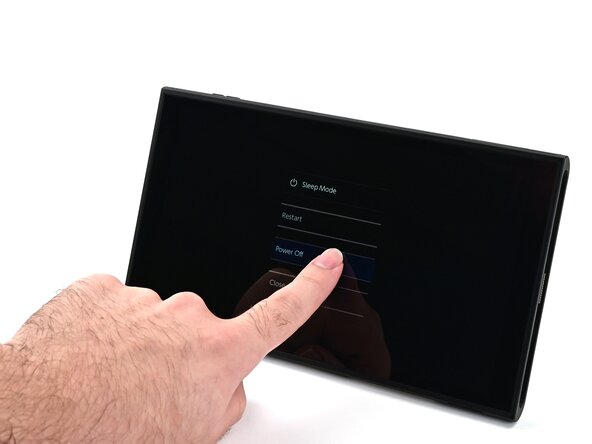
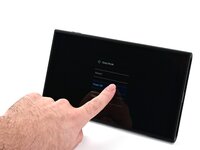
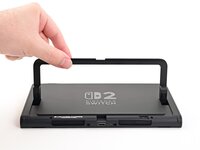
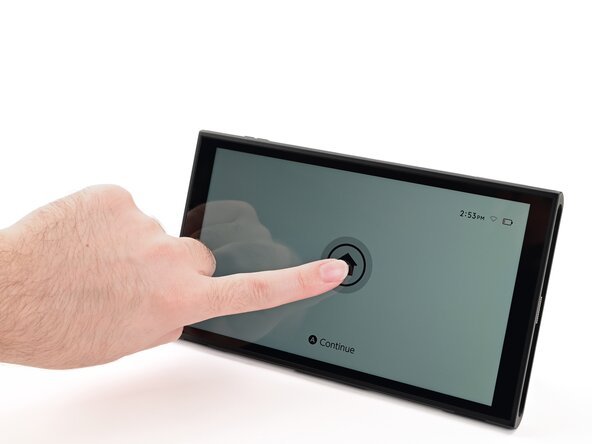
    • Power off the console by holding down the power button, selecting Power Options, then pressing Power Off.

    Vraag FixBot
  2. Nintendo Switch 2 Kickstand Replacement, Remove the bottom screws: stap 2, afbeelding 1 van 2 Nintendo Switch 2 Kickstand Replacement, Remove the bottom screws: stap 2, afbeelding 2 van 2
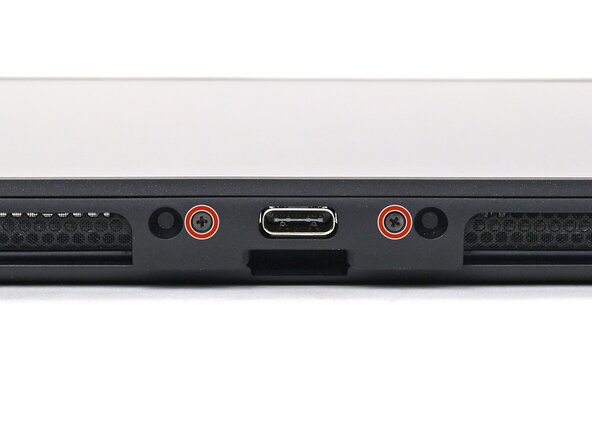
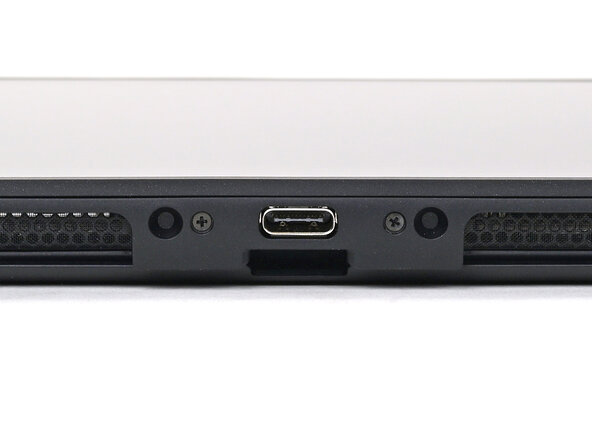
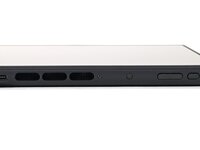
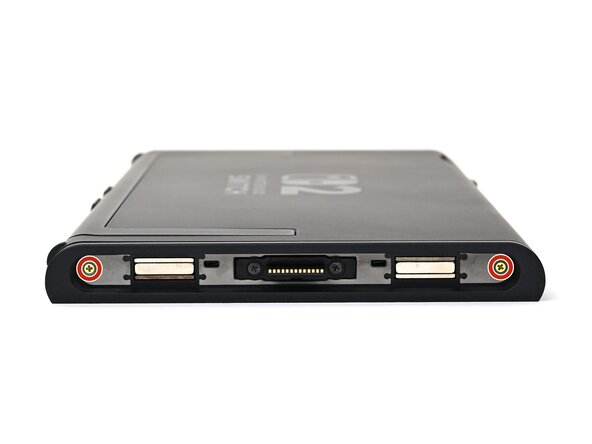
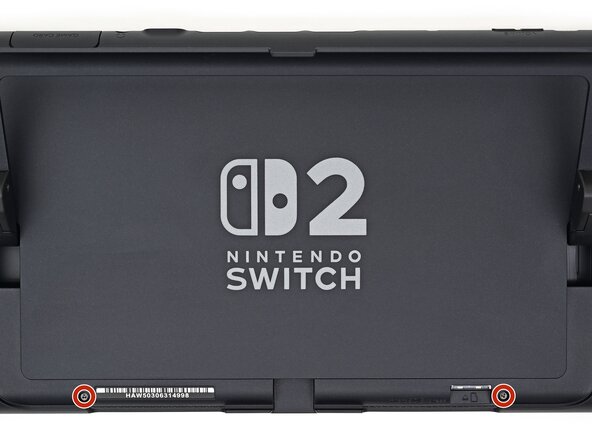
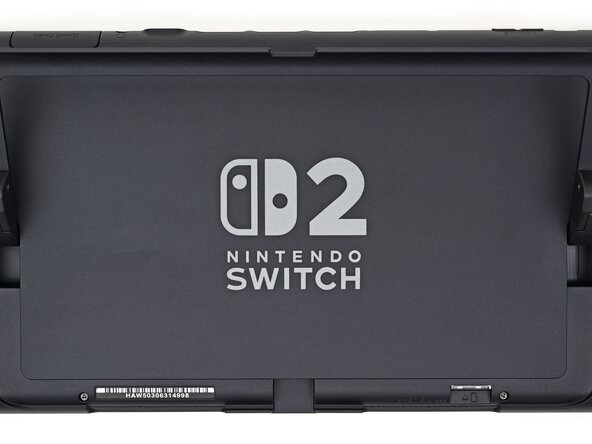
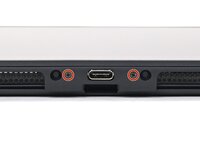
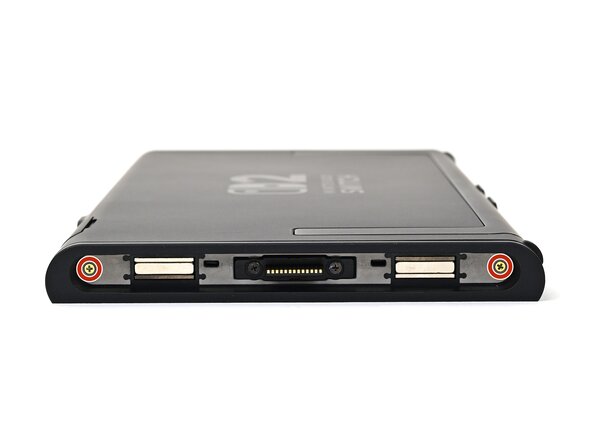
    • Use a JIS 00 driver to remove the two 3.1 mm‑long screws on either side of the bottom USB-C port.

    • You can try a non-iFixit Phillips driver in a pinch, but you risk damaging or stripping the screw. Push down firmly on the driver and twist slowly.

    Vraag FixBot
  3. Nintendo Switch 2 Kickstand Replacement, Remove the top screw: stap 3, afbeelding 1 van 2 Nintendo Switch 2 Kickstand Replacement, Remove the top screw: stap 3, afbeelding 2 van 2
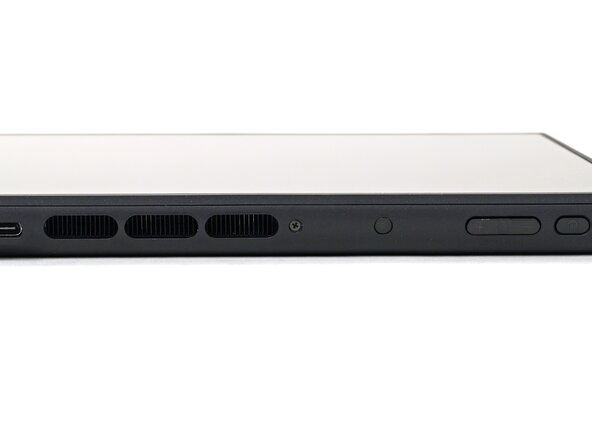
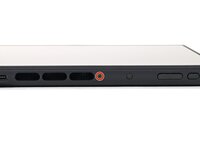
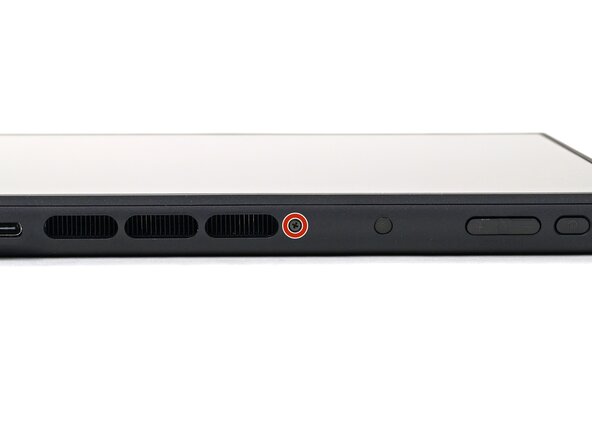
    • Use a JIS 00 driver to remove the 3.1 mm‑long screw on the top edge of the console (next to the ventilation cutouts).

    Vraag FixBot
  4. Nintendo Switch 2 Kickstand Replacement, Heat the right side sticker: stap 4, afbeelding 1 van 1
    • The Switch 2 has stickers on either side that need to removed to access the screws securing the back cover. It's easy to damage the stickers during removal, but you can mitigate this by regularly reheating the stickers and working carefully.

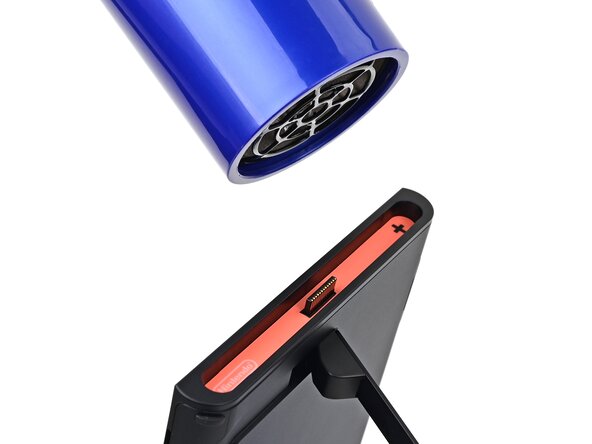
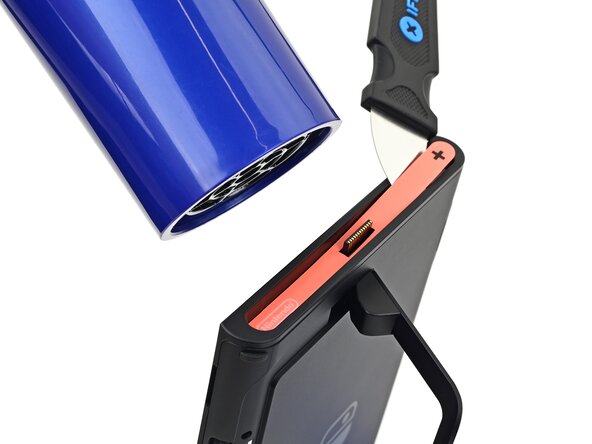
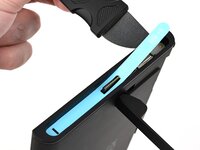
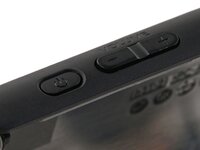
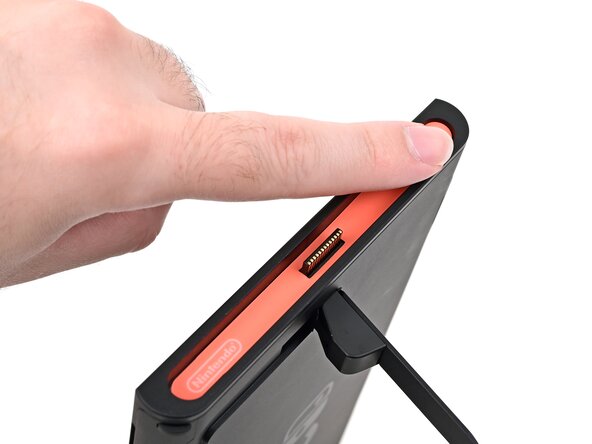
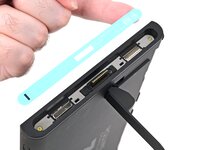
    • Use a hair dryer or heat gun to heat the sticker on the right side of the console, labeled with a "+" symbol, until it's hot to the touch.

    • You can use the kickstand to prop the console up vertically for easier access.

    • If you're using a heat gun, set it to low to avoid melting the plastic edge of the console.

    Vraag FixBot
  5. Nintendo Switch 2 Kickstand Replacement, Pry up the right side sticker: stap 5, afbeelding 1 van 3 Nintendo Switch 2 Kickstand Replacement, Pry up the right side sticker: stap 5, afbeelding 2 van 3 Nintendo Switch 2 Kickstand Replacement, Pry up the right side sticker: stap 5, afbeelding 3 van 3
    • The pointed end of the tweezers can damage the sticker from the underside, leaving a noticeable mark. If it's difficult to lift, apply more heat instead of using more force.

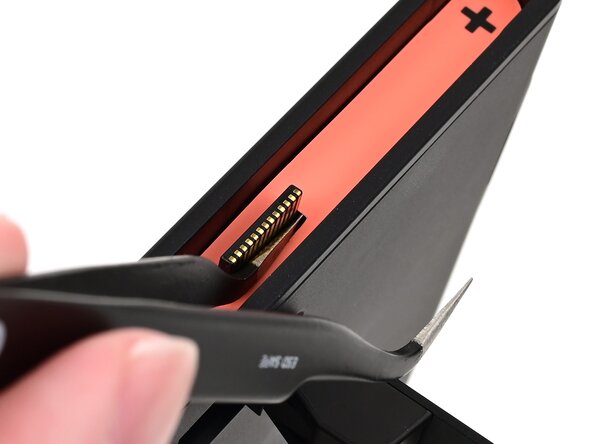
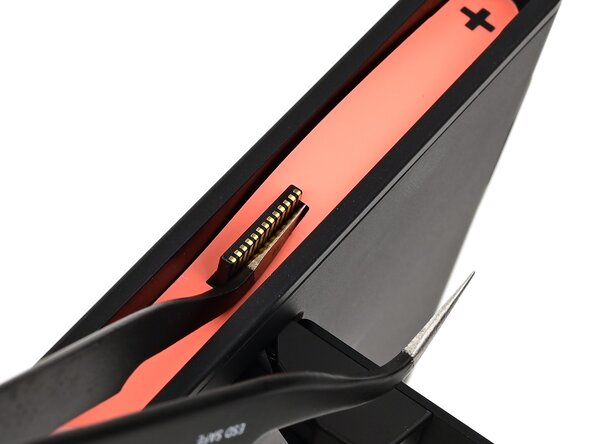
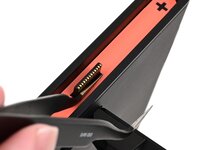
    • Slide one arm of angled tweezers underneath the sticker from its cutout around the right Joy‑Con 2 connector.

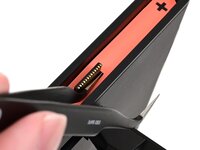
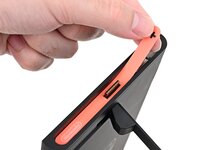
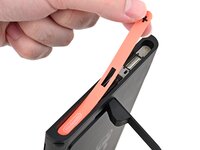
    • Gently pry up on the sticker until it starts to lift from the console.

    • Leave the tweezers in place to keep the sticker lifted.

    Vraag FixBot
  6. Nintendo Switch 2 Kickstand Replacement: stap 6, afbeelding 1 van 3 Nintendo Switch 2 Kickstand Replacement: stap 6, afbeelding 2 van 3 Nintendo Switch 2 Kickstand Replacement: stap 6, afbeelding 3 van 3
    Gereedschap gebruikt in deze stap:
    Jimmy
    $7.95
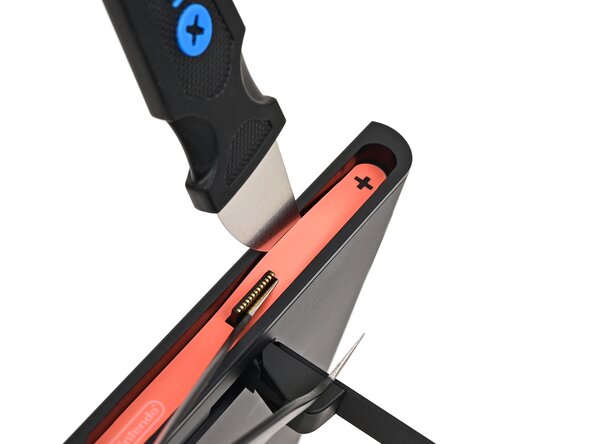
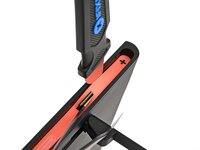
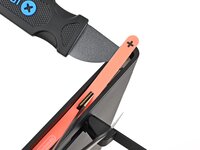
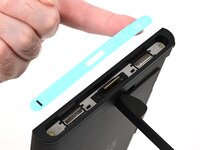
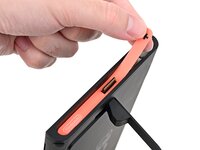
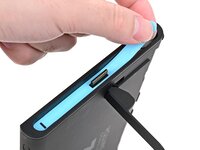
    • Insert the tip of a Jimmy into the gap formed between the long edge of the console and the sticker.

    • Gently pry up the sticker, working your way up the long edge until the top of the sticker is separated from the console.

    • Remove the tweezers once the sticker is lifted.

    • You can leave the Jimmy in place to hold the top of the sticker off the frame—if it falls back into its recess, repeat this procedure to lift it back up.

    Vraag FixBot
  7. Nintendo Switch 2 Kickstand Replacement, Heat the right side sticker: stap 7, afbeelding 1 van 1
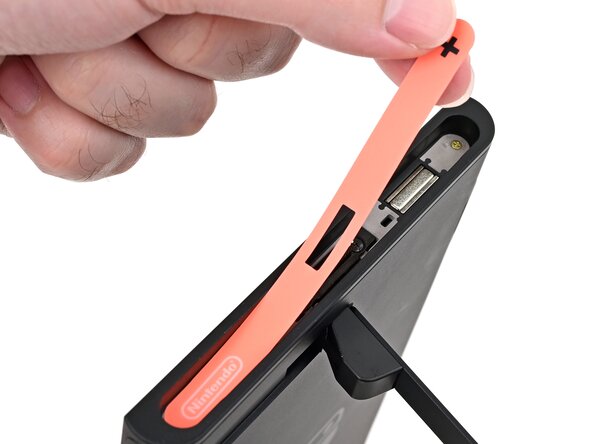
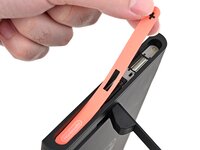
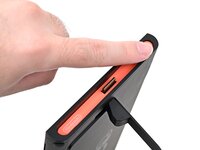
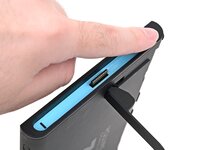
    • Reheat the bottom of the right side until it's hot to the touch.

    Vraag FixBot
  8. Nintendo Switch 2 Kickstand Replacement, Remove the right side sticker: stap 8, afbeelding 1 van 3 Nintendo Switch 2 Kickstand Replacement, Remove the right side sticker: stap 8, afbeelding 2 van 3 Nintendo Switch 2 Kickstand Replacement, Remove the right side sticker: stap 8, afbeelding 3 van 3
    • Carefully lift the sticker over the Joy‑Con 2 connector, then peel it up fully to remove it.

    Vraag FixBot
  9. Nintendo Switch 2 Kickstand Replacement, Remove the left side sticker: stap 9, afbeelding 1 van 3 Nintendo Switch 2 Kickstand Replacement, Remove the left side sticker: stap 9, afbeelding 2 van 3 Nintendo Switch 2 Kickstand Replacement, Remove the left side sticker: stap 9, afbeelding 3 van 3
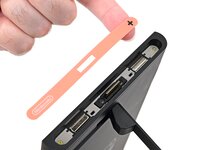
    • Repeat this procedure to remove the sticker along the left side of the console, labeled with a "-" symbol.

    Vraag FixBot
  10. Nintendo Switch 2 Kickstand Replacement, Remove the side screws: stap 10, afbeelding 1 van 2 Nintendo Switch 2 Kickstand Replacement, Remove the side screws: stap 10, afbeelding 2 van 2
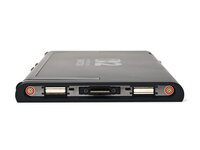
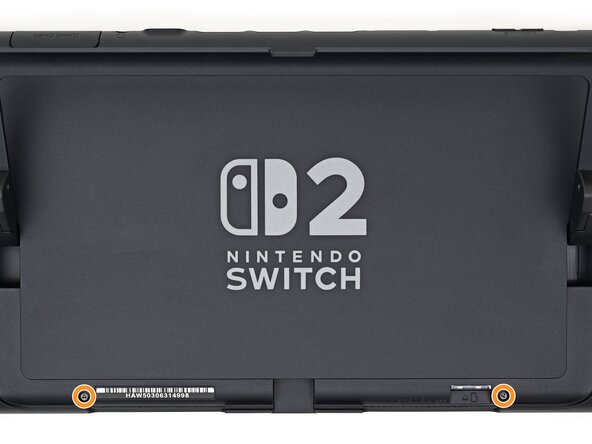
    • Use a JIS 00 driver to remove the two 3.6 mm‑long gold screws on each side of the console (four in total).

    Vraag FixBot
  11. Nintendo Switch 2 Kickstand Replacement, Open the kickstand: stap 11, afbeelding 1 van 3 Nintendo Switch 2 Kickstand Replacement, Open the kickstand: stap 11, afbeelding 2 van 3 Nintendo Switch 2 Kickstand Replacement, Open the kickstand: stap 11, afbeelding 3 van 3
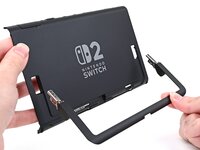
    • Use your fingers to flip up the kickstand on the back of the console.

    • If there's a microSD Express card installed, remove it now before you continue to the next step.

    Vraag FixBot
  12. Nintendo Switch 2 Kickstand Replacement, Remove the back-side screws: stap 12, afbeelding 1 van 2 Nintendo Switch 2 Kickstand Replacement, Remove the back-side screws: stap 12, afbeelding 2 van 2
    • Use a Y00 driver to remove the two 4.4 mm‑long screws in the kickstand cutout.

    Vraag FixBot
  13. Nintendo Switch 2 Kickstand Replacement, Insert an opening pick: stap 13, afbeelding 1 van 2 Nintendo Switch 2 Kickstand Replacement, Insert an opening pick: stap 13, afbeelding 2 van 2
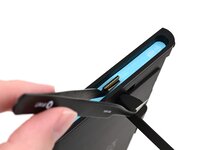
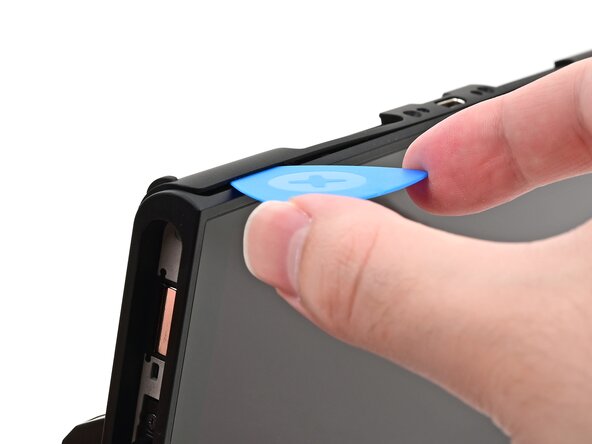
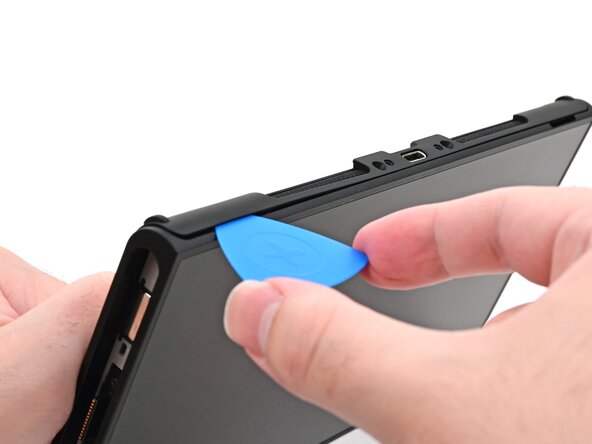
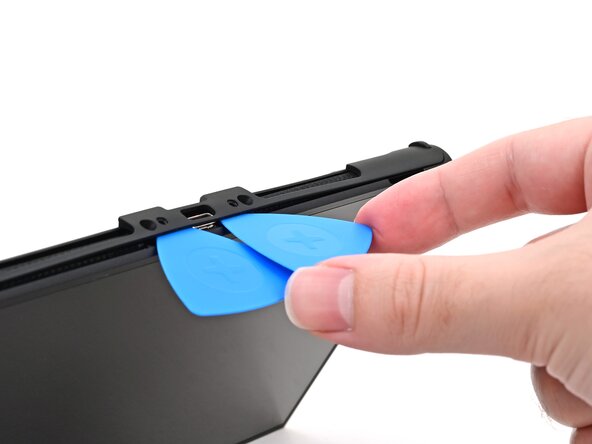
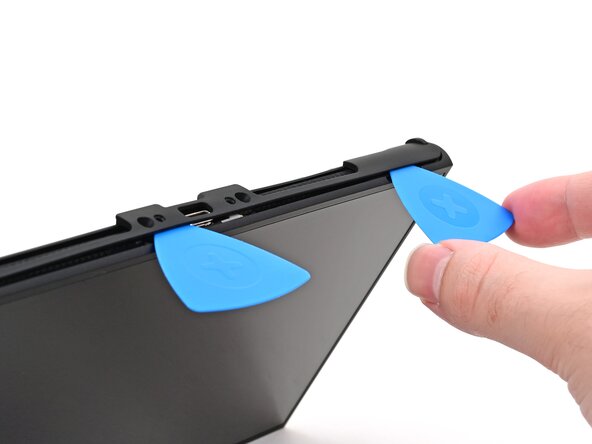
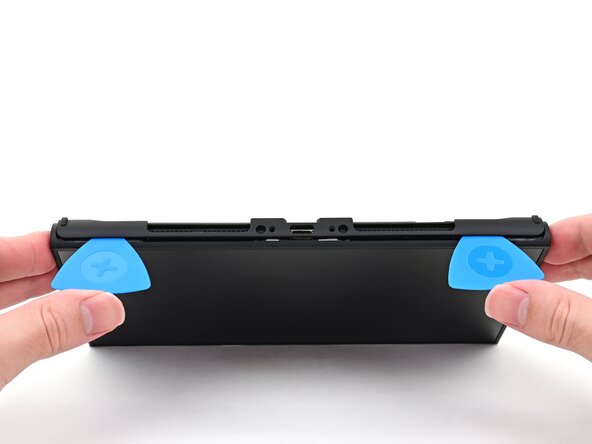
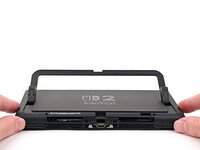
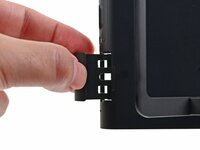
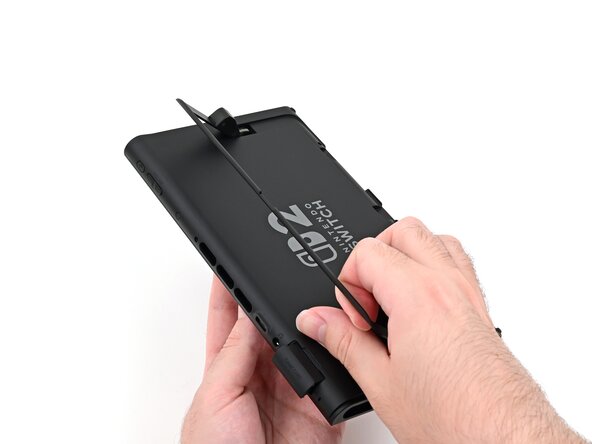
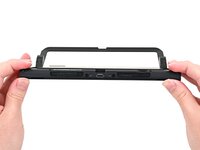
    • Insert an opening pick into the gap between the back cover and speaker cutout on the bottom edge of the console.

    Vraag FixBot
  14. Nintendo Switch 2 Kickstand Replacement: stap 14, afbeelding 1 van 2 Nintendo Switch 2 Kickstand Replacement: stap 14, afbeelding 2 van 2
    • Slide the opening pick towards the USB-C port until it's underneath the screw hole next to the port.

    Vraag FixBot
  15. Nintendo Switch 2 Kickstand Replacement, Insert a second opening pick: stap 15, afbeelding 1 van 3 Nintendo Switch 2 Kickstand Replacement, Insert a second opening pick: stap 15, afbeelding 2 van 3 Nintendo Switch 2 Kickstand Replacement, Insert a second opening pick: stap 15, afbeelding 3 van 3
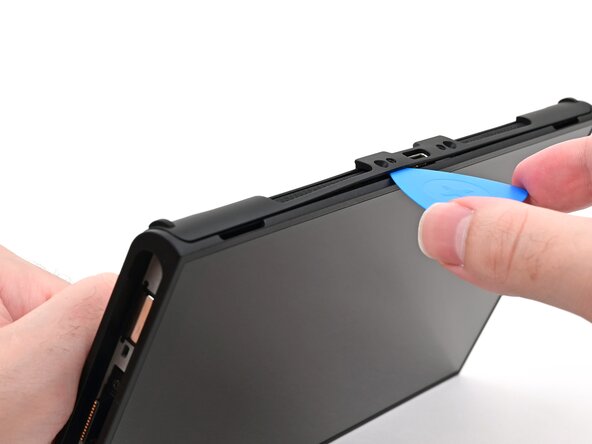
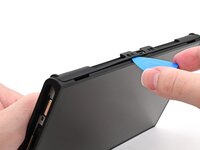
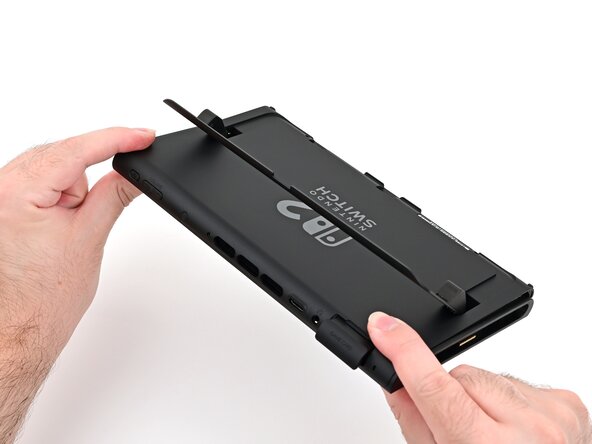
    • Insert a second opening pick underneath the screw hole on the opposite side of the USB-C port, and slide it to the corner of the console.

    Vraag FixBot
  16. Nintendo Switch 2 Kickstand Replacement: stap 16, afbeelding 1 van 2 Nintendo Switch 2 Kickstand Replacement: stap 16, afbeelding 2 van 2
    • Slide the first opening pick back to where it was first inserted.

    Vraag FixBot
  17. Nintendo Switch 2 Kickstand Replacement, Remove the back cover: stap 17, afbeelding 1 van 3 Nintendo Switch 2 Kickstand Replacement, Remove the back cover: stap 17, afbeelding 2 van 3 Nintendo Switch 2 Kickstand Replacement, Remove the back cover: stap 17, afbeelding 3 van 3
    • Be careful not to drop your console. Once the back cover pops up, the opening picks will fall out of place.

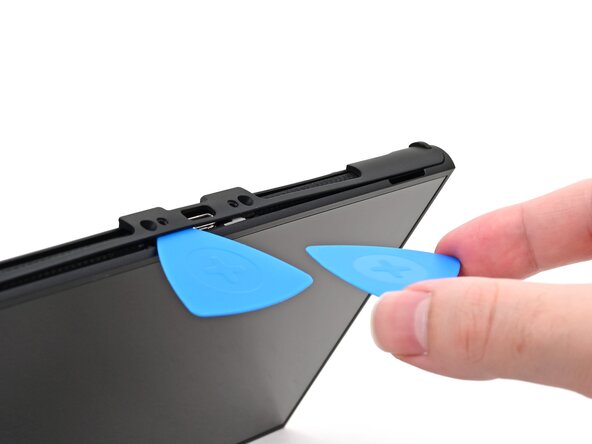
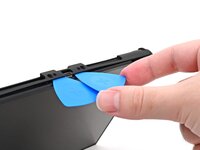
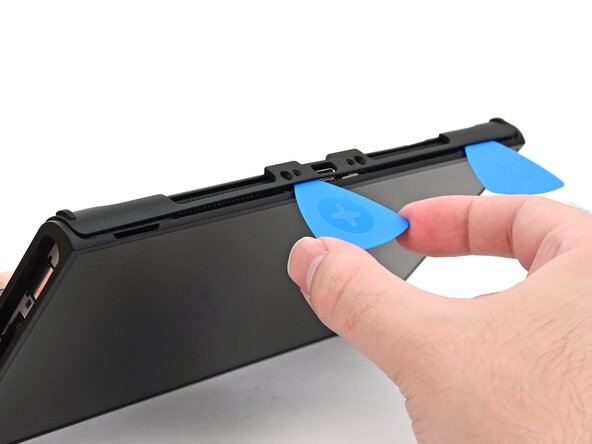
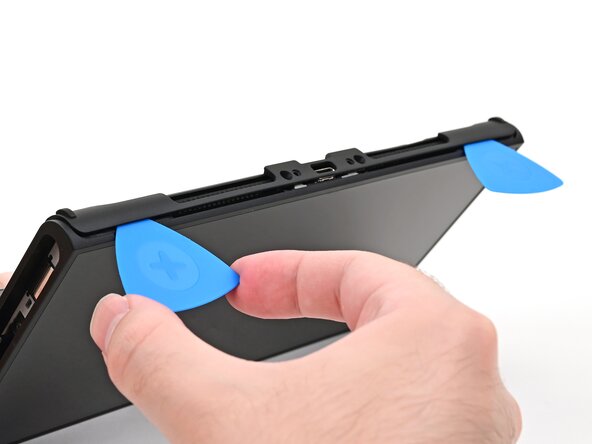
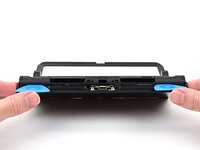
    • Hold the console with two hands. Rest your thumbs on the opening picks.

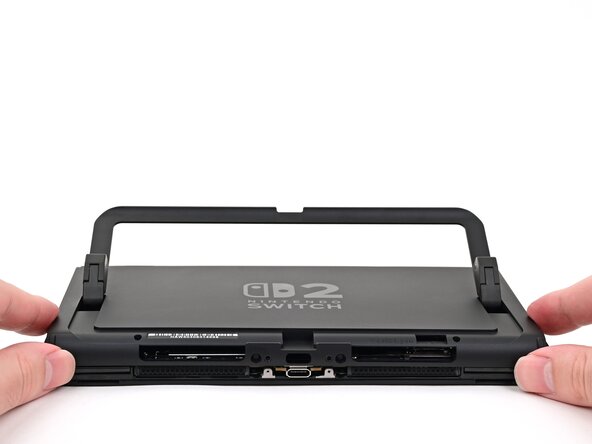
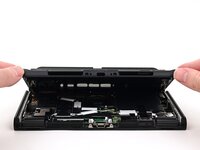
    • Push up on the opening picks to lift the back cover until it pops up above the USB-C port.

    Vraag FixBot
  18. Nintendo Switch 2 Kickstand Replacement: stap 18, afbeelding 1 van 3 Nintendo Switch 2 Kickstand Replacement: stap 18, afbeelding 2 van 3 Nintendo Switch 2 Kickstand Replacement: stap 18, afbeelding 3 van 3
    • Lift the back cover up from the bottom edge and remove it.

    Vraag FixBot
  19. Nintendo Switch 2 Kickstand Replacement, Remove the upper hinge covers: stap 19, afbeelding 1 van 2 Nintendo Switch 2 Kickstand Replacement, Remove the upper hinge covers: stap 19, afbeelding 2 van 2
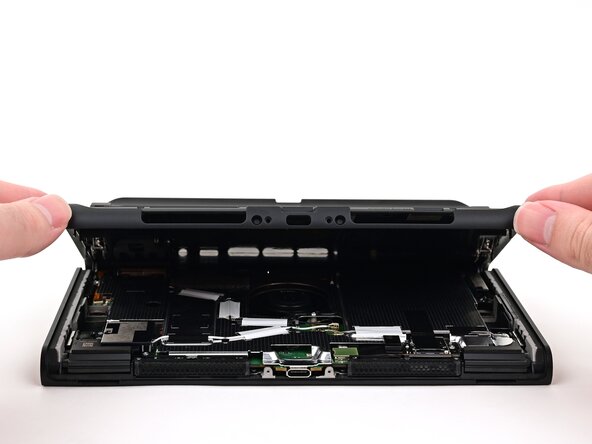
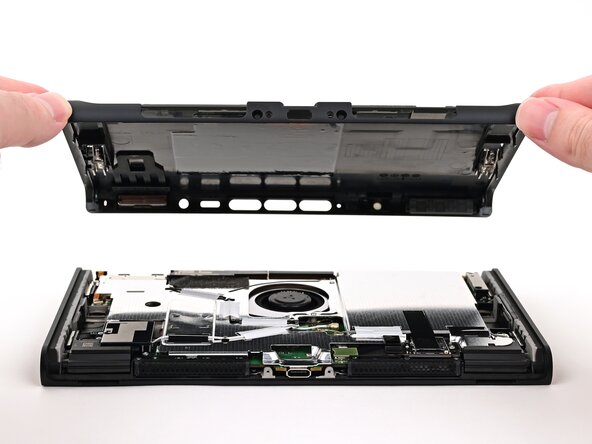
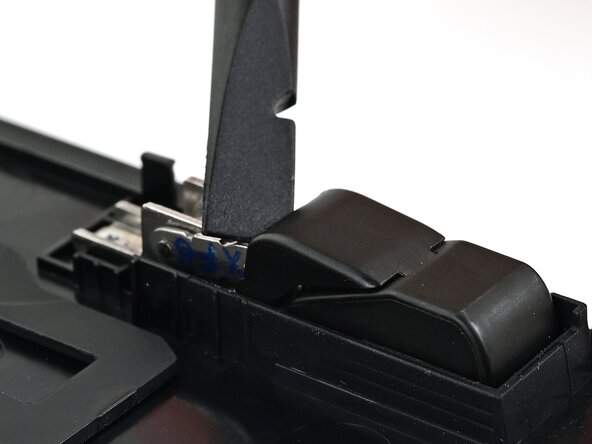
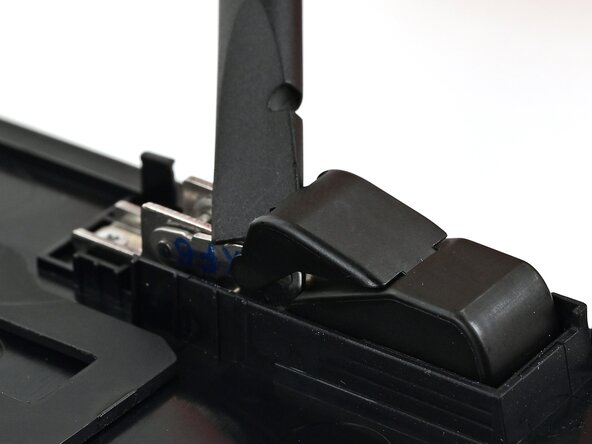
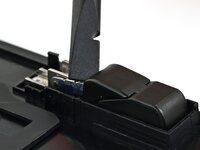
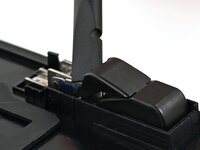
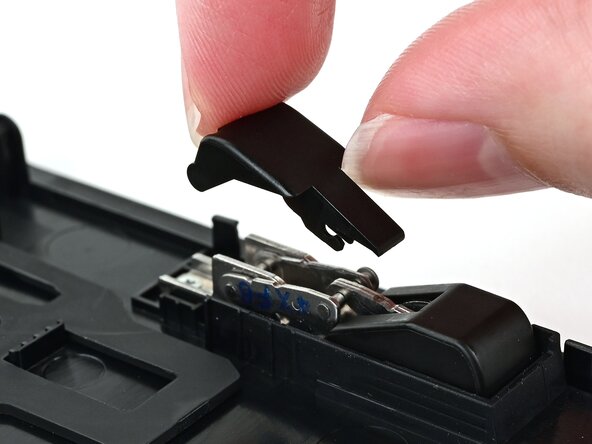
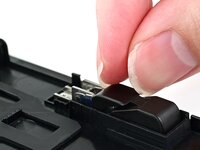
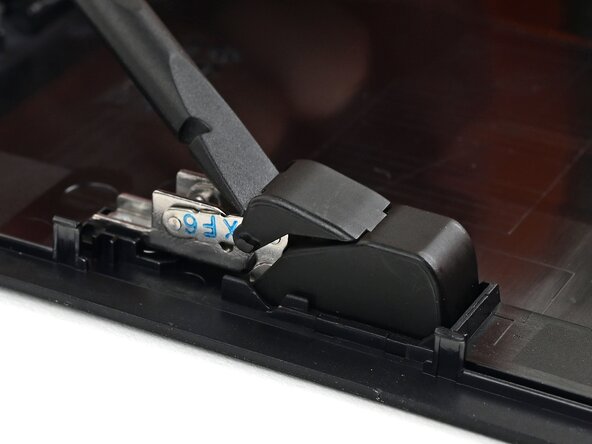
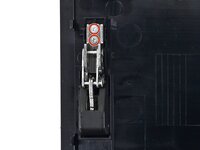
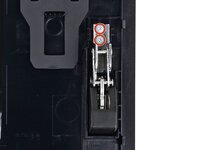
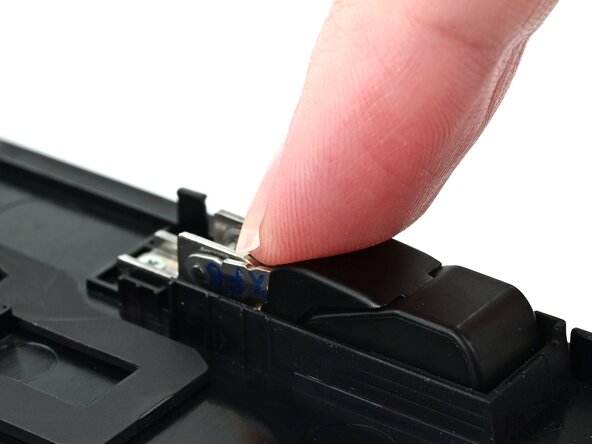
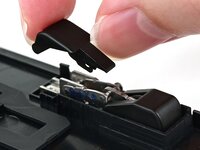
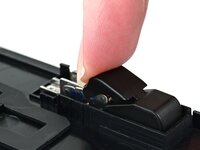
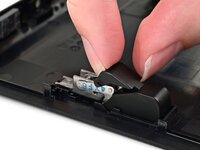
    • Use the flat end of a spudger to pry up one of the hinge's plastic upper hinge covers until it "pops" up.

    Vraag FixBot
  20. Nintendo Switch 2 Kickstand Replacement: stap 20, afbeelding 1 van 2 Nintendo Switch 2 Kickstand Replacement: stap 20, afbeelding 2 van 2
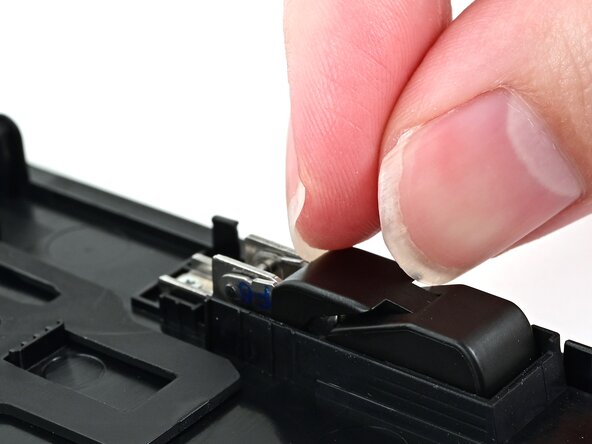
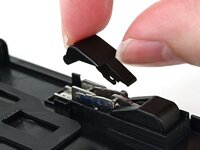
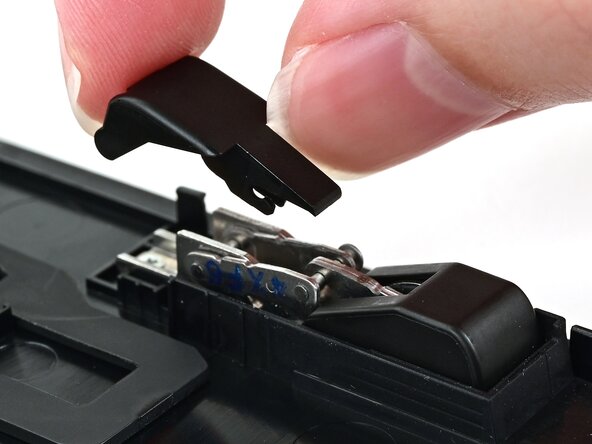
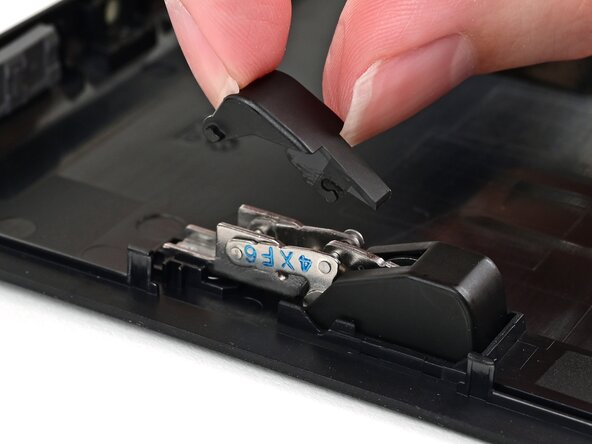
    • Pull the upper hinge cover out from underneath the lower hinge cover to remove it.

    • The cover is clipped in place and requires a little bit of force to remove.

    Vraag FixBot
  21. Nintendo Switch 2 Kickstand Replacement: stap 21, afbeelding 1 van 3 Nintendo Switch 2 Kickstand Replacement: stap 21, afbeelding 2 van 3 Nintendo Switch 2 Kickstand Replacement: stap 21, afbeelding 3 van 3
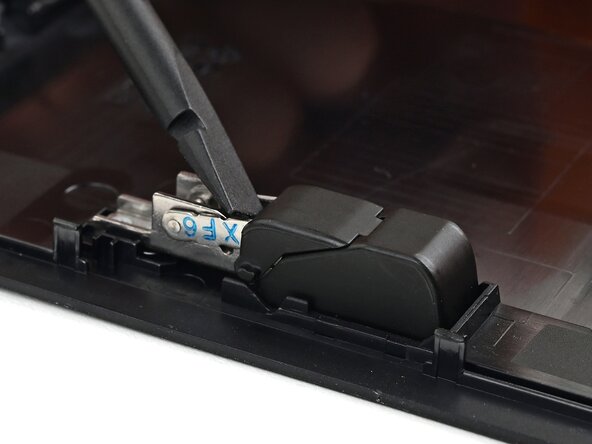
    • Repeat this process to remove the upper hinge cover on the other hinge.

    Vraag FixBot
  22. Nintendo Switch 2 Kickstand Replacement, Remove the kickstand screws: stap 22, afbeelding 1 van 2 Nintendo Switch 2 Kickstand Replacement, Remove the kickstand screws: stap 22, afbeelding 2 van 2
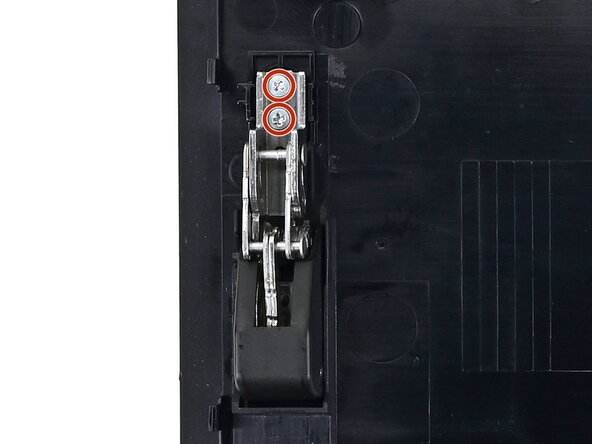
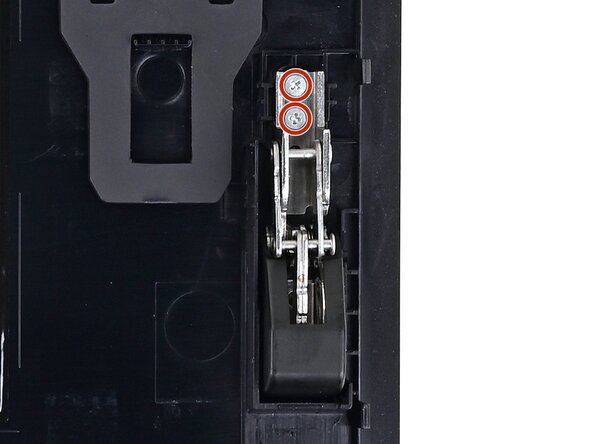
    • Use a JIS 00 driver to remove the two 2.3 mm‑long silver screws securing each hinge to the inside of the back cover (four total).

    Vraag FixBot
  23. Nintendo Switch 2 Kickstand Replacement, Remove the kickstand: stap 23, afbeelding 1 van 3 Nintendo Switch 2 Kickstand Replacement, Remove the kickstand: stap 23, afbeelding 2 van 3 Nintendo Switch 2 Kickstand Replacement, Remove the kickstand: stap 23, afbeelding 3 van 3
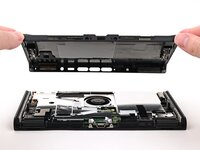
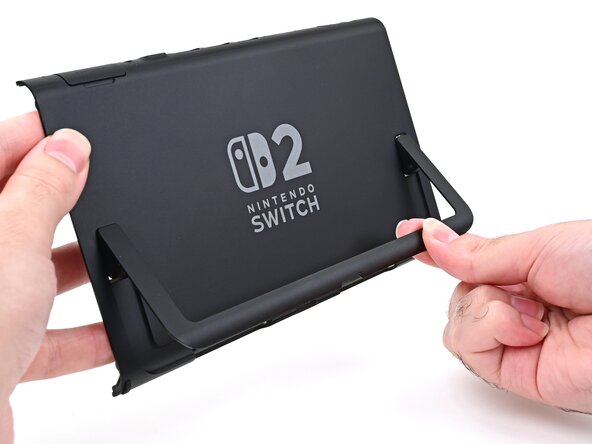
    • Open the kickstand to a 45‑degree angle and pull it out of the back cover to remove it.

    Vraag FixBot
  24. Nintendo Switch 2 Kickstand Replacement, Disassembly complete: stap 24, afbeelding 1 van 1
    • Congratulations on completing disassembly! The remaining steps will show how to reassemble your console.

    Vraag FixBot
  25. Nintendo Switch 2 Kickstand Replacement, Install the kickstand: stap 25, afbeelding 1 van 3 Nintendo Switch 2 Kickstand Replacement, Install the kickstand: stap 25, afbeelding 2 van 3 Nintendo Switch 2 Kickstand Replacement, Install the kickstand: stap 25, afbeelding 3 van 3
    • Align the kickstand so its hinge covers are facing the back cover.

    • Insert the hinges through their slots in the back cover and set the kickstand into its cutout.

    Vraag FixBot
  26. Nintendo Switch 2 Kickstand Replacement, Install the kickstand screws: stap 26, afbeelding 1 van 2 Nintendo Switch 2 Kickstand Replacement, Install the kickstand screws: stap 26, afbeelding 2 van 2
    • Use a JIS 00 driver to install the two 2.3 mm‑long silver screws securing each hinge to the inside of the back cover (four total).

    Vraag FixBot
  27. Nintendo Switch 2 Kickstand Replacement, Install the upper hinge covers: stap 27, afbeelding 1 van 3 Nintendo Switch 2 Kickstand Replacement, Install the upper hinge covers: stap 27, afbeelding 2 van 3 Nintendo Switch 2 Kickstand Replacement, Install the upper hinge covers: stap 27, afbeelding 3 van 3
    • Align one of the upper hinge covers with its respective hinge, and slide it underneath the lower hinge cover.

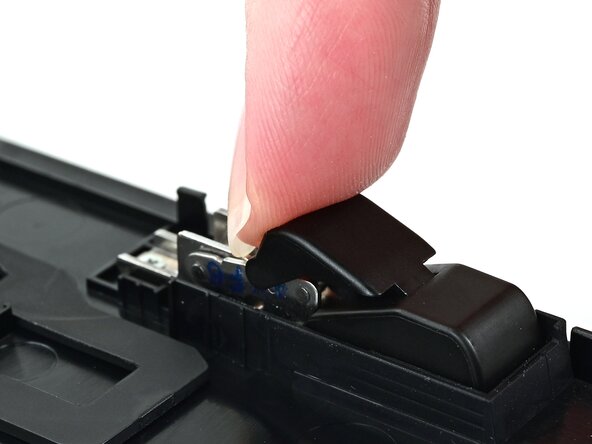
    • Use your finger to press the upper hinge cover down until it clicks into place.

    Vraag FixBot
  28. Nintendo Switch 2 Kickstand Replacement: stap 28, afbeelding 1 van 3 Nintendo Switch 2 Kickstand Replacement: stap 28, afbeelding 2 van 3 Nintendo Switch 2 Kickstand Replacement: stap 28, afbeelding 3 van 3
    • Repeat this process to install the other upper hinge cover.

    Vraag FixBot
  29. Nintendo Switch 2 Kickstand Replacement, Prepare the back cover: stap 29, afbeelding 1 van 3 Nintendo Switch 2 Kickstand Replacement, Prepare the back cover: stap 29, afbeelding 2 van 3 Nintendo Switch 2 Kickstand Replacement, Prepare the back cover: stap 29, afbeelding 3 van 3
    • Fully pull out the game card tray.

    • Double-check the power and volume buttons to ensure they're seated correctly. If the rubber membrane beneath the buttons is out of place, ensure it's aligned with its pegs.

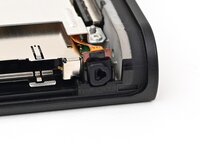
    • Check the microphone to ensure it's fully seated in its slot in the frame.

    Vraag FixBot
  30. Nintendo Switch 2 Kickstand Replacement, Install the back cover: stap 30, afbeelding 1 van 3 Nintendo Switch 2 Kickstand Replacement, Install the back cover: stap 30, afbeelding 2 van 3 Nintendo Switch 2 Kickstand Replacement, Install the back cover: stap 30, afbeelding 3 van 3
    • Align the top of the back cover with the top of the console.

    • Set the top edge of the back cover into place, checking the buttons and ports to ensure they're aligned properly. If they aren't, lift the back cover and try again.

    • Press along the top edge to fasten the clips securing the back cover to the console.

    Vraag FixBot
  31. Nintendo Switch 2 Kickstand Replacement: stap 31, afbeelding 1 van 2 Nintendo Switch 2 Kickstand Replacement: stap 31, afbeelding 2 van 2
    • Squeeze the rest of the back cover and console together to fasten the clips.

    Vraag FixBot
  32. Nintendo Switch 2 Kickstand Replacement, Install the back-side screws: stap 32, afbeelding 1 van 3 Nintendo Switch 2 Kickstand Replacement, Install the back-side screws: stap 32, afbeelding 2 van 3 Nintendo Switch 2 Kickstand Replacement, Install the back-side screws: stap 32, afbeelding 3 van 3
    • Use a JIS 00 driver to install the three 3.1 mm‑long screws securing the back cover: one on the top edge of the console, and two on either side of the bottom USB-C port.

    • Use a Y00 driver to install the two 4.4 mm‑long screws in the kickstand cutout.

    Vraag FixBot
  33. Nintendo Switch 2 Kickstand Replacement, Install the side screws: stap 33, afbeelding 1 van 2 Nintendo Switch 2 Kickstand Replacement, Install the side screws: stap 33, afbeelding 2 van 2
    • Install the two 3.6 mm‑long gold screws on each side of the console (four in total).

    Vraag FixBot
  34. Nintendo Switch 2 Kickstand Replacement, Test the console: stap 34, afbeelding 1 van 2 Nintendo Switch 2 Kickstand Replacement, Test the console: stap 34, afbeelding 2 van 2
    • Power on the console and test functionality to ensure it's working as expected.

    Vraag FixBot
  35. Nintendo Switch 2 Kickstand Replacement, Install the stickers: stap 35, afbeelding 1 van 3 Nintendo Switch 2 Kickstand Replacement, Install the stickers: stap 35, afbeelding 2 van 3 Nintendo Switch 2 Kickstand Replacement, Install the stickers: stap 35, afbeelding 3 van 3
    • Align the right side sticker with its recess. Ensure the cutout in the sticker is aligned with the Joy-Con connector.

    • Set the sticker into its recess, first on one side, then the other.

    • Use your finger or the flat end of a spudger to press the sticker into place.

    • If the sticker isn't sticking well, apply heat after you press it into place.

    Vraag FixBot
  36. Nintendo Switch 2 Kickstand Replacement: stap 36, afbeelding 1 van 3 Nintendo Switch 2 Kickstand Replacement: stap 36, afbeelding 2 van 3 Nintendo Switch 2 Kickstand Replacement: stap 36, afbeelding 3 van 3
    • Repeat this procedure to install the left side sticker.

    Vraag FixBot
Conclusie

You finished fixing your Switch 2!

Take your e-waste to an R2 or e-Stewards certified recycler.

Repair didn’t go as planned? Try some basic troubleshooting, or ask our Nintendo Switch 2 Answers Community for help.

Nick Schultz

Lid sinds: 03/24/24

54.476 Reputatie

305 handleidingen geschreven

0Gids Commentaar

Voeg opmerking toe

Weergavestatistieken:

Afgelopen 24 uren: 13

Afgelopen 7 dagen: 66

Afgelopen 30 dagen: 308

Altijd: 1,890