Nintendo Game Boy Advance SP Brightness Switch Replacement
Inleiding
Ga naar stap 1The brightness switch is the circular button with a sun symbol engraved into it. The brightness switch is located at the top of the button panel.
Wat je nodig hebt
-
-
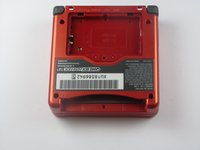
Use a standard Phillips #00 screwdriver to loosen the 4 mm screw that keeps the battery cover attached to the device.
-
-
-
-
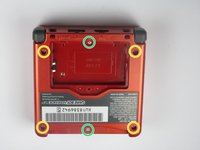
Remove four 6.5 mm screws from the corners of the back cover using a tri-point Y00 screwdriver.
-
Remove two 4.6mm screws from the top-center and bottom-center of the device using a tri-point Y00 screwdriver.
-
-
-
Using a Phillips #00 screwdriver, remove the three Phillips #00 4 mm long screws that hold the motherboard to the button panel.
-
-
-
Flip the motherboard up and rest it on the other half of the device, so that the back of the buttons are visible as seen in the picture.
My Game Boy Advance SP has a problem where it won’t charge the device. The Game Boy is plugged in but the charge light does not go on. How may I turn it back on? What, inside the system, needs to be fixed? Is it one of the cables behind the charging socket inside the Game Boy?
-
-
-
With your fingers, lift the track pad out off the brightness switch.
-
To reassemble your device, follow these instructions in reverse order.
To reassemble your device, follow these instructions in reverse order.
Annuleren: ik heb deze handleiding niet afgemaakt.
15 andere personen hebben deze handleiding voltooid.


Quel est le nom du vis svp je l'ai perdu et j'ai pas la référence
la chaîne de Samarium - Antwoord
Bonjour @lachainede96340 D'après les instructions du tutoriel, il s'agit d'une vis Phillips (ou cruciforme) #00 de 4 mm de long. Ces mesures devraient suffire pour trouver une vis de remplacement dans votre stock de vis ou en magasin le cas échéant.
Claire Miesch -