Inleiding
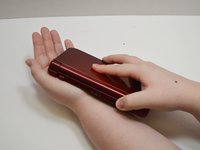
This guide will allow you to repair a broken circle pad on your 2015 Nintendo 3DS XL. If your circle pad no longer functions well or doesn't function at all this is the guide for you. All you will need is a new circle pad, a few screwdrivers and with a little patience your 3DS will once again have full functionality.
Wat je nodig hebt
-
-
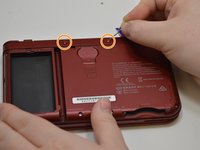
Turn the device so that the back cover is facing you and locate the two screws at the top of the back cover.
-
Using the Phillips #000 screwdriver, loosen the screws on the back cover.
-
Gently pry the tabs on the side of the device with the metal spudger or your thumbnail and lift off the back cover.
-
-
-
-
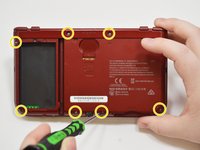
Remove the two rubber bumpers on the back of the device with a thumb tack.
-
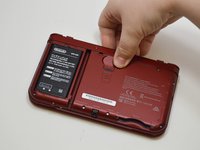
Using the Phillips #00 screwdriver, remove all 8 of the screws holding the bottom cover to the motherboard.
-
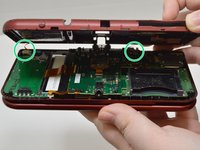
Lift off the bottom cover, being sure not to disconnect the two ZIF connectors for the L/R buttons on the back of the device.
-
-
-
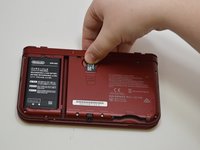
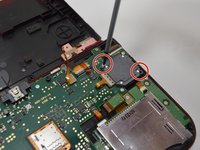
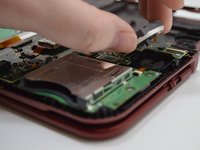
Using the tip of the spudger, gently lift off the lid of the ZIF connector to release the circle pad cable.
what am i supposed to do to get the rest of it off? there's a whole part of the circle pad missing in these steps.
-
-
-
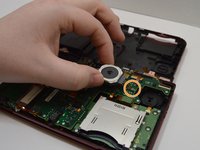
Take the new circle pad assembly and insert the cable back into the open ZIF connector and close it using the spudger.
-
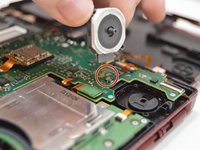
Ensure the internal component of the circle pad is correctly oriented with a small screwdriver or spudger.
-
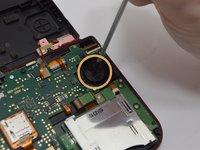
Gently place the new circle pad back into its place and secure with the screws.
No where does this Mention the 3 different sized screws and where they go after disassemble.
Great guide, it could also do with how to replace the rubber top half of the circle pad too. I've also done this. From the photo in step 8, there's a thin split plastic washer underneath the underside of the circle pad still attached to the 3DS. You can carefully slide this washer out through it's split, then you can remove the upper half of the circle pad by carefully sliding one prong of the C shape through the hole, sliding it through going round, then the other prong will side out and it will be removed. To replace, do it in reverse, but it's very fiddly sliding the split washer back into place, but it can be done with tweezers. On all 3DSs I've opened, the notch on the C shape on the underside is facing down towards the bottom, on this photo it's shown facing the top, but I don't know if it makes any difference. This applies to both old and new 3DS XL and I imagine applies to others too.
-


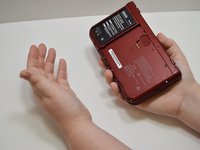
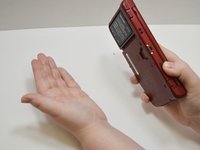


To reassemble your device, follow these instructions in reverse order.
To reassemble your device, follow these instructions in reverse order.
Annuleren: ik heb deze handleiding niet afgemaakt.
23 andere personen hebben deze handleiding voltooid.
Team

University of Memphis, Team S5-G2, Baddour Spring 2018 Lid van University of Memphis, Team S5-G2, Baddour Spring 2018
UM-BADDOUR-S18S5G2
2 Leden
6 handleidingen geschreven
5 opmerkingen
oh my gosh this is the best guide my grand-son and i fixed his sons 3DS he is so happy
Thanks for the guide! I needed to replace the internal component of the circle pad as well, as the rubber pad came off mine. @thirtyninester 's comment on Step 8 helped! Thanks to that comment as well!
Help! I'm stuck on Step 5. Upper leftmost screw refuses to come out and I can't tell whether I've worn down the screwhead or the screwdriver. Removal advice please. Otherwise my only recourse may be to replace the entire system. Just transfer everything datawise and be done with it. It'd be a shame if I had to admit I spent $90+ on parts & tools for nothing just for it to come to this. And I don't even want to think about how much a new unit will cost on the secondhand market. I'll be lucky to find one at it's original MSRP.
Hey,
you could try to use a slightly larger screwdriver and see if the screw comes out. Otherwise you have to drill the screw out which is probably still better/cheaper than replacing everything. Hope this helps!