
Motorola Droid RAZR M Front Assembly Replacement
Inleiding
Ga naar stap 1This guide will help you remove the front assembly from the Motorola Droid RAZR M so that you can have access to the guts of the phone. At the end of this guide, the phone will be separated into two pieces: the front assembly with the display and ear speaker, and the rear assembly with the battery, motherboard, and other remaining components.
Wat je nodig hebt


-
-
Open the small latch on the left side of the device by lifting gently with your finger, exposing the SIM card and microSD card slots.
-
If either of these cards are present, remove them to prevent damaging them while taking apart the phone. Our device does not have either.
-
Close the latch once the two cards are removed.
-
-
-
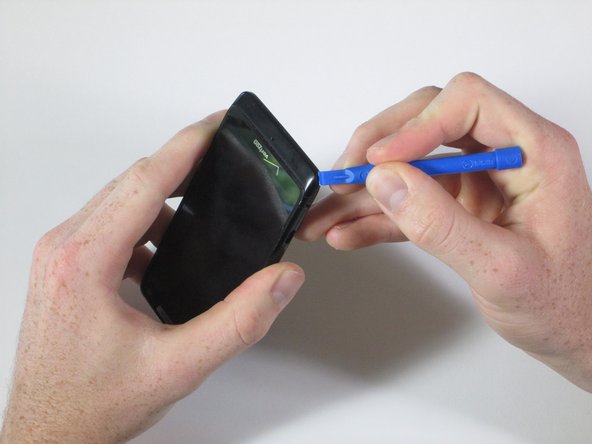
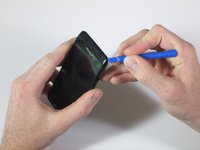
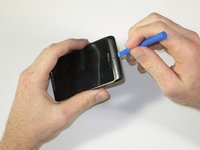
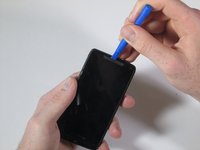
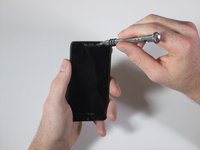
Run the plastic opening tool under the bottom edge of the phone to detach the small plastic cover below the Verizon logo.
-
It will take some force to remove this piece. Work around the bottom corners to unlatch the two hooks holding the piece in place.
-
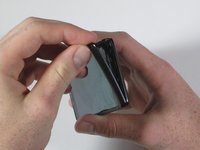
Once the plastic cover is detached, pull the piece away with your fingers.
-
-
-
-
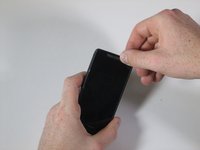
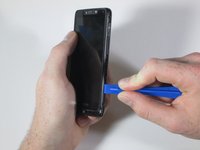
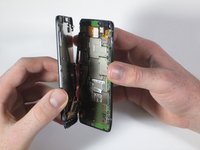
Like a clamshell, slowly open the device from the top. Open the remainder of the device slowly while being mindful of the flat orange wire that connects the motherboard to the front assembly.
-
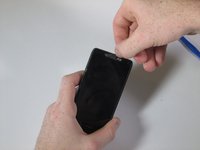
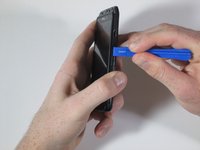
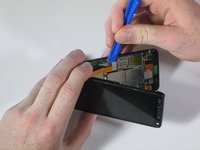
Undo the snap connection in the lower left corner by inserting the plastic opening tool under the end of the orange wire connected to the motherboard. Lift gently.
-
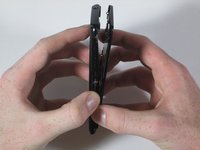
Once the snap connection is undone, pull apart the front assembly from the rest of the phone.
-


To reassemble your device, follow these instructions in reverse order.
To reassemble your device, follow these instructions in reverse order.
Annuleren: ik heb deze handleiding niet afgemaakt.
4 andere personen hebben deze handleiding voltooid.
Team

Cal Poly, Team 15-1, Amido Spring 2015 Lid van Cal Poly, Team 15-1, Amido Spring 2015
CPSU-AMIDO-S15S15G1
4 Leden
14 handleidingen geschreven