Ga door naar hoofdinhoud
Logitech MX Keys Feet Replacement

Logitech MX Keys Feet Replacement

Spencer Day

Spencer Day en een andere bijdrager

Voor het laatst geüpdatet op February 10, 2025

10 - 15 minuten
Gemiddeld

Follow this guide to replace worn-out or damaged feet (also known as skates, glides, slides, or pads) on your Logitech MX Keys wireless keyboard.

Wat je nodig hebt

Onderdelen

Gereedschap

Toon meer…

iFixit krijgt commissie als je dingen koopt via deze links.
  1. Logitech MX Keys Feet Replacement, Prepare your keyboard for disassembly: stap 1, afbeelding 1 van 3 Logitech MX Keys Feet Replacement, Prepare your keyboard for disassembly: stap 1, afbeelding 2 van 3 Logitech MX Keys Feet Replacement, Prepare your keyboard for disassembly: stap 1, afbeelding 3 van 3
    • Slide the keyboard's power switch into the OFF position.

    • A red indicator should be visible beneath the switch.

    • Unplug all cables from your keyboard.

    • Lay your keyboard down with the feet facing up on a clean work surface.

    • If your work surface may scratch the keyboard, place a soft towel under it.

  2. Logitech MX Keys Feet Replacement, Remove the feet: stap 2, afbeelding 1 van 2 Logitech MX Keys Feet Replacement, Remove the feet: stap 2, afbeelding 2 van 2
    • Heat an iOpener and lay it on the top left foot for one minute.

    • Alternatively, you can use a hair dryer on the Low heat setting to soften the adhesive.

    • If you're using a hair dryer, only heat the feet a few seconds at a time or you may warp the plastic.

  3. Logitech MX Keys Feet Replacement: stap 3, afbeelding 1 van 3 Logitech MX Keys Feet Replacement: stap 3, afbeelding 2 van 3 Logitech MX Keys Feet Replacement: stap 3, afbeelding 3 van 3
    • The foot should come up without much force. If it feels stuck, apply more heat and try again.

    • Insert the point of a spudger under an end of the foot.

    • Push the spudger underneath the foot and lift until you can grip it with your fingers.

    • Peel the foot up and remove it.

    • Repeat the previous two steps to remove the remaining feet.

    • If you're just replacing the battery, you only need to remove the feet along the top edge.

  4. Logitech MX Keys Feet Replacement, Reassembly information: stap 4, afbeelding 1 van 2 Logitech MX Keys Feet Replacement, Reassembly information: stap 4, afbeelding 2 van 2
    Gereedschap gebruikt in deze stap:
    Tesa 61395 Tape
    $2.99
    • To install the feet during reassembly:

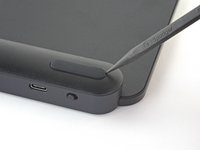
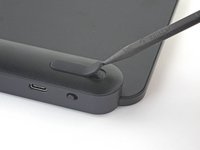
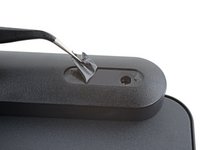
    • Use a pair of angled tweezers to peel up and remove all the plastic film from the foot recesses.

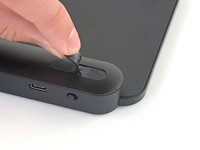
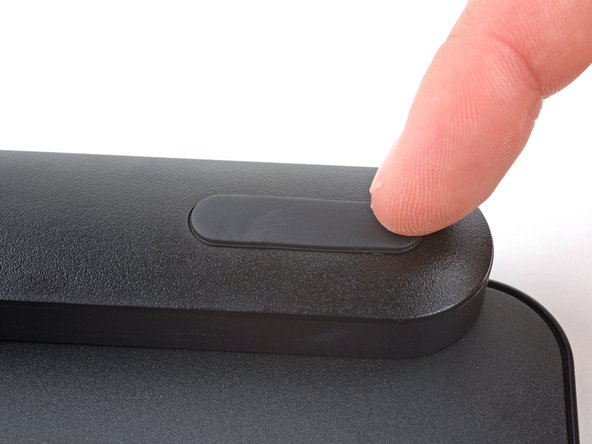
    • If you're installing new feet, remove them from their backing and firmly press them into place.

    • If you're reusing the feet, use a strip of double-sided tape to secure them in their recesses.

Conclusie

Repair didn’t go as planned? Try some basic troubleshooting, or ask our Answers community for help.

Één andere persoon heeft deze handleiding voltooid.

Spencer Day

Lid sinds: 09/14/22

95.682 Reputatie

662 handleidingen geschreven

Team

iFixit Lid van iFixit

Staff

118 Leden

19.539 handleidingen geschreven

0 opmerkingen

Voeg opmerking toe

Weergavestatistieken:

Afgelopen 24 uren: 9

Afgelopen 7 dagen: 66

Afgelopen 30 dagen: 364

Altijd: 1,470