Inleiding
Gebruik deze handleiding om de versleten of kapotte batterij van je draadloze Logitech G903 te vervangen.
Het is normaal dat batterijen hun capaciteit verliezen naarmate ze ouder worden. Als je muis steeds sneller leeg is en nog maar moeilijk de lading vast kan houden, is het tijd om de batterij te vervangen.
Voer deze reparatie, voor je eigen veiligheid, alleen uit als de batterij tot onder de 15% ontladen is. Als een geladen lithium-ionbatterij tijdens een reparatie wordt doorboord of beschadigd, kan dit een gevaarlijke situatie opleveren. Neem de juiste voorzorgsmaatregelen als je batterij er gezwollen uitziet.
Wat je nodig hebt
-
-
Zet de aan-uitschakelaar van de muis in de OFF-stand.
-
Koppel alle aangesloten kabels los.
 Vraag FixBot
-
-
-
Verwarm een iOpener en leg deze gedurende een minuut op de muisvoeten om de lijm eronder te verwarmen.
-
-
-
Schuif de punt van een openingsplectrum onder een van de hoeken van de onderste muisvoet en zorg dat je je plectrum onder zowel de voet als de lijmlaag schuift.
-
Schuif je plectrum verder onder de voet en til de voet omhoog tot je 'm vast kunt pakken.
-
Trek de voet verder los en verwijder 'm.
-
-
-
Schuif je het platte deel van je spudger onder een hoek van de lijmlaag. Verhit het opnieuw als de lijm hard aanvoelt.
-
Trek de lijmlaag eraf.
-
Controleer je eerst of de oude voeten beschadigd zijn, bijvoorbeeld doordat je de lijm- van de rubberlaag hebt gescheiden, en vervang je ze indien nodig.
-
Gebruik je een spudger om de oude lijmresten te verwijderen.
-
Gebruik je wat isopropylalcohol en een pluisvrije doek om alle lijmresten van de muis te verwijderen. Laat de gebieden ongeveer 1-2 minuten drogen.
-
Verwijder de beschermfolie van de nieuwe voetjes en druk ze stevig op hun plek.
-
-
-
Herhaal dit proces om de twee vijfhoekige voetjes aan de linker- en rechterkant van de muis te verwijderen.
-
-
-
Verwarm een iOpener en leg deze gedurende een minuut op de Logitech-sticker om de lijm eronder te verwarmen.
-
-
-
-
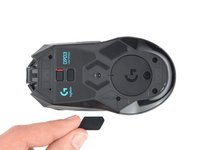
Schuif de punt van een openingsplectrum onder een van de hoeken van de Logitech-sticker.
-
Schuif je plectrum langzaam maar zeker voorzichtig verder en duw de sticker omhoog tot je 'm met je vingers vast kunt pakken.
-
Peuter de sticker verder los en verwijder 'm.
-
-
-
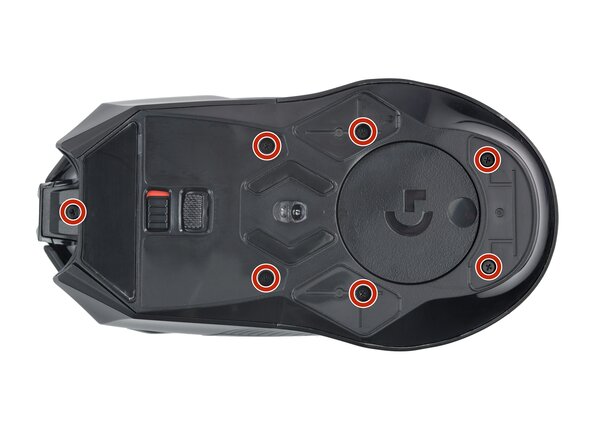
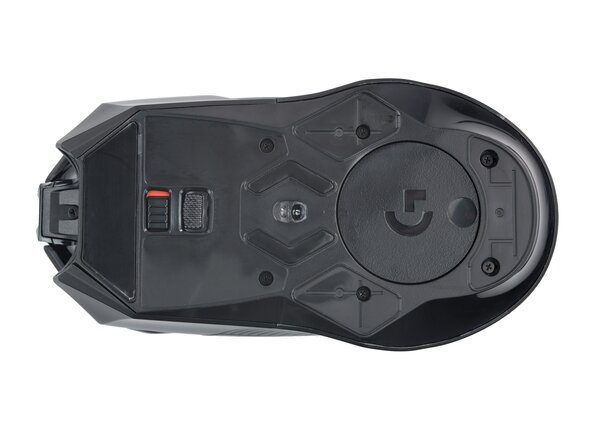
Gebruik een kruiskopschroevendraaier om de zeven 4.5 mm lange schroeven, waarmee de twee helften van de behuizing aan elkaar bevestigd zijn, te verwijderen.
-
-
-
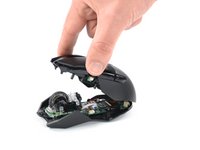
Klap de bovenkant van de behuizing naar achteren voor toegang tot de binnenkant.
-
Houd de bovenste behuizing met een hand omhoog of leg 'm op een stevig object terwijl je aan de muis werkt.
-
-
-
Gebruik een spudger of een van je nagels om de vergrendeling op het ZIF-contact van de interconnectkabel naar voren te duwen en te openen.
-
-
-
Pak de treklip van de interconnectkabel met een pincet of je vingers vast om de kabel uit het contact te trekken.
-
-
-
Gebruik een pincet om de zijkanten van de batterijaansluiting stevig vast te pakken.
-
Trek de batterijaansluiting uit het contact door 'm rustig heen en weer te wiebelen terwijl je trekt.
-
-
-
Verwijder de bovenkant van de behuizing.
-
-
-
Verwarm een iOpener en leg deze gedurende twee minuten op de bovenste behuizing.
-
-
-
Steek de punt van een openingsplectrum onder de batterij en begint bij de zijde tegenover de batterijkabel.
-
Schuif je plectrum onder de batterij en duw de batterij wat omhoog om de batterij van de lijm eronder te scheiden.
-
-
Gereedschap gebruikt in deze stap:Tesa 61395 Tape$2.95
-
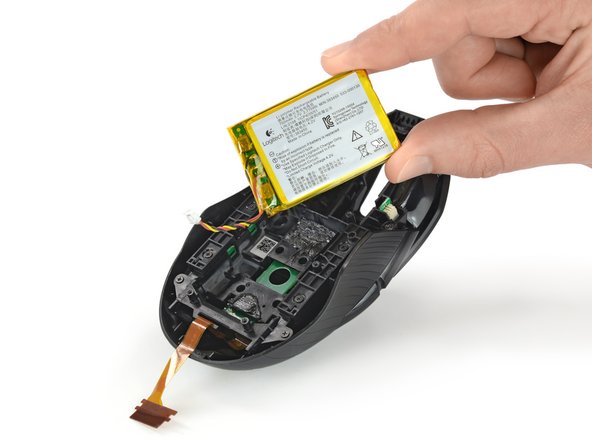
Verwijder de batterij.
-
Controleert of de lijm onder de batterij nog plakkerig is. Als dat het geval is, kun je de lijm laten zitten en hergebruiken. Anders raden we je aan wat isopropylalcohol (>90%) en een pluisvrije doek te gebruiken om de oude lijm te verwijderen.
-
Eerst de beschermfolie verwijdert voordat je je nieuwe batterij bevestigt (als je batterij een lijmstrip bevat). Als dat niet het geval is, kun je stukken dubbelzijdige tape op de plek van de oude lijm in de batterij-uitsparing plakken (en niet direct op de batterij).
-
Druk de batterij stevig op z'n plek en zorg dat de kabels zich aan de achterkant van de behuizing bevinden.
-


Vergelijk het nieuwe onderdeel met het origineel om te zien of je extra onderdelen mee over moet zetten. Controleer ook of je beschermfolie moet verwijderen om je nieuwe onderdeel te kunnen bevestigen.
Volg bovenstaande instructies in omgekeerde volgorde om je toestel weer in elkaar te zetten.
Ging je reparatie niet helemaal volgens plan? Bezoek dan onze algemene probleemoplossingspagina of stel je vraag op ons antwoordenforum.
Recyclen of hergebruiken: Gooi je overbodige elektronica of onderdelen nooit bij het restafval. Bezoek de Logitech Recycling-pagina om te zien welk recyclingpunt het dichtst bij je in de buurt zit of om te zien hoe je je oude Logitech-apparaat kostenloos terug kunt sturen als er geen recyclemogelijkheid is. Je kunt je e-afval ook naar een door R2 of e-Stewards gecertificeerd recyclepunt brengen. Laat goed werkende onderdelen en gerepareerde apparaten ook niet op je zolder liggen, maar geef ze door aan iemand die er wel gebruik van kan maken!
Deel je ervaring: Laat een reactie achter of stuur je feedback direct naar Logitech via repair@logitech.com om te helpen bij het vormgeven van de volgende generatie reparatiehandleidingen en producten.
Annuleren: ik heb deze handleiding niet afgemaakt.
12 andere personen hebben deze handleiding voltooid.
Met dank aan deze vertalers:
100%

Thomas Keulemans helpt ons de wereld te repareren! Doe je mee?
Begin met vertalen ›


2Gids Commentaar
This guide helped me on my G900's battery. Thank you!
G903: Easy peasy. Took longer to clean the glue residues up than to open, replace the battery and close it back up.