Deze vertaling geeft mogelijk niet de meest recente updates van de bronhandleiding weer. Help ons met het updaten van de vertaling of bekijk de bronhandleiding.
Inleiding
Een jeansknoop (ook wel een spijkerbroekknoop genoemd) houdt een spijkerbroek stevig vast in de taille.
Deze handleiding laat zien hoe je een nieuwe jeansknoop aanbrengt.
Lees de hele handleiding door voordat je met de reparatie begint en verzamel de benodigde gereedschappen en materialen. Hoewel Patagonia-specifieke materialen ideaal zijn, zijn ze niet noodzakelijk. Nieuwe Patagonia-onderdelen zijn verkrijgbaar door te bellen of een bericht te sturen naar de Patagonia-klantenservice.
Patagonia-producten kunnen ook naar een plaatselijke winkel worden gebracht voor een reparatie-evaluatie of naar Patagonia worden opgestuurd via hun mail-in reparatiedienst.
Laten we het repareren!
WAARSCHUWING! Kleine onderdelen. Patagonia raadt af om deze reparaties uit te voeren op kledingstukken die bedoeld zijn voor kinderen van 3 jaar of jonger. In plaats daarvan raden we aan het product te retourneren voor professionele reparatie.
Gerelateerde tutorial: [handleiding|181277|Klinknagels vervangen op werkbroeken|new_window=true]
Wat je nodig hebt
-
-
Verzamel de vervangende onderdelen, inclusief een knoop en een punaise.
-
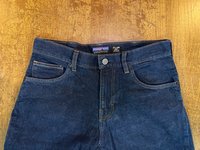
Leg de jeans met de voorkant naar boven op een stevige tafel of werkbank.
-
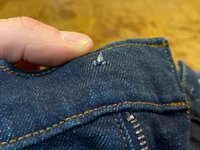
Maak de gulp open en zoek het gaatje in de tailleband waar voorheen de knoop zat.
-
Verwijder alle restanten van de oude knop volledig voordat u de nieuwe installeert. Gooi de oude stukken op een verantwoorde manier weg.
 Vraag FixBot
-
-
-
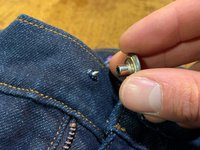
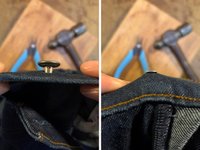
Plaats de punaise in de achterkant van het gat.
-
Duw de spijker in het gat totdat deze gelijk ligt met de tailleband.
-
-
-
-
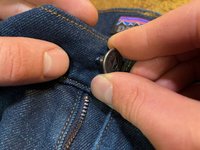
Houd de spijker aan de achterkant op zijn plaats, plaats de knoop erbovenop en houd de stukken met uw vingers op hun plaats.
-
-
-
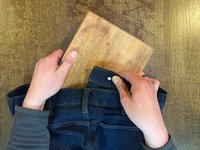
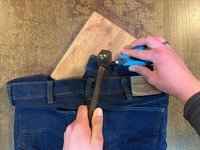
Draai de jeans om en leg een zacht, plat werkoppervlak direct onder de knoop, bijvoorbeeld een zacht stuk hout of leer.
-
Gebruik een punttang om de spijker op zijn plaats te houden. Zorg er daarbij voor dat de spijker en de knoop nog steeds op één lijn zitten.
-
Sla de tack met een rechte, neerwaartse slag aan.
-
-
-
Test de nieuwe knoop door de knoop van de jeans dicht te knopen en aan de tailleband te trekken om te controleren of de knoop goed vastzit.
-


Annuleren: ik heb deze handleiding niet afgemaakt.
51 andere personen hebben deze handleiding voltooid.
Met dank aan deze vertalers:
91%


Deze vertalers helpen ons de wereld te repareren! Doe je mee?
Begin met vertalen ›


10Gids Commentaar
Nice, but let's consider how this situation occurs. The tack comes out of its hole, just simply replacing it is not realistic, unless the new tack is significantly bigger. So how do you "repair" the hole such that it will hold a tack again?
As noted in step 2, you can move the tack over to where the denim isn't damaged. If that will cause the jeans not to fit properly, you can sew a folded piece of denim behind the hole (sew around the edges on the inside of the jeans) and punch the tack through the new piece.
I didn´t have a new button and was in a pinch. Just ripped the old button off completely, jammed it in the tail end of a hammer and yanked it apart with som pliers. Then i followed the instructions in this fix. Worked like a charm, so far...
Thanks I’m gonna try this first!
The best thing to do is patch the hole. I simply use fabric glue and some pieces of blue jeans that you probably have hanging around. Trim off the extra threads and then apply fabric glue to the back of the waist band covering the hole made by the old button. Do the same on the front and then let dry. about 30 minutes or so, if you have a machine I always stitch back and for on the edges. Trim any edges or use additional glue to tack them down. Now because you have strengthened the hole carefully push the back of the button through where you can see the end, add the front to the nail end and turning the garment face down on a protected hard surface hammer about 3 times and check to see if it is sturdy, continue to hammer until you have reached the objective. Now you have got many more years with that button.