Inleiding
Use this guide to apply liquid metal in your PlayStation 5 Pro. You can also use this guide to re-spread existing liquid metal.
Your PS5 Pro has an Accelerated Processing Unit (APU), which uses liquid metal TIM (thermal interface material) instead of traditional thermal paste to transfer heat. Over time, the liquid metal can oxidize or become unevenly spread on the APU and heatsink, especially if the PS5 Pro stood upright for long periods of time. If the liquid metal has oxidized, it'll look dried-out or cracked and will need to be cleaned and replaced. If it's just unevenly covered, you can re-spread it evenly across the surfaces of the APU and heatsink.
Your liquid metal might need to be replaced if your PS5 Pro is overheating, throttling, or having overall poor performance. These signs could also mean a faulty or dirty fan. To remove your fan for cleaning, follow this guide.
Wat je nodig hebt
-
-
Shut down your PlayStation and unplug all cables and accessories.
-
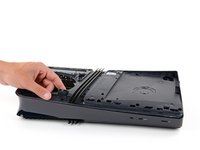
Remove any stands supporting your console and lay it down so the right side is facing up.
-
-
-
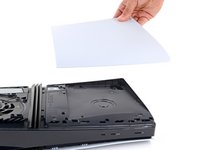
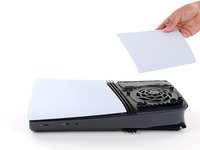
To remove a cover, firmly pull up the front edge to release the clips.
-
Remove the cover.
-
-
Gereedschap gebruikt in deze stap:FixMat$36.95
-
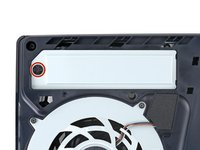
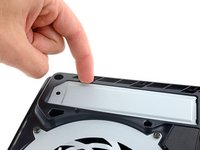
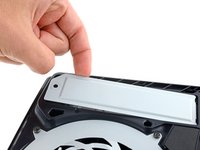
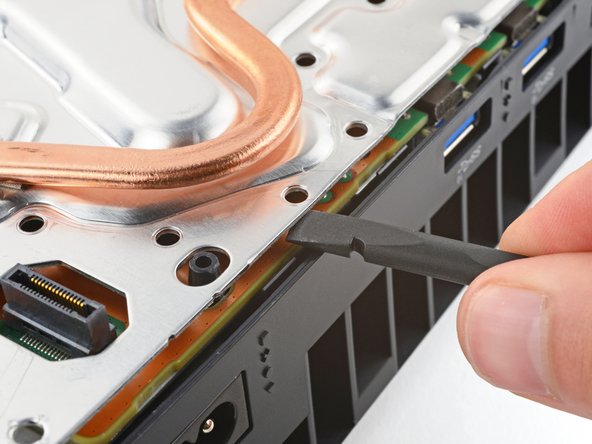
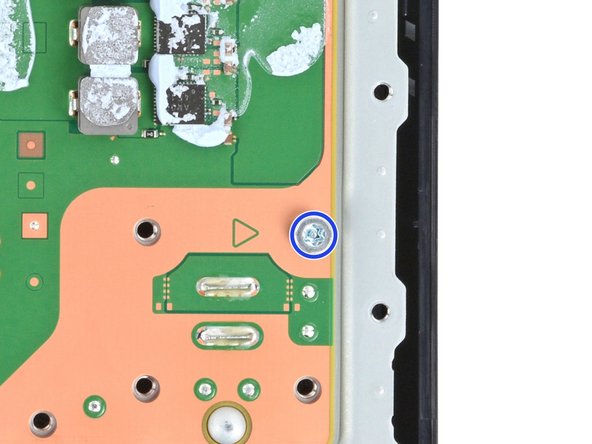
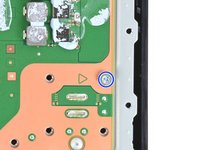
Use a Phillips screwdriver to remove the 17.1 mm‑long screw securing the expansion slot cover.
-
-
-
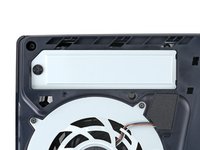
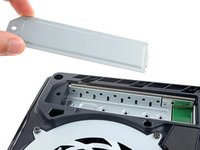
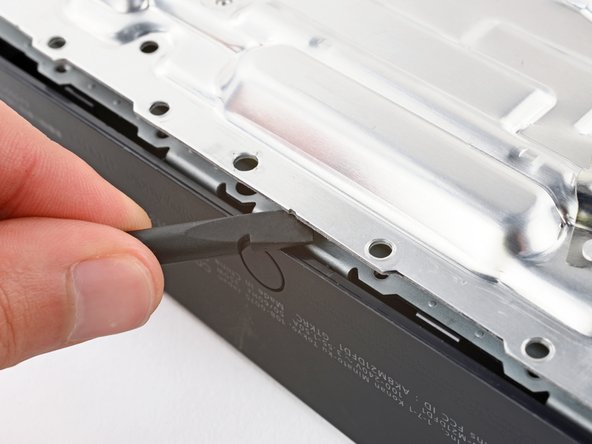
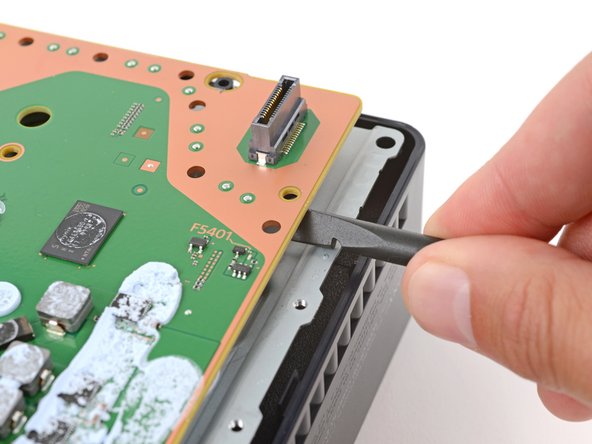
Use your fingers to lift the expansion slot cover near the notch by the screw hole and remove it.
-
-
Gereedschap gebruikt in deze stap:Tesa 61395 Tape$5.99
-
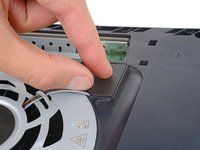
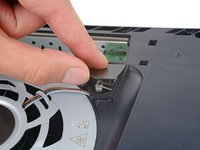
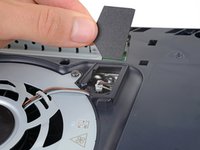
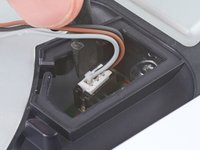
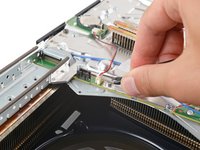
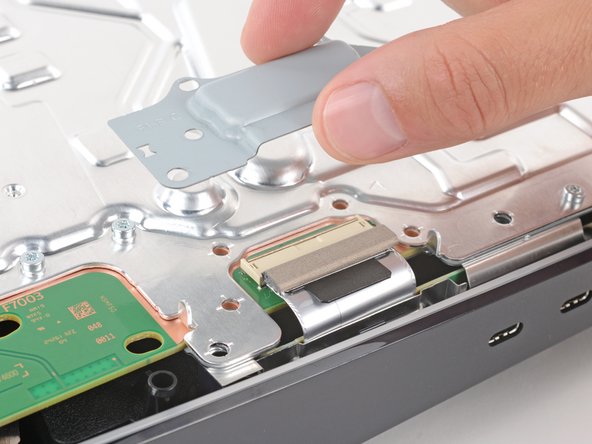
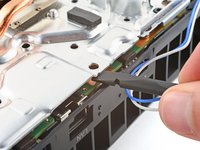
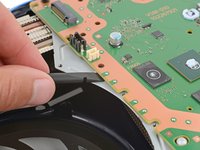
Use your fingers to remove the plastic cover hiding the fan cables connector.
-
-
-
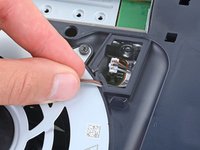
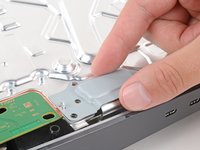
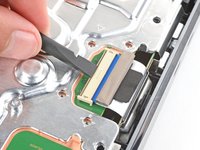
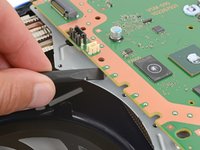
Gently pull the fan cables out from under their plastic clip on the frame.
-
-
-
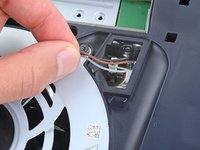
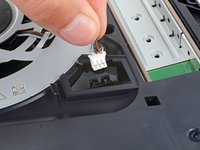
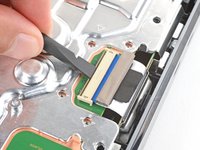
Firmly grip the fan cables' white connector head and pull it straight up and out of its socket.
-
-
-
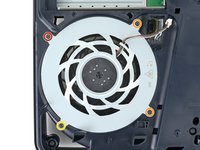
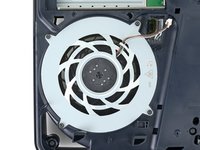
Use a T8 Torx Security screwdriver to remove the four screws securing the fan:
-
One 31.7 mm‑long screw
-
Two 21.5 mm‑long screws
-
One 11.5 mm‑long screw
-
-
-
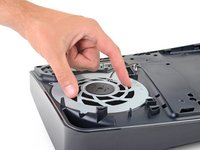
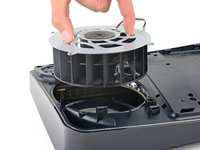
Use your fingers to grab the fan by its vents and lift it straight up to remove it.
-
Insert the fan so its cables are near their connector.
-
-
-
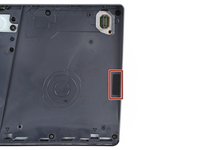
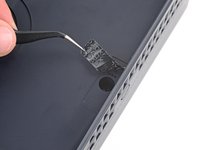
A tamper-evident sticker hides one of the right‑side inner shell screws.
-
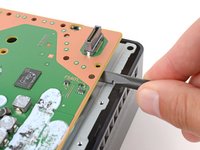
Use tweezers to peel up the sticker until you can access the screw underneath.
-
-
-
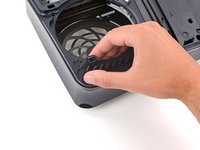
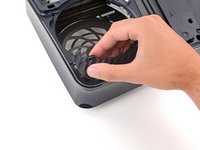
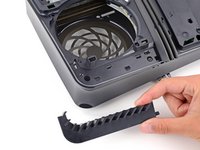
Use your fingers to unclip and remove the plastic grille near the fan recess.
-
-
-
-
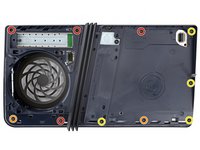
Use a T8 Torx Security screwdriver to remove the 10 screws securing the right‑side inner shell:
-
Four 18.8 mm‑long screws
-
Two 18.6 mm‑long screws
-
Four 31.7 mm‑long screws
-
-
-
Lift the right‑side inner shell straight up and remove it.
-
-
-
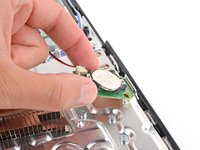
Use a pair of angled tweezers to firmly grip the sides of the CMOS board connector, holding the tweezers as close to the connector as possible to get a good grip.
-
Pull the connector straight up and out of its socket to disconnect it.
-
-
-
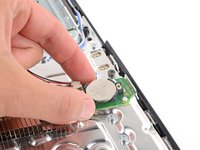
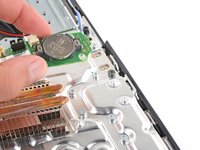
Use your fingers to lift the CMOS board off the small metal nubs and pull it toward the center of your console to remove it.
-
-
-
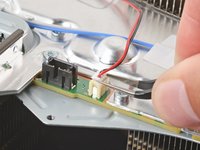
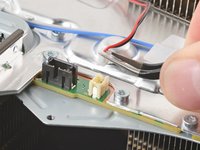
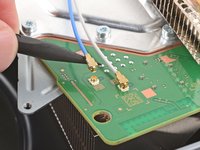
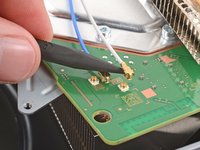
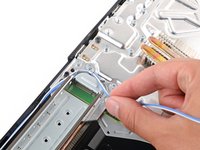
Insert a spudger under the metal neck of one of the antenna cable's coaxial connectors and lift straight up to disconnect it.
-
Repeat the process to disconnect the other antenna cable.
-
Use the markings on the board to reconnect the antenna cables to the correct sockets—connect the blue cable to the socket marked RB and the white cable to the one marked RW.
-
To reconnect a cable, hold the metal connector head over its socket and press down with the flat end of a spudger until the connector snaps into place. Don't try to force the connector into place. If you're having trouble, reposition the connector and try again.
-
-
-
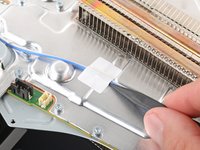
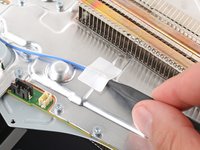
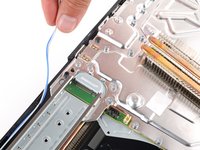
Use your fingers to de‑route the antenna cables from their clips on the metal shield.
-
Move the antenna cables over the side of your PlayStation so they're out of the way.
-
-
-
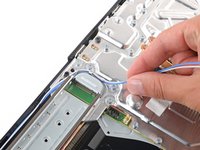
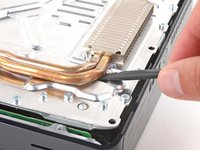
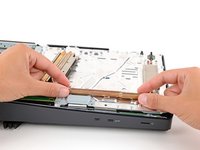
Insert the flat end of a spudger under the bend in the copper pipes, near the heat sink's bottom edge.
-
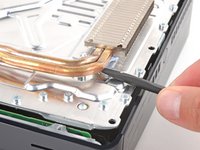
Use your spudger to pry up the heat sink, applying steady pressure to separate it from the thermal paste.
-
If the heat sink doesn't fully separate, use your spudger to pry up the bottom edge on the other side of the metal fins.
-
-
-
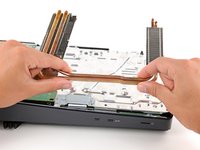
Grip the heat sink by its copper pipes and remove it.
-
Use the flat end of a spudger to scrape up and remove as much of the old thermal paste as possible.
-
Remove all the remaining thermal paste and its residue with high‑concentration (>90%) isopropyl alcohol and a microfiber cloth.
-
Apply new thermal paste where the old paste was.
-
Firmly push the heat sink into place.
-
-
-
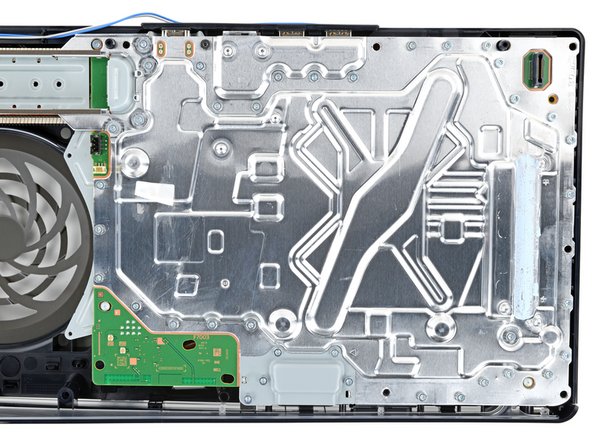
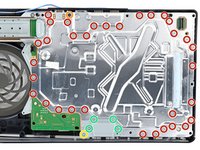
Use a T8 Torx Security screwdriver to remove 39 screws:
-
Thirty‑three 7.5 mm‑long screws securing the metal shield plate
-
One 11.5 mm‑long black screw securing the main board assembly
-
One 28.7 mm‑long screw securing the interconnect cable cover
-
Four 7.5 mm‑long screws securing the interconnect cable cover
-
-
-
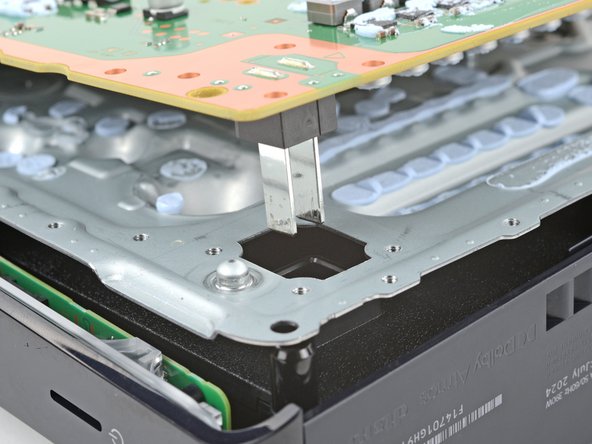
Use the flat end of a spudger to push down the metal bar on the interconnect cable socket.
-
With the metal bar held down, use your fingers or tweezers to grip the plastic pull tab and slide the cable straight out of its socket.
-
-
-
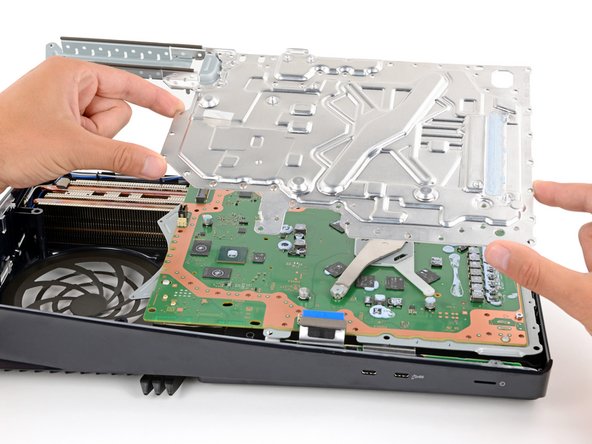
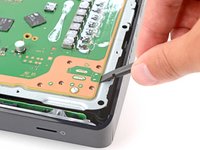
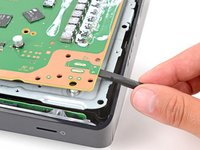
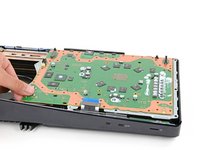
Insert the flat end of a spudger between the top shield plate and the main board and pry up to release the plate. Work your way around the perimeter until it separates completely.
-
-
-
Use a T8 Torx Security screwdriver to remove the three remaining screws securing the main board:
-
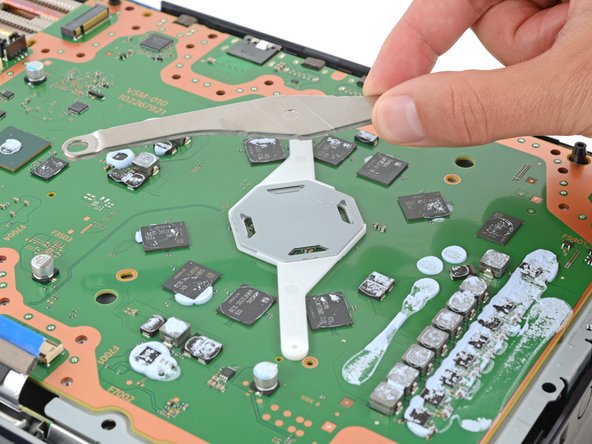
Two 16.3 mm‑long screws securing the APU tension bracket
-
One 7.5 mm‑long screw
-
-
-
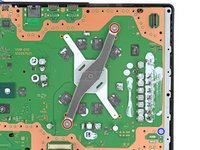
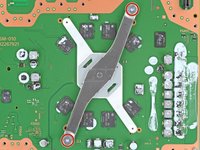
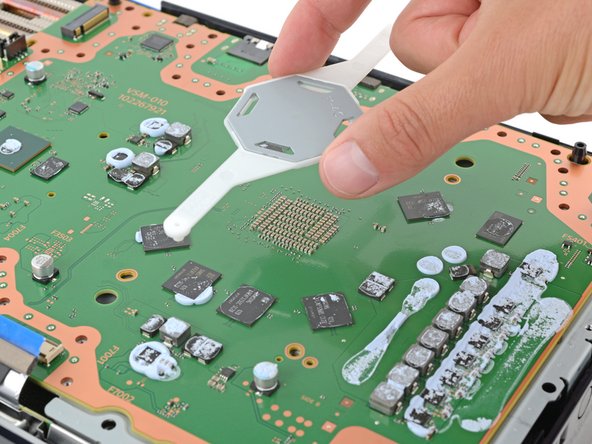
Lift and remove both APU brackets from the board.
-
Put the bracket with plastic arms on first so the pegs go into their cutouts.
-
Then, put the metal bracket onto the plastic one so they're perpendicular and the screw holes line up.
-
-
-
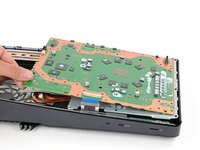
Insert the flat end of a spudger under the main board (near the fan recess) and twist the spudger to separate the board.
-
Repeat this process at different points around the perimeter to separate the board.
-
-
-
Insert the flat end of a spudger between the bottom edge of the board and lower shield plate, by the two parallel solder joints near the corner with the power button.
-
Use your spudger to pry up the board until the two prongs come completely out of their socket.
-
-
-
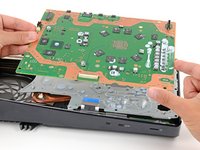
Remove the main board, flip it over, and carefully lay it on a clean work surface, so the APU is facing up
-
Make sure all cables that connect to the board are out of the way so they don't get trapped underneath.
-
Carefully flip the board over so the APU is on the bottom, making sure no liquid metal spills.
-
Keep the board level and lower it into place.
-
-
Gereedschap gebruikt in deze stap:Dispensing Syringe Kit 9 pieces$8.99
-
If you have a disposable syringe, you can use it to suck up any large pools of liquid metal. Don't use the syringe containing your new liquid metal.
-
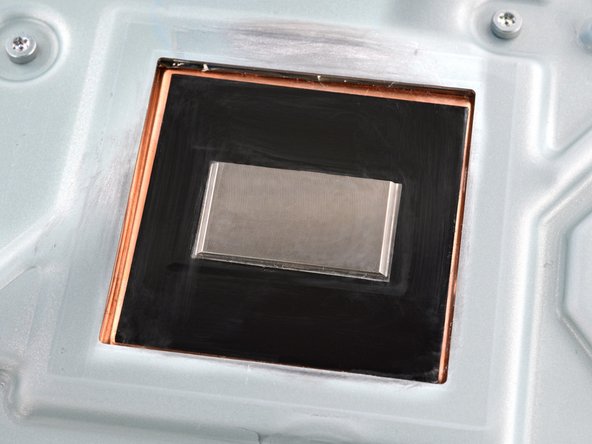
Starting with the heatsink: apply a few drops of highly-concentrated (greater than 90%) isopropyl alcohol to a cotton swab and carefully clean up all of the liquid metal from the heatsink surface.
-
Use the same cleaning process to thoroughly clean up all of the liquid metal residue.
-
Let the heatsink dry completely.
-
-
-
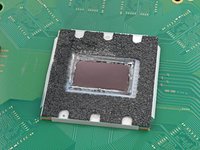
Just as you did for the heatsink, clean and remove all of the old liquid metal and its residue from the APU.
-
This is a good point to replace any thermal pads on the bottom of the main board, if necessary. The pads might be stuck to both the bottom shield plate and the main board.
-
-
-
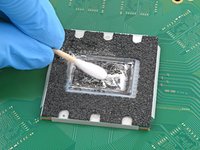
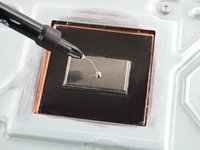
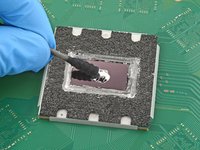
Apply a small drop of liquid metal to the heatsink (not the APU)—about the size of a small matchstick head.
-
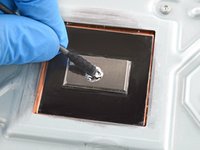
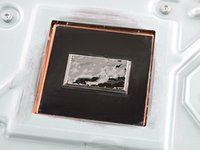
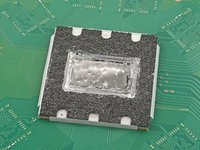
Use the spreader that came with your liquid metal or a new cotton swab to lightly push down on and evenly spread the liquid metal across the entire surface.
-
If there's excess liquid metal anywhere, use the syringe to suck it back up.
-


To reassemble your device, follow these instructions in reverse order, starting with this step.
Take your e-waste to an R2 or e-Stewards certified recycler.
Repair didn’t go as planned? Try some basic troubleshooting, or ask our Answers community for help.
To reassemble your device, follow these instructions in reverse order, starting with this step.
Take your e-waste to an R2 or e-Stewards certified recycler.
Repair didn’t go as planned? Try some basic troubleshooting, or ask our Answers community for help.

