
HTC Vive Controller Vervanging van de voorste knoppen
Inleiding
Ga naar stap 1De knoppen in het voorste paneel van de HTC Vive-controller kunnen versleten zijn of niet langer klikken door veelvuldig gebruik. Dit kan problemen veroorzaken in het gebruik van de controller. Wees bij het verwijderen van de knoppen voorzichtig en voorkom dat je de rubberen pinnen scheurt. Deze handleiding laat zien hoe je de knoppen vervangt.


-
-
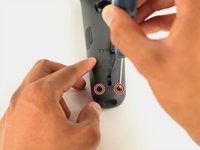
Draai de Vive-controller om zodat de onderste schotel naar boven wijst.
-
Gebruik een T5 Torx-schroevendraaier of -bitje om de drie zwarte 21 mm lange schroeven uit de onderste schotel te verwijderen.
-
-
-
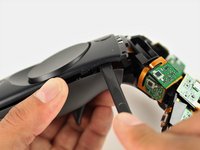
Gebruik een nylon spudger om de deksels van de bovenste en onderste schotels langs de gehele rand los te wrikken.
-
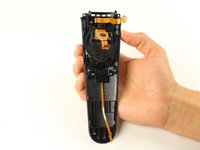
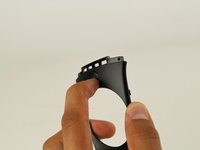
Verwijder enkel het deksel van de bovenste schotel door deze met je hand weg te trekken.
My top saucer was REALLY stubborn. Don’t force it with your hand, use the spudger to separate it at the seam. Try not to poke your spudger in too deep, there are internals just inside the seam.
The second time around, I learned why it was so stubborn. The picture suggests that you should start at the base of the saucer and work your way around, but that’s backwards.
Start separating with your spudger at the distal side of the saucer and work your way toward the handle. Then for the last part, pull the piece up and away, like peeling a banana. See the second picture for the bottom half of the saucer, below. Do the same on the top.
-
-
-
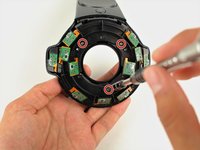
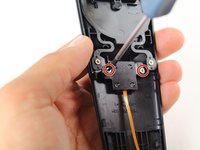
Gebruik een 00 kruiskopschroevendraaier of -bitje om de drie zilveren 12.8 mm lange schroeven uit het bovenste, nu blootliggende sensorpaneel te verwijderen.
It’s Phillips 0, not 00.
You do not need to remove these screws to remove the bottom saucer. They provide stability to the two halves of the donut.
I had the same experience. Putting the screws back in made the bottom shell easier to remove.
I concur, you don’t need to remove these screws to take the bottom shell off.
I found mine had ph#000 screws size, not ph#00.
please do not remove the Phillips-head screws it is not necessary to remove them.
-
-
-
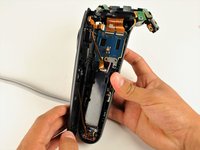
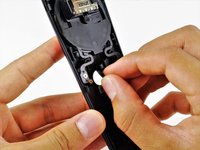
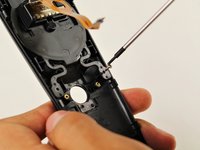
Trek het deksel van de onderste schotel langzaam met je hand weg.
From what I can tell, there are two clicks on each side? one is quite easy, then the other one seems to require considerable force pushing down and on the side, I had to do it one side at a time and found two YouTube videos performing this step to use as reference. I have the vive pro wands and not the originals, so this may explain the difference. This felt very wrong to me.
-
-
-
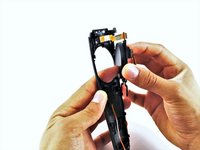
Gebruik een T5 Torx-schroevendraaier of -bitje om de twee zwarte 5.2 mm lange schroeven uit de grijze achterkant te verwijderen.
-
-
-
Draai de Vive-controller om zodat de openliggende onderste schotel naar boven wijst.
-
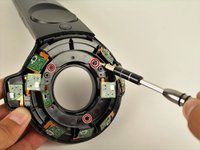
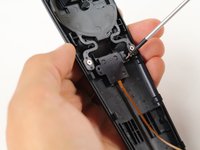
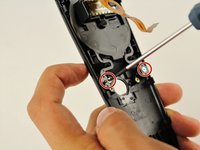
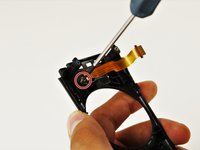
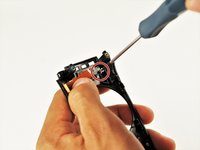
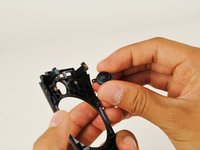
Gebruik een T5 Torx-schroevendraaier of -bitje om de drie zwarte 5.2 mm lange schroeven te verwijderen.
Leave the middle screw where it is (the one being unscrewed in the picture). That screw holds the two halves of the photodiode assembly together, not the case.
five screws… two at bottom
I concur with trevosklar, don’t need to remove center screw to remove front panel (pad cover).
-
-
-
-
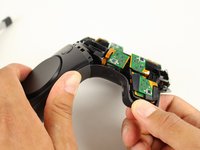
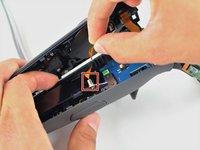
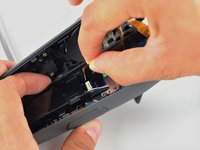
Koppel de bovenste lintkabel los door deze met twee vingers rustig omhoog en van het moederbord weg te trekken.
You do not have to remove the ribbon cables from the plugs…you can carefully work the battery holder around them and remove it…being very gentle. And the black part of the handle will stay attached to the cables and be in the way. But removing the cables does make it easier to access the area for the battery, just not completely necessary.
-
-
-
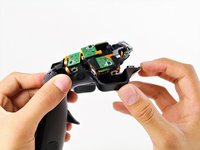
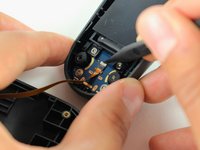
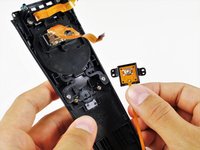
Koppel de middelste lintkabel los door deze voorzichtig met twee vingers van het moederbord omhoog en los te trekken.
-
-
-
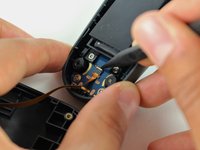
Gebruik een nylon spudger om de witte lip 90 graden omhoog te duwen.
-
Koppel de onderste lintkabel los door deze met twee vingers op voorzichtige wijze naar beneden te trekken.
Hallo what is the name of this conector because i Broker it
Yeah I did as instructed only to realize after that my gen 1 vive controller does not do that, and i desoldered the power button ribbon. That cable, does NOT detach on my model. destroyed.
-
-
-
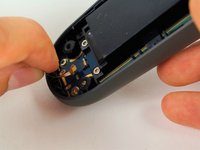
Gebruik een T5 Torx-schroevendraaier om de twee zilveren 4.2 mm lange schroeven uit de achterste plastic cover van de systeemknop te verwijderen.
-
-
-
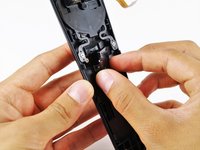
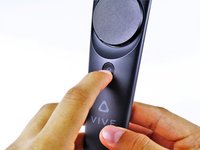
Duw de menuknop met je vinger uit het voorste paneel.
-


Volg bovenstaande instructies in omgekeerde volgorde om je toestel weer in elkaar te zetten.
Volg bovenstaande instructies in omgekeerde volgorde om je toestel weer in elkaar te zetten.
Annuleren: ik heb deze handleiding niet afgemaakt.
8 andere personen hebben deze handleiding voltooid.
Met dank aan deze vertalers:
100%

Manusje van Alles helpt ons de wereld te herstellen! Wil je bijdragen?
Begin met vertalen ›
Team

Cal Poly, Team S15-G5, Livingston Fall 2017 Lid van Cal Poly, Team S15-G5, Livingston Fall 2017
CPSU-LIVINGSTON-F17S15G5
4 Leden
51 handleidingen geschreven
5 opmerkingen
Okay great! But where can I buy replacement parts?
Thanks for the guide! Even though iFixit doesn’t have the replacement parts, I was able to fix my button that was off-center and get my controller back up and running! The only issue is that with step 5, the T5 screwdriver that comes with the iFixit tool kits doesn’t work, as it’s too wide. I had to go out and buy a narrower driver, but still much less expensive than the controller. Thanks again!
I had my front panel TOUCHPAD STUCK, in the sense it could sense my thumb touch, but NOT my thumb press on the upper-right part (presses on the other directions were detected). I figured out how to fix it:
The touchpad presses are detected by a little sensor on the controller: it’s the little pink button we can see on the picture of Step 8 on the dark-blue board. This button is pressed when pressing the touchpad, via a little black round plastic thingy behind the very center of the touchpad : we can see it on the top of picture of Step 11, the little black circle. If this black circle is off-center or simply *too low*, the contact with the pink button will not happen properly. I personnaly got the black circle thingy off, placed another thin layer of material below it (of approximately the size of the thingy) and placed it back, so it would be more in contact with the pink button. Solved on my both controllers !
Thanks for this really good guide which helped me solve this !
Hi! My ribbon cable to the touchpad is damaged. Does anyonw know whre to buy a replacment? Seems like it’s soldered to the rumblepack also.
Where can I buy new t5 21 mm screws? Mine are getting stripped out!
jeremyvanwoerden - Antwoord
Where can you get replacement batteries?
Mike Justice - Antwoord
The middle bottom screw may have some form of warranty sticker on it if you have a Vive Pro wand (which is purple). Mine had this. Easy enough to remove and get on with it.
sodiboo - Antwoord