
HP Envy M6-1205DX Optical Drive Replacement
Inleiding
Ga naar stap 1This guide will show you how to replace the optical drive of your HP Envy laptop, model M6-1205DX. The steps to replace the optical drive are intended to be followed in the same order as they appear in this guide.
An optical drive is an accessory device for a computer that uses laser technology to read and write data for media such as DVD's, CD's, or Blu-Ray discs. This drive may be rendered inoperable if the internal components stop functioning properly, resulting in the laptop being unable play music, movies or games from discs or write data to these discs. Replacing a faulty optical drive will restore the laptop's ability to read and write to discs.
Before using this guide, use an ESD safe brush or dust blower to remove any debris from the inside of the optical drive as well as any disc that you wish to read or write to. This will ensure that a buildup of debris is not the cause of the optical drive being unable to read discs. After removing any debris, you should test multiple discs to ensure that a scratched or damaged disc is not preventing the optical drive from functioning properly.
Partial disassembly of the laptop is required in order to reach the optical drive for removal. Many of the laptop's internal components are especially vulnerable to static shock, so use caution when dealing with exposed electronics.
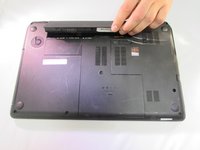
Make sure your laptop is powered off and disconnected from any power source before replacing the optical drive.
Wat je nodig hebt
Gereedschap


-
-
-
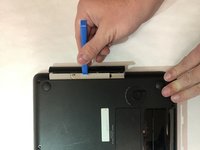
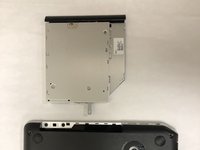
Using a Phillips #1, remove the 3.5 mm screw from the back of the optical drive.
-


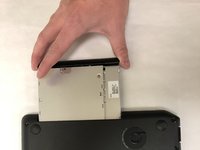
To reassemble your device, follow these instructions in reverse order.
To reassemble your device, follow these instructions in reverse order.
Team

IUPUI, Team S2-G2, Wilson Fall 2019 Lid van IUPUI, Team S2-G2, Wilson Fall 2019
IUPUI-WILSON-F19S2G2
4 Leden
5 handleidingen geschreven