Ga door naar hoofdinhoud
Disconnecting the Samsung Galaxy S8+ Battery

Disconnecting the Samsung Galaxy S8+ Battery

Jeff Suovanen

Jeff Suovanen en een andere bijdrager

Voor het laatst geüpdatet op March 17, 2025

Geen schatting
Gemiddeld
Alleen vereisten
Deze handleiding is alleen bedoeld als vereiste voor andere handleidingen. Het staat niet op zichzelf.

Prerequisite-only instructions for disconnecting the battery in the Samsung Galaxy S8+.

Wat je nodig hebt

Gereedschap

Toon meer…

iFixit krijgt commissie als je dingen koopt via deze links.
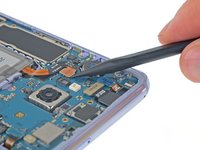
  1. Disconnecting the Samsung Galaxy S8+ Battery, Disconnecting the Samsung Galaxy S8+ Battery: stap 1, afbeelding 1 van 2 Disconnecting the Samsung Galaxy S8+ Battery, Disconnecting the Samsung Galaxy S8+ Battery: stap 1, afbeelding 2 van 2
    Gereedschap gebruikt in deze stap:
    Tweezers
    $4.99
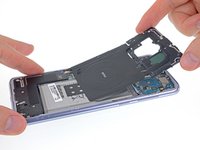
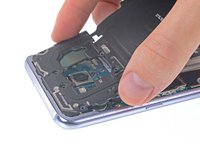
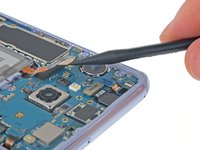
    • Remove the eleven 3.7 mm Phillips screws securing the wireless charging coil + antenna assembly.

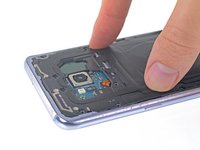
    • If any screws are difficult to remove even when fully loosened, you can pull them out with tweezers.

  2. Disconnecting the Samsung Galaxy S8+ Battery: stap 2, afbeelding 1 van 2 Disconnecting the Samsung Galaxy S8+ Battery: stap 2, afbeelding 2 van 2
    • The wireless charging coil + antenna assembly is also secured with small plastic clips.

    • Use a spudger to gently pry up the plastic in the marked areas to pop the clips free.

  3. Disconnecting the Samsung Galaxy S8+ Battery: stap 3, afbeelding 1 van 3 Disconnecting the Samsung Galaxy S8+ Battery: stap 3, afbeelding 2 van 3 Disconnecting the Samsung Galaxy S8+ Battery: stap 3, afbeelding 3 van 3
    • Remove the wireless charging coil + antenna assembly.

    • To reinstall, first insert the top edge of the assembly into the phone's frame, and then gently press down on the rest of the assembly to snap it into place.

  4. Disconnecting the Samsung Galaxy S8+ Battery: stap 4, afbeelding 1 van 2 Disconnecting the Samsung Galaxy S8+ Battery: stap 4, afbeelding 2 van 2
    • Use a spudger to disconnect the battery by prying the connector straight up from its socket.

Conclusie

To reassemble your device, follow these instructions in reverse order.

Jeff Suovanen

Lid sinds: 08/06/13

439.685 Reputatie

259 handleidingen geschreven

Team

iFixit Lid van iFixit

Staff

118 Leden

19.455 handleidingen geschreven

0 opmerkingen

Voeg opmerking toe

Weergavestatistieken:

Afgelopen 24 uren: 0

Afgelopen 7 dagen: 6

Afgelopen 30 dagen: 12

Altijd: 135