
Dell Precision T3400 Video Card Replacement
Inleiding
Ga naar stap 1This guide provides the necessary steps to successfully replace the video card in the Dell Precision T3400 desktop computer.
-
-
Lay the computer on its side so the panel faces up.
-
Push the cover release latch at the back of the computer's case. The cover should pop off and away from the computer.
-
-
-
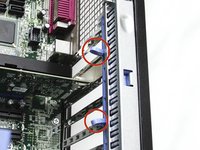
Push the tab on the blue plastic secure lever and pivot the lever down and away from the assembly
-
-
-
-
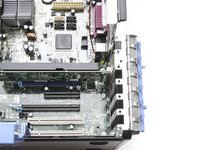
Squeeze the two release tabs together and pivot the secure hatch to the right to open.
-
-
-
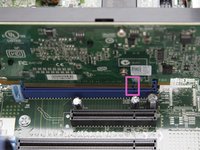
Hold the card by its top corner and metal bracket and pull it out of its slot.
-
-
-
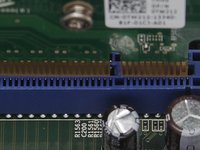
Match the new card’s connectors with the notches in the slot and gently push it into place. The card should click into position when inserted correctly.
-
Close the card door and move the blue plastic secure lever back into place.\
-


To reassemble your device, follow these instructions in reverse order. Step 1: Install new card and latch it in place. Step 2: Reinstall the side panel. Step 3: Plug everything back in
To reassemble your device, follow these instructions in reverse order. Step 1: Install new card and latch it in place. Step 2: Reinstall the side panel. Step 3: Plug everything back in
Annuleren: ik heb deze handleiding niet afgemaakt.
8 andere personen hebben deze handleiding voltooid.
Team

UMass Dartmouth, Team 1-2, Gulbrandsen Fall 2013 Lid van UMass Dartmouth, Team 1-2, Gulbrandsen Fall 2013
UMASSD-GULBRANDSEN-F13S1G2
3 Leden
14 handleidingen geschreven
Één opmerking
Does it have PCI-E 2.0?
What dimensions the graphics card can have?