
Asus Q525U Speakers Replacement

Inleiding
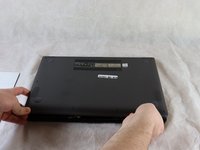
Ga naar stap 1This guide will show you how to replace the speakers of ASUS Q525U (model BI7T9). The speakers are responsible for playing audio when external speakers are not present. Damaged speakers may cause distorted audio, static, or a lack of sound from your laptop.
Before beginning this repair, ensure that your audio drivers are up to date and update them if necessary. If this does not resolve the issue, try uninstalling and then reinstalling the drivers.
If you have determined that your speakers need to be replaced, be sure that your laptop is turned off and disconnected from the charger. Wear cut-resistant ESD gloves or ground yourself to avoid damaging the internal components.
Wat je nodig hebt


-
-
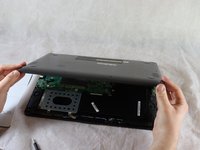
Carefully remove the two longer 9.5 mm screws on the corners with a Phillips #1 screwdriver.
-
Remove the eight 7.5 mm Phillips #1 screws on the back of the device.
-
-
-
-
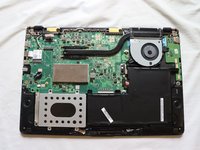
Use a Phillips #1 screwdriver to remove the four 2.6 mm screws that hold the speakers in place.
-
-
-
To disconnect the speaker cable, try pushing on alternating sides of the connector, like small sliding connectors.
-
If that doesn't work, use a pair of tweezers to firmly grip the sides of the connector and pull straight away from the socket. Hold the tweezers closer to the connector to get a better grip.
-


To reassemble your device, follow these instructions in reverse order. Take your e-waste to an R2 or e-Stewards certified recycler.
To reassemble your device, follow these instructions in reverse order. Take your e-waste to an R2 or e-Stewards certified recycler.

Team

University of North Texas, Team 1-4, Coppersmith Spring 2024 Lid van University of North Texas, Team 1-4, Coppersmith Spring 2024
UNT-COPPERSMITH-S24S1G4
4 Leden
4 handleidingen geschreven