
Asus Q500A Hard Drive Replacement
Inleiding
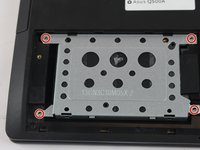
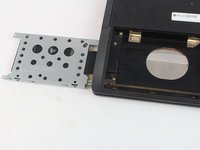
Ga naar stap 1This guide will demonstrate how to replace the hard drive on the Asus Q500A.
Wat je nodig hebt
Reparatieset
Deze set bevat alle onderdelen en tools om deze handleiding te voltooien.

Onderdelen

Gereedschap

Toon meer…


To reassemble your device, follow these instructions in reverse order.
To reassemble your device, follow these instructions in reverse order.
Annuleren: ik heb deze handleiding niet afgemaakt.
2 andere personen hebben deze handleiding voltooid.
Team

USF Tampa, Team 12-5, Eyestone Spring 2017 Lid van USF Tampa, Team 12-5, Eyestone Spring 2017
USFT-EYESTONE-S17S12G5
3 Leden
3 handleidingen geschreven