
ASUS X533SA-BHCLN10 Fan Replacement
Inleiding
Ga naar stap 1In this guide we will be replacing the fan of this laptop. After finding a replacement be sure to follow this guide carefully to easily and simply replace the fan. This process is a bit more difficult, but be sure to carefully go through the process.
Wat je nodig hebt
Gereedschap


-
-
Turn over the laptop on the back panel.
-
Use the Phillips #0 screwdriver to unscrew all ten screws visible on the back panel. There should be a total of ten screws: (4) four 5.5mm screws and (6) six 10.5mm screws.
-
-
-
-
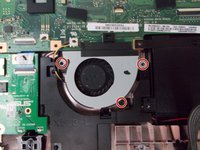
Remove the three 5.5mm screws shown in the picture using the Phillips #0 screwdriver.
-
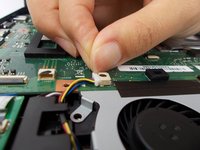
Carefully push the white connector out of the slot.
-
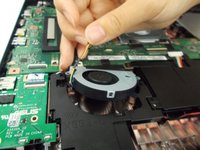
After removing the black electrical tape hold on to the side of the fan and lightly pull on the wire to remove the fan.
-


To reassemble your device, follow these instructions in reverse order.
To reassemble your device, follow these instructions in reverse order.
Team

USF Tampa, Team S13-G3, Boczar Fall 2017 Lid van USF Tampa, Team S13-G3, Boczar Fall 2017
USFT-BOCZAR-F17S13G3
5 Leden
5 handleidingen geschreven