Ga door naar hoofdinhoud

The Gear 2 Neo is a variant of the Gear 2 smartwatch by Samsung. It replaces the Gear 2's steel exterior with plastic and forgoes the camera for a more sporty and resilient exterior.

18 Vragen Bekijk alle

Missing one brass piece on charging plate

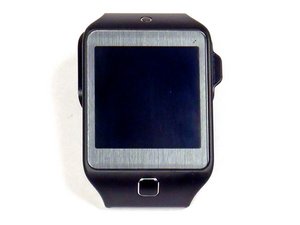
On the back side of my Android watch where the little brass boxes are for the charging connection, one of the brass plates have broken off. Is there a way to fix this? Can I just replace the back piece of this watch?

Beantwoord deze vraag Dit probleem heb ik ook

Is dit een goede vraag?

Score 10

1 Opmerking:

you can buy replacement charging plates it just pops out of the back section .I have replaced on two of my watches. Buy them on ebay

door

Voeg een opmerking toe

2 Antwoorden

I ordered a replacement for the charging connector pins you're talking about. However, when I removed the old one and put the new one in, there wasn't anything to 'adhese' it down with. But when I put it all back together it seemed to be snug and not move around. So I charged it and it did fine for a couple days until I was on the treadmill and, I suppose, sweat or condensation built up and got inside and the whole watch stopped working. I know it had a full charge before I got on the treadmill so something inside got affected. I've since taken the watch apart, hit it with a cool hairdryer, put it in a bag of rice and just tried to let it air out. All to no avail. It still will not turn on.

So my advice to you is to make sure you put some glue or something around the replacement to form an airtight seal.

Here's a link I found to the replacement part: http://stellatech.com/article.php?id=820...

Good Luck!

Was dit antwoord nuttig?

Score 0
Voeg een opmerking toe

Hello,

I just had to complete this same repair. I got a replacement contact board off eBay (Charging Charger Connector With Adhesive For Samsung Gear 2 SM-R380 Neo SM-R381) and dropped it in. Hindsight being 20/20 and all I should have taken a ton of pics to go along with but oh well. I was originally planning on replacing the entire rear cover but ultimately decided on just replacing the contact board.

Anyways, a few things to note (reference pic here http://i.imgur.com/Z86H9Cw.jpg, don't mind the destroyed board in the center - I tried lifting the old one out and the PCB tore away from the contact assembly)

1) When buying a new contact board, get the ones with the adhesive already on the gasket - it's protected by the little blue tab in the center there. Some new covers might have the adhesive already in place so don't double stack it.

2) The easiest way to get the old contact board out is to take a flat screwdriver and press on the contacts from the outside. With a little bit of pressure the board will come up clean. The Spudger worked great for this.

3) Once all of the old adhesive is cleaned off, hold the new contact board by the little tab with some tweezers, then remove the adhesive cover and drop the new board into place. Tiny bit of pressure to set the adhesive and then you're good to go!

Hope this helps!

Spudger Afbeelding

Product

Spudger

$3.99

Was dit antwoord nuttig?

Score 0
Voeg een opmerking toe

Voeg je antwoord toe

Caryn c zal eeuwig dankbaar zijn.
Weergavestatistieken:

Afgelopen 24 uren: 0

Afgelopen 7 dagen: 0

Afgelopen 30 dagen: 2

Altijd: 1,243