Ga door naar hoofdinhoud

Wat je nodig hebt

Deze demontage is geen reparatiehandleiding. Om je Xbox 360 te repareren, gebruik onze reparatiehandleidingen.

  1. Xbox 360 Teardown, Xbox 360 Teardown: stap 1, afbeelding 1 van 3 Xbox 360 Teardown, Xbox 360 Teardown: stap 1, afbeelding 2 van 3 Xbox 360 Teardown, Xbox 360 Teardown: stap 1, afbeelding 3 van 3
    • The Xbox 360 is one of the most powerful gaming consoles on the market. I may have the Halo 3 Edition, but the dissasembly for all models is the same.

    • The disassembly of this console is not easy, but with some patience you can do it.

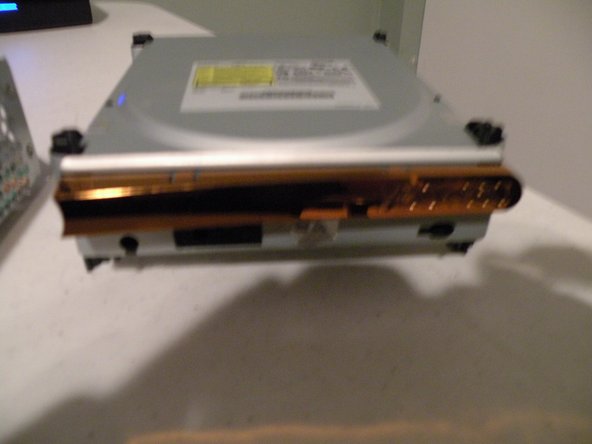
    • This Disassembly also works with HDMI models, and Non-HDMI models

  2. Xbox 360 Teardown: stap 2, afbeelding 1 van 3 Xbox 360 Teardown: stap 2, afbeelding 2 van 3 Xbox 360 Teardown: stap 2, afbeelding 3 van 3
    • Begin by removing the hard drive, (skip this step if your console doesn't have a hard drive)

    • Press the button on the hard drive, then pull up near the front. Once the front is removed, slide the drive forward and then lift the drive out.

  3. Xbox 360 Teardown: stap 3, afbeelding 1 van 3 Xbox 360 Teardown: stap 3, afbeelding 2 van 3 Xbox 360 Teardown: stap 3, afbeelding 3 van 3
    • Removing the Face-Plate

    • Put two fingers into the USB port area, then push down, while pulling the face-plate towards you.

  4. Xbox 360 Teardown: stap 4, afbeelding 1 van 1
    • Not so pretty anymore!

  5. Xbox 360 Teardown: stap 5, afbeelding 1 van 3 Xbox 360 Teardown: stap 5, afbeelding 2 van 3 Xbox 360 Teardown: stap 5, afbeelding 3 van 3
    • Removing The Top Bezel

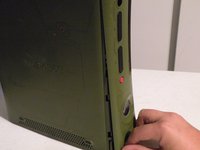
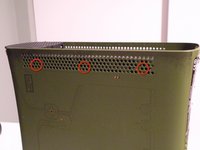
    • Make sure the console is standing up. Then look into the grill.

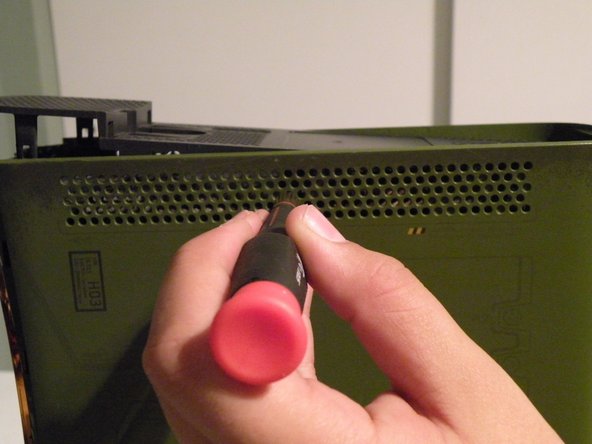
    • The red circles mark the location of tabs (like this on the other side too). Together there are 6. To pull off the top grill, use a small round object to insert into the holes onto the tab, then pull up on the grill, freeing it partially. You need to do this to all 6 tabs to ensure you don't break them. Then lift the grill up. This process is the same for the top and bottom.

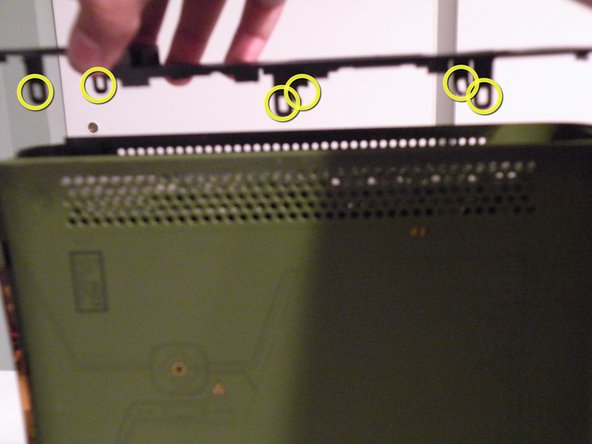
    • The Tabs Are Circled In Yellow

    • As you can see, I got lazy and broke two of them. Try not to do the same, yet as long as most of the tabs are there, it should still go back on. So don't sweat it, if you break them.

  6. Xbox 360 Teardown: stap 6, afbeelding 1 van 3 Xbox 360 Teardown: stap 6, afbeelding 2 van 3 Xbox 360 Teardown: stap 6, afbeelding 3 van 3
    • The Bottom Grill

    • Flip the console over, and remove the bottom grill the same way you removed the top one.

    • Once you are done removing the grills, both the top and the bottom should look like this.(3rd Photo)

  7. Xbox 360 Teardown: stap 7, afbeelding 1 van 2 Xbox 360 Teardown: stap 7, afbeelding 2 van 2
    • The Point of No Return

    • That little thing that I am pointing at, with a screwdriver, is the "Microsoft Seal". It is a sticker that you must remove to continue. It is the warranty sticker. Mine has already been removed, and once you remove it, you will see why you can't put it back on. This is the point of no return, but if you heat it up a little, you can certainly reduce this

  8. Xbox 360 Teardown: stap 8, afbeelding 1 van 3 Xbox 360 Teardown: stap 8, afbeelding 2 van 3 Xbox 360 Teardown: stap 8, afbeelding 3 van 3
    • Once you break the Microsoft seal, we can continue. Start by taking multiple flathead screwdriver bits or 4 spudgers (The most common spudger is a black or yellow nylon stick with a metal hook at one end.) and put them in these 4 latches to hold them open.

    • After all 4 tabs are held open, pull up on the top half of the case. The bits should pop out(don't lose them!). Lift the case up and make sure the tabs don't reconnect.

  9. Xbox 360 Teardown: stap 9, afbeelding 1 van 2 Xbox 360 Teardown: stap 9, afbeelding 2 van 2
    • Lift the half up and then flip the console upright, and make sure that you don't let the tabs close.

  10. Xbox 360 Teardown: stap 10, afbeelding 1 van 2 Xbox 360 Teardown: stap 10, afbeelding 2 van 2
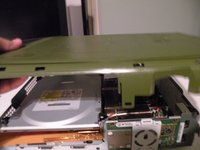
    • Removing the bottom half.

    • This next step is hard, but I promise that the bottom half comes off.

    • Using a small flathead screwdriver, pry these tabs apart. It's hard to show how to remove the clips, but you'll see soon enough.

    • Using a flathead screwdriver, pop out all 7 tabs. It's hard to do this without causing some damage to the casing.

    • You can unlock the tabs without causing any damage by using a x-acto knife insted

  11. Xbox 360 Teardown: stap 11, afbeelding 1 van 3 Xbox 360 Teardown: stap 11, afbeelding 2 van 3 Xbox 360 Teardown: stap 11, afbeelding 3 van 3
    • Removing the bottom/right half.

    • These pictures should explain how it's done.

    • Once all tabs are free, flip the console back over and lift the bottom half off.

  12. Xbox 360 Teardown: stap 12, afbeelding 1 van 2 Xbox 360 Teardown: stap 12, afbeelding 2 van 2
    • Removing the Top Half

    • Using a small flathead screwdriver, or a spudger, remove the eject button assembly.

    • It should come off easily, but some models have adhesive, making the process slightly harder.

  13. Xbox 360 Teardown: stap 13, afbeelding 1 van 2 Xbox 360 Teardown: stap 13, afbeelding 2 van 2
    • Removing the top half.

    • Flip the console over and remove the 6 T10 Screws. They should each be 2.5" long, if not, you removed the wrong screws.

    • Then flip the console back over, holding it by both the plastic and the metal.

  14. Xbox 360 Teardown: stap 14, afbeelding 1 van 2 Xbox 360 Teardown: stap 14, afbeelding 2 van 2
    • Now lift the top half off, and Voila! You now have access to the guts.

  15. Xbox 360 Teardown: stap 15, afbeelding 1 van 3 Xbox 360 Teardown: stap 15, afbeelding 2 van 3 Xbox 360 Teardown: stap 15, afbeelding 3 van 3
    • Removing the DVD Drive.

    • It is a SATA DVD drive with a proprietary Xbox power connector.

    • Lift the drive up near the back revealing the connectors.

    • Remove both the power and SATA cables from the drive. Be careful when doing this, the connectors are fragile.

    • Pull the drive out of the console. There may be tape on the front of the drive holding it in, remove the tape.

    • Set the drive aside.

  16. Xbox 360 Teardown: stap 16, afbeelding 1 van 2 Xbox 360 Teardown: stap 16, afbeelding 2 van 2
    • Removing the Fan Shroud.

    • Using a flathead screwdriver, pry out the tab connecting it to the fans.

    • Lift the shroud out.

  17. Xbox 360 Teardown: stap 17, afbeelding 1 van 3 Xbox 360 Teardown: stap 17, afbeelding 2 van 3 Xbox 360 Teardown: stap 17, afbeelding 3 van 3
    • Removing the Fans.

    • Remove the 3-Pin power connector from the logic board. This is the same connector used in some PC fans.

    • Using a flathead screwdriver, pry the fans toward you.

    • Pull the fans toward you, then lift them out of the casing.

  18. Xbox 360 Teardown: stap 18, afbeelding 1 van 2 Xbox 360 Teardown: stap 18, afbeelding 2 van 2
    • Removing the Fans

    • Here are pictures of the fans and power connector.

  19. Xbox 360 Teardown: stap 19, afbeelding 1 van 2 Xbox 360 Teardown: stap 19, afbeelding 2 van 2
    • Removing the "Ring Of Light"/RF board.

    • Pop off the plastic LED cover.

    • Remove these 3 T8 Screws

    • Pull the board toward you. Than set it aside.

  20. Xbox 360 Teardown: stap 20, afbeelding 1 van 1
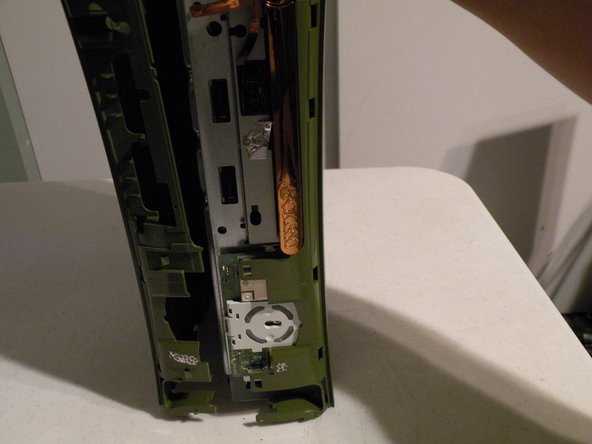
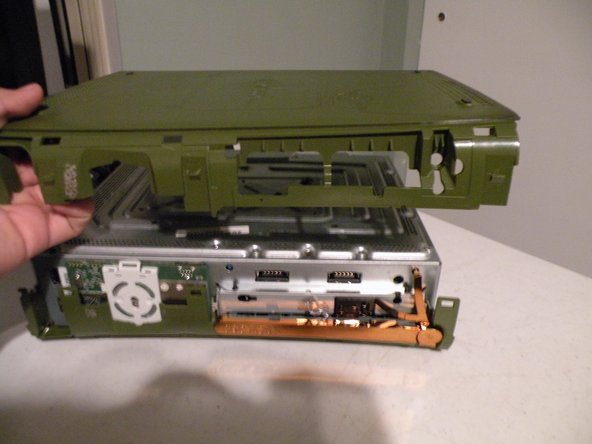
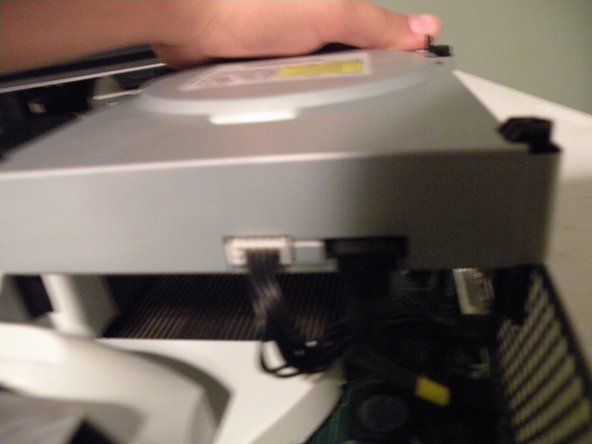
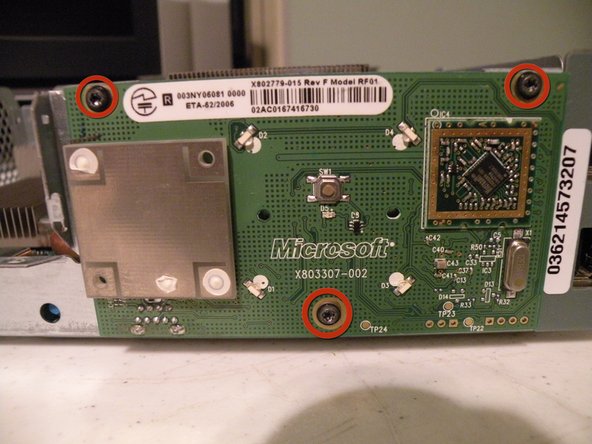
    • Removing the logic board.

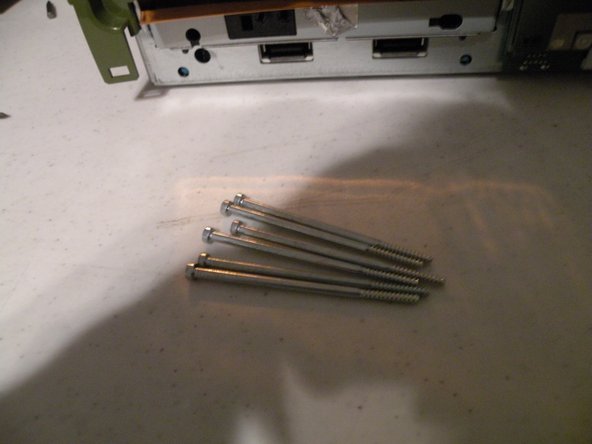
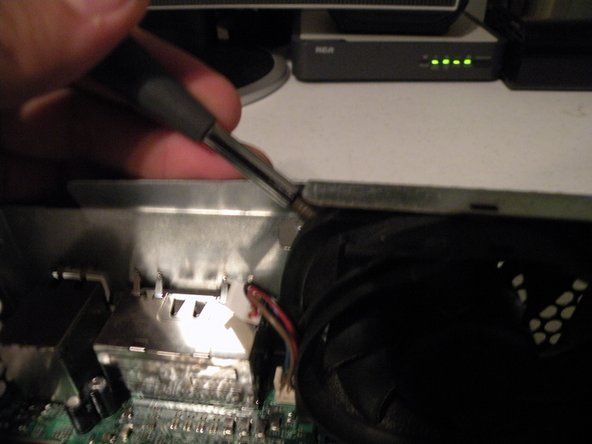
    • Remove these T10 Screws from the bottom metal casing, there may be more than the number circled, just remove them all.

    • If they are present, remove these T8 Screws from the bottom metal casing.

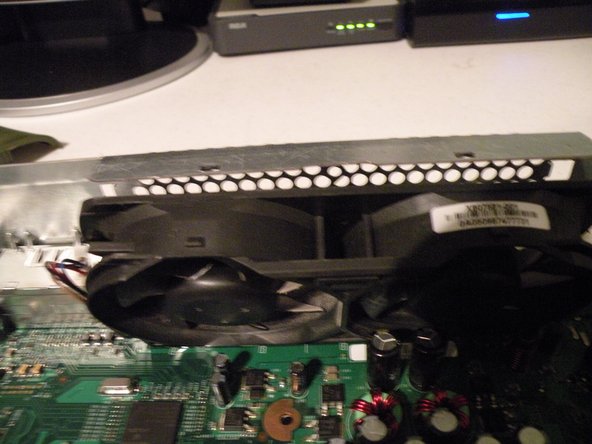
    • Flip the casing over.

    • With a little persuasion, the logic board should lift out of the casing.

  21. Xbox 360 Teardown, Logic Board: stap 21, afbeelding 1 van 2 Xbox 360 Teardown, Logic Board: stap 21, afbeelding 2 van 2
    • This board has advanced cooling for the Graphics Processor Unit (GPU). This is the true mothership of your Xbox 360.

    • Custom ATi "Xenos" GPU with up to 512 MB of GDDR3 RAM, with a dedicated die on the GPU to 10 MB of eDRAM, shared with the CPU via Shared Memory Architecture

    • IBM PowerPC "Xenos" CPU with 3 cores, each running at 3.20 GHz with up to 512 MB of GDDR3 RAM, shared with the GPU via Shared Memory Architecture

    • Memory Card Ports

    • Proprietary Hard Drive Port, supporting up to SATA II (300 MB/s)

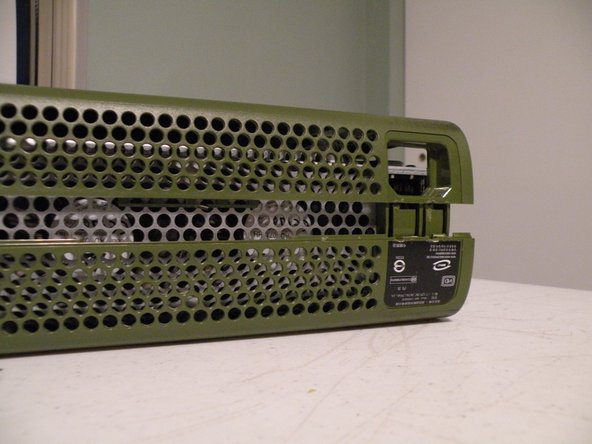
    • HDMI Port, supporting version 1.2, and a Video Port, supporting Composite, S-Video, VGA, and Component (also SCART in Europe)

    • Power Port

  22. Xbox 360 Teardown, Integrated Circuits: stap 22, afbeelding 1 van 2 Xbox 360 Teardown, Integrated Circuits: stap 22, afbeelding 2 van 2
    • There's also a bunch of integrated circuits on here. What I've noticed:

    • Microsoft X02014-007

    • 6 x Samsung K4J52324QC-BC14 512MB GDDR3 SDRAM

    • Microsoft X0247-012 BGA IC

    • Numerous x NTD60N02R Power MOSFETs

    • ADP3188 Synchronous Buck Controller(?? See datasheet)

  23. Xbox 360 Teardown: stap 23, afbeelding 1 van 2 Xbox 360 Teardown: stap 23, afbeelding 2 van 2
    • The Guts!

Chris Green

Lid sinds: 10/11/09

36.869 Reputatie

49 handleidingen geschreven

Team

Master Techs Lid van Master Techs

Community

322 Leden

2.495 handleidingen geschreven

5 opmerkingen

The video RAM isn't just 10mb, lmao. The system RAM is shared with the GPU, so theoretically if the system didn't need any RAM the video card could access all 512mb. The 10MB is an embedded DRAM module that allows AA filtering without a performance hit.

nitesh singh - Antwoord

thanks for the guide buddy, my xbox wouldnt play anything(games or dvds) but i used this guide to strip the bugger down, and found that it was dustier than an old ladys privates, cleaned the laser and and the cpu, now it works a treat. so if anyone has the open tray error then the best bet is to use this guide, strip it down step by step and clean the bugger but be careful not to damage any components and do not " I REPEAT DO NOT TOUCH THE LASERS EYE WITH ANYTHING OTHER THAN A SOFT CLOTH. Best to use the little green one that comes with LCD tvs if not then a little cotton bud will suffice. Thanks Again for the guide bro, saved my xbox..

Johnny - Antwoord

Thanks for the guide. My brothers 8 year old xbox was getting 2 red leds after 10-15 minuets of playing. Further investigation showed that the CPU was overheating. I figured either the thing was clogged with dust, or the thermal paste was nonexistent, or both. Turned out it was both. I cleaned it out, removed what was left of the old thermal paste, and reapplied. The fans had been running at full speed for the longest time, but now its as if it just came out of the box.

James - Antwoord

nice consul and also did you put it back together

tostypinapple - Antwoord

so mine was not tampered with and it constantly got the red ring of death

No thermal pads on the ramđź’€lmaooo

Nednal404 - Antwoord

Voeg opmerking toe

Weergavestatistieken:

Afgelopen 24 uren: 17

Afgelopen 7 dagen: 196

Afgelopen 30 dagen: 833

Altijd: 234,373