Ga door naar hoofdinhoud

Sostituzione scocca inferiore Xbox 360

Waarschuwing: Je bewerkt een vooraf vereiste handleiding. Alle wijzigingen die je hierin maakt, beïnvloeden alle 12 handleidingen die deze stap bevatten.

Stap 2
Xbox 360 Lower Case Replacement: stap 0, afbeelding 1 van 3 Xbox 360 Lower Case Replacement: stap 0, afbeelding 2 van 3 Xbox 360 Lower Case Replacement: stap 0, afbeelding 3 van 3
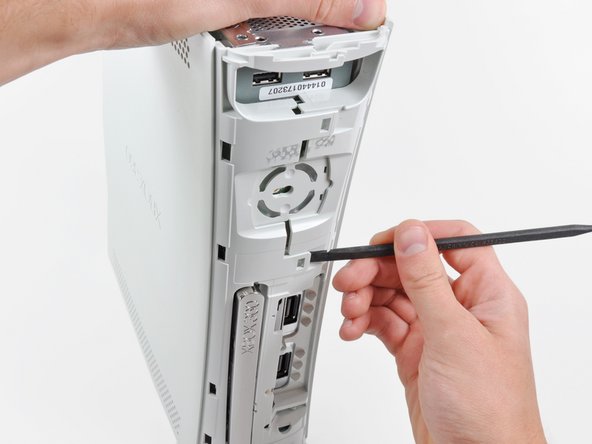
  • The upper and lower cases are attached via several latches, located in the front and back of the console. These latches must be disengaged to separate the upper case from the console.

  • Use the flat end of a spudger to release the following latches:

  • Above the front-facing USB ports.

  • Beneath the front-facing USB ports.

  • Above the Memory Unit slots.

La scocca superiore e inferiore sono unite da diverse clip sia sul fronte sia sul retro della console. Questi ganci devono essere rilasciati per separare la scocca inferiore dalla console.

Usa la parte piatta di uno spudger per rilasciare i seguenti ganci:

Sopra le prese USB anteriori.

Sotto le prese USB anteriori.

Sopra lo slot per la memoria esterna.

Je bijdragen zijn gelicentieerd onder de open source Creative Commons-licentie.