Stap 1 vertalen
Stap 1


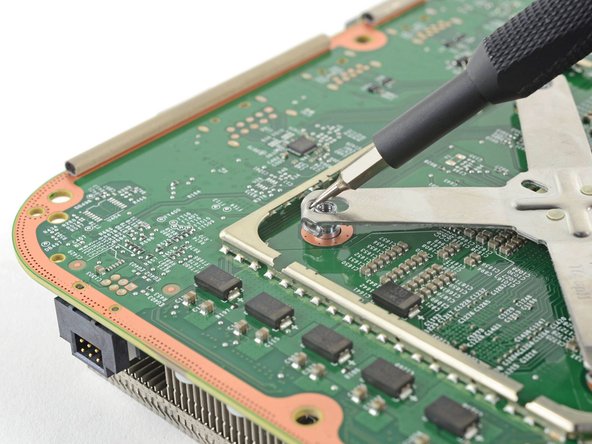


Remove the x-clamp
-
Insert a 1.5 mm flathead screwdriver from the top between the heat sink pin and the x-clamp.
-
Pry the x-clamp out and away from the heat sink pin to loosen the x-clamp.
| [title] Remove the x-clamp | |
| - | [* black] Insert a 1.5 mm flathead screwdriver from the top between the heat sink pin and the x-clamp. |
| + | [* black] Insert a [product|IF145-431|1.5 mm flathead] screwdriver from the top between the heat sink pin and the x-clamp. |
| [* black] Pry the x-clamp out and away from the heat sink pin to loosen the x-clamp. | |
| [* icon_caution] Do not attempt to completely release the x-clamp with this technique. |
Je bijdragen zijn gelicentieerd onder de open source Creative Commons-licentie.