
iPad 2 Wi-Fi EMC 2560 Front Panel Replacement

Inleiding
Ga naar stap 1Note: this is a complete guide for replacing a plain front panel. If you have a Front Panel Assembly replacement part, stop before removing the home button from your old front panel, and reverse the steps to install your new front panel assembly.
Wat je nodig hebt
Reparatieset
Deze set bevat alle onderdelen en tools om deze handleiding te voltooien.

Onderdelen


Gereedschap


Toon meer…
-
-
Fill a pot or pan with enough water to fully submerge an iOpener.
-
Heat the water to a boil. Turn off the heat.
-
Place an iOpener into the hot water for 2-3 minutes. Make sure the iOpener is fully submerged in the water.
-
Use tongs to extract the heated iOpener from the hot water.
-
Thoroughly dry the iOpener with a towel.
-
Your iOpener is ready for use! If you need to reheat the iOpener, heat the water to a boil, turn off the heat, and place the iOpener in the water for 2-3 minutes.
-
-
-
If your display glass is cracked, keep further breakage contained and prevent bodily harm during your repair by taping the glass.
-
Lay overlapping strips of clear packing tape over the iPad's display until the whole face is covered.
-
Do your best to follow the rest of the guide as described. However, once the glass is broken, it will likely continue to crack as you work, and you may need to use a metal prying tool to scoop the glass out.
-
-
Gereedschap gebruikt in deze stap:Safety Glasses$3.19
-
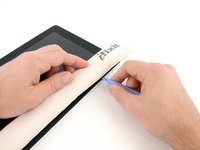
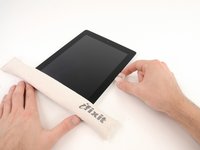
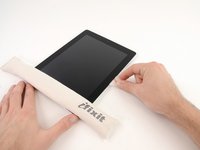
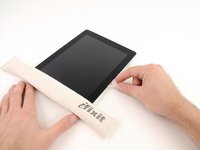
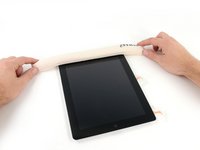
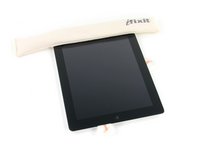
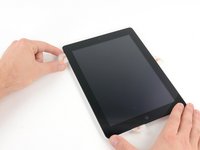
Lay the iOpener flat on the right edge of the iPad, smoothing it out so that there is good contact between the surface of the iPad and the iOpener.
-
Let the bag sit on the iPad for approximately 90 seconds before attempting to open the front panel.
-
-
-
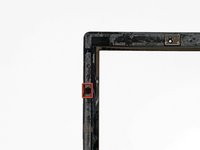
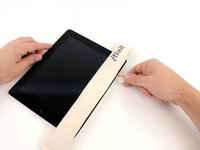
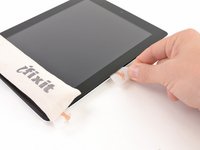
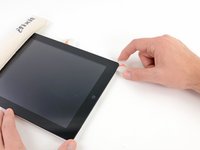
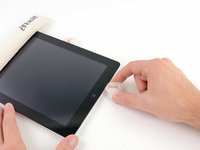
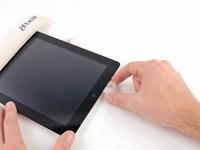
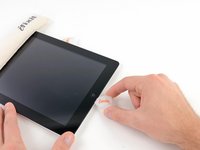
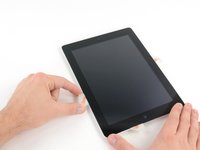
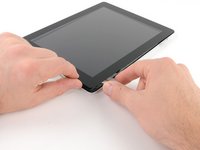
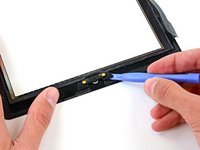
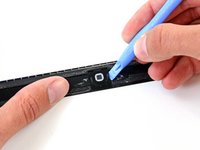
There is a small gap in the iPad's adhesive ring in the upper right corner of the iPad, approximately 2.0 inches (~5 cm) from the top of the iPad. You are going to exploit this weakness.
-
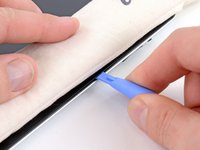
Align the tool with the mute button. Insert the tip of a plastic opening tool into the gap between the front glass and the plastic bezel. Just insert the very tip of the opening tool, just enough to widen the crack.
-
-
-
-
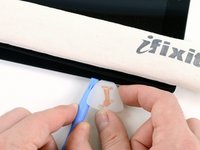
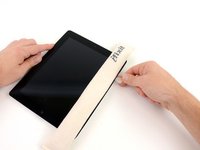
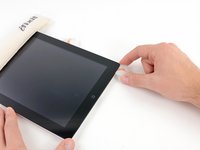
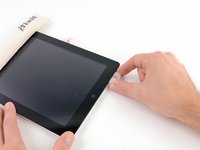
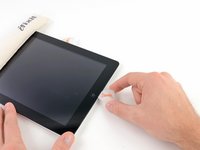
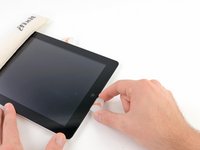
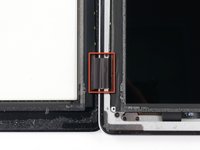
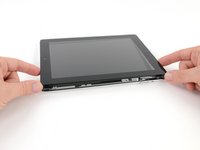
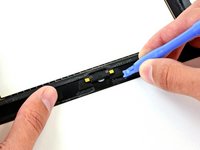
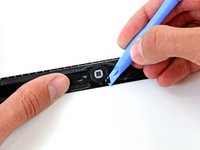
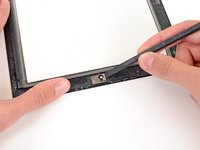
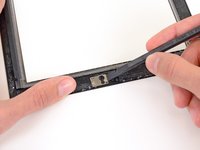
Once you have moved past the Wi-FI antenna (approximately 3" (75 mm) from the right edge, or right next to the home button) re-insert the opening pick to its full depth.
-
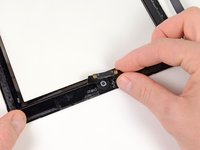
Slide the pick to the right, releasing the adhesive securing the Wi-Fi antenna to the front glass.
-
The antenna is attached to the bottom of the iPad via screws and a cable. This step detaches the antenna from the front panel, ensuring that when you remove the panel, the antenna will not be damaged.
-
-
-
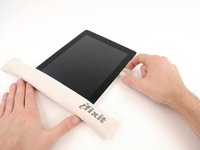
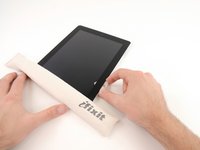
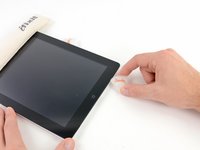
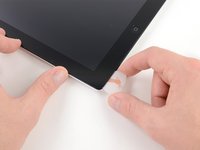
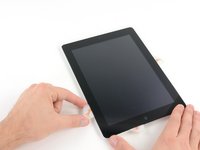
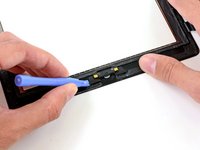
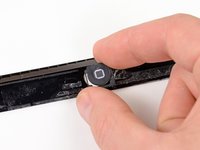
Slide the opening pick along the top edge of the iPad, pulling it out slightly to go around the front-facing camera bracket.
-
The adhesive along this section is very thick, and a fair amount of force may be required. Work carefully and slowly, making sure to not slip and damage yourself or your iPad.
-
-
-
Use the edge of a plastic opening tool to carefully flip up the retaining flaps on the two digitizer ribbon cable ZIF sockets.
-
-
-
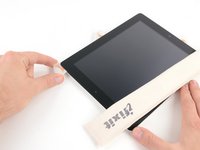
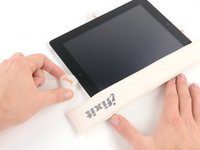
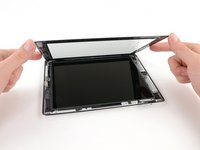
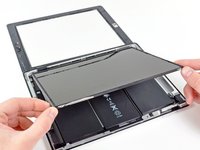
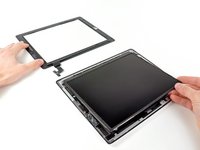
Lift the LCD from its long edge farthest from the digitizer cable and gently flip it toward the rear case—like closing a book.
-
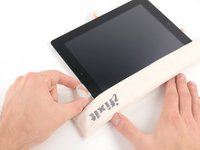
While holding the LCD up, gently slide the front panel away from the iPad. Be careful not to snag the digitizer cable on the rear case or LCD.
-
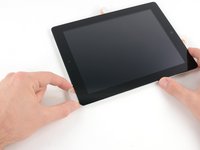
Set the LCD back into the body for safekeeping.
-
-
-
Place the iOpener in the microwave and microwave it for thirty seconds on the highest power setting.
-
Place the iOpener over the home button on the front edge of the display.
-
-
-
Follow the iOpener heating instructions described in the iOpener heating section at the beginning of this guide.
-


To reassemble your device, follow these directions in reverse and use our iPad 2 Wi-Fi EMC 2560 Front Panel Adhesive strips guide to reattach the front panel.
To reassemble your device, follow these directions in reverse and use our iPad 2 Wi-Fi EMC 2560 Front Panel Adhesive strips guide to reattach the front panel.
Annuleren: ik heb deze handleiding niet afgemaakt.
173 andere personen hebben deze handleiding voltooid.


9 opmerkingen
Finally getting the new screen on, I can only hope this baby powers on as it seems I did a decent job not severing any major cords.
Helpful tips:
Use Hairdryer, work slowly, use fine point tweezers to help pick away shards of glass, wear glasses. I have something similar to the "i opener" and it did jack squat, so save yourselves the time.
As long as you are familiar with the Ipad diagram and where the individual !caution! parts are for your version, it should be simple not to screw anything up as long as you are working carefully.
Roughly 3 hours later, success. Besides the power button acting funny, not severed but doesn't want to respond, everything works fine. She turned on when I plugged it in, I thought it was toast when the button wasn't responding.
Make sure when you guys replace that home button that she is making contact. Had to press that part of the screen down real good for it to start functioning again.
Superb guide, wish I had pictures of the reassembly; noting the step where you reattach the digitizer cord. After plugged make sure that cord folds over so everything fits right.
Sorry for the long rants, this was my first repair, and it was exciting to do right the first time!
here's a picture of my screen off
Thank you for the great video. I am wondering what is the glue type you used after replacing broken item.
Thanks for this guide. I replaced my first iPad screen. Did not go wholly to plan and I ended up having to buy a power flex that I ripped (there are two types of power flex so make sure you order the right one for you iPad 2 version). Glass was shattered but carefully removed it. Final tip is make sure you remove as much of the old adhesive residue as you can if its built up, to include a flush fit.