Ga door naar hoofdinhoud

Canon EOS Rebel T2i Main PCB Board Replacement

Waarschuwing: Je bewerkt een vooraf vereiste handleiding. Alle wijzigingen die je hierin maakt, beïnvloeden de handleiding die deze stap bevat.

Stap 1 vertalen

Engels
Nederlands
Stap 1
Canon EOS Rebel T2i Main PCB Board Replacement: stap 0, afbeelding 1 van 3 Canon EOS Rebel T2i Main PCB Board Replacement: stap 0, afbeelding 2 van 3 Canon EOS Rebel T2i Main PCB Board Replacement: stap 0, afbeelding 3 van 3
  • Use caution while handling ribbon cables and ribbon cables connects to avoid damaging them.

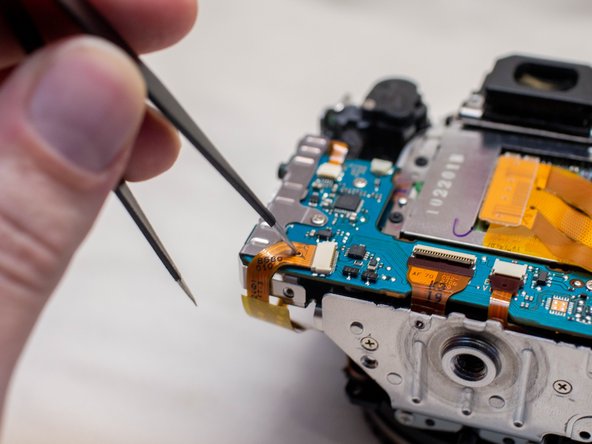
  • Locate these three ribbon cables located on the left side of the main PCB board.

  • Disconnect the ribbon cables.

  • Two of these ribbon cables features a hole in them which can assist with disconnecting them. Use either a pair of tweezers or another tool with a thin point to pull out the ribbon cables utilizing this hole.

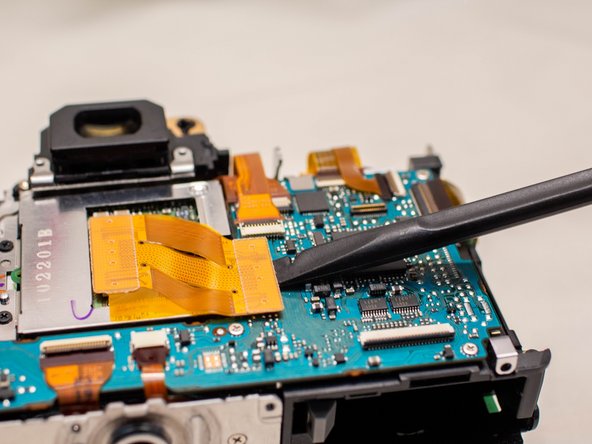
  • Use a plastic spudger tool to carefully push up and disconnect the imaging sensor ribbon cable.

Vertaling hier toevoegen

Vertaling hier toevoegen

Vertaling hier toevoegen

Vertaling hier toevoegen

Vertaling hier toevoegen

Je bijdragen zijn gelicentieerd onder de open source Creative Commons-licentie.