Ga door naar hoofdinhoud

Asus ROG Ally Left Thumbstick Replacement

Engels
Nederlands
Stap 8
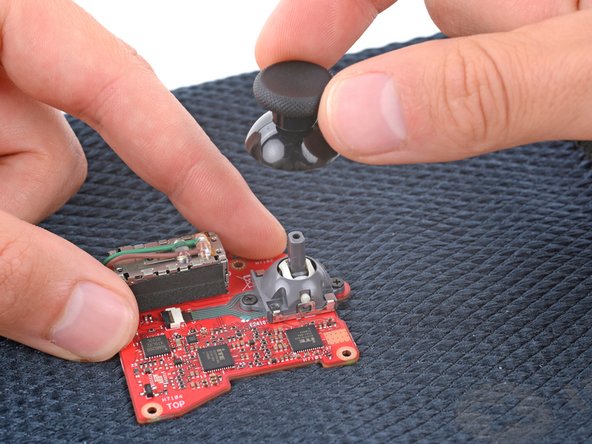
Asus ROG Ally Left Thumbstick Replacement, Remove the left thumbstick cover: stap 0, afbeelding 1 van 2 Asus ROG Ally Left Thumbstick Replacement, Remove the left thumbstick cover: stap 0, afbeelding 2 van 2
Remove the left thumbstick cover
  • With one hand, firmly secure the thumbstick board.

  • With your free hand, pull the thumbstick cover straight up and off its module.

  • To install the thumbstick cover, rotate it on its module until it slides into place. Then firmly press down until the cover snaps into place or bottoms out.

Vertaling hier toevoegen

Vertaling hier toevoegen

Vertaling hier toevoegen

Je bijdragen zijn gelicentieerd onder de open source Creative Commons-licentie.